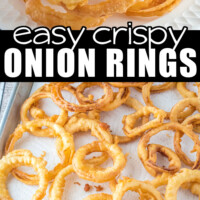
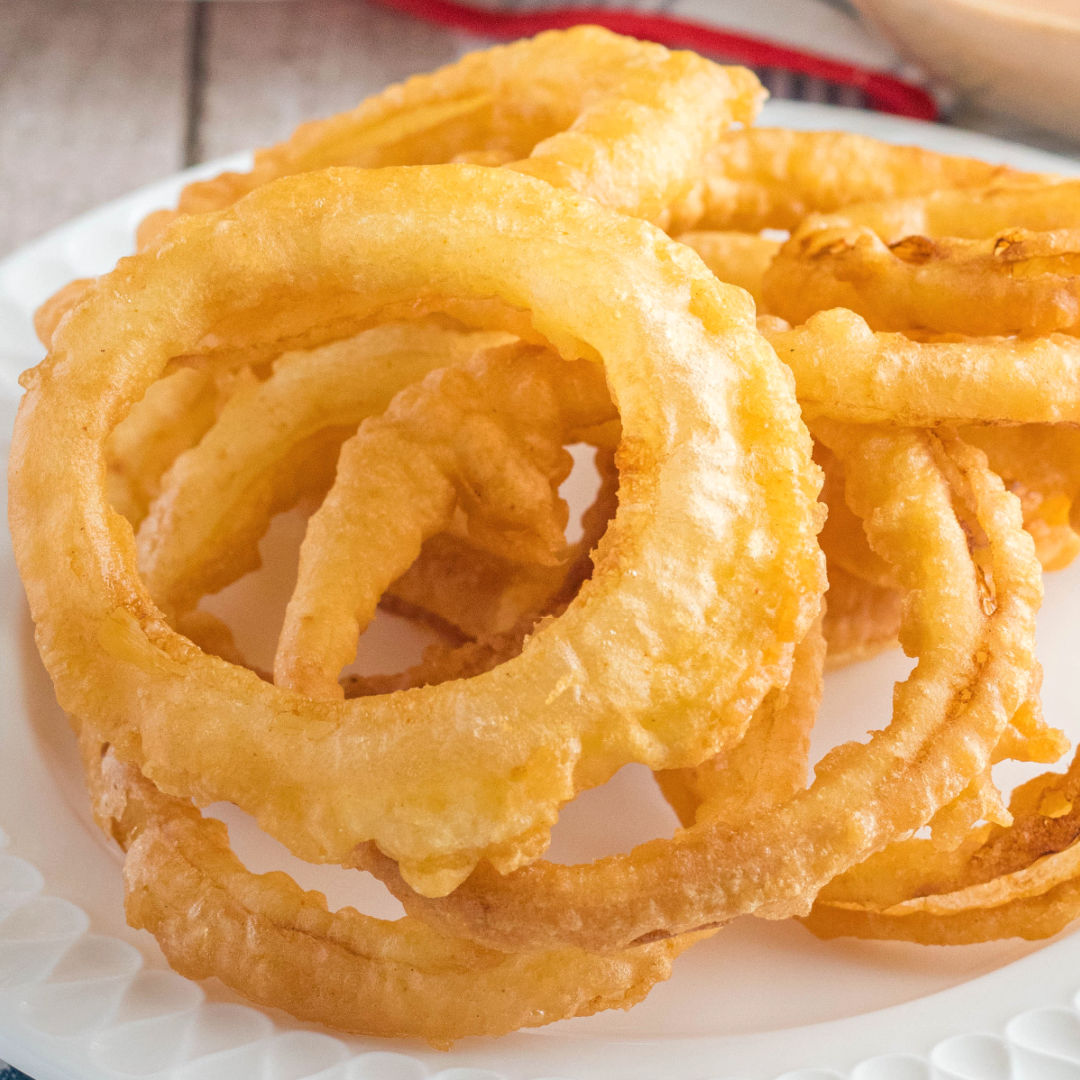
Crispy Onion Rings Recipe

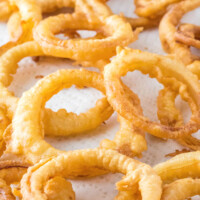
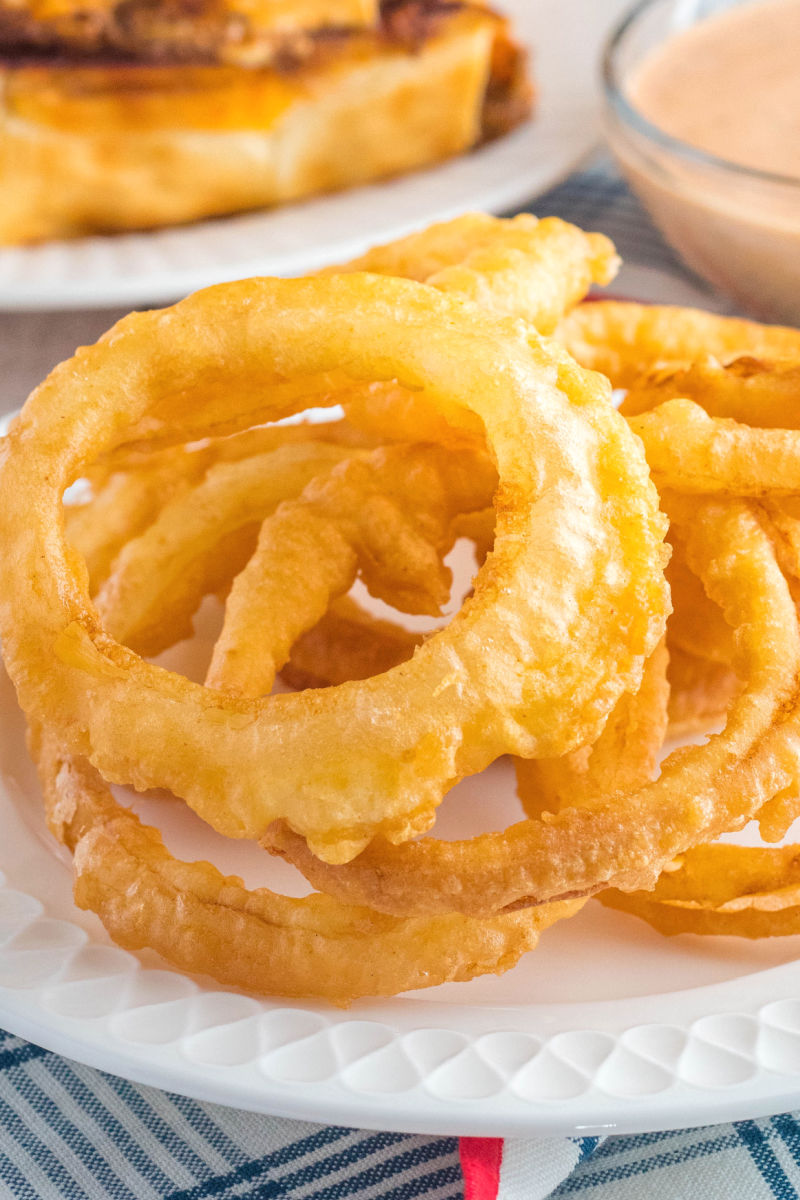
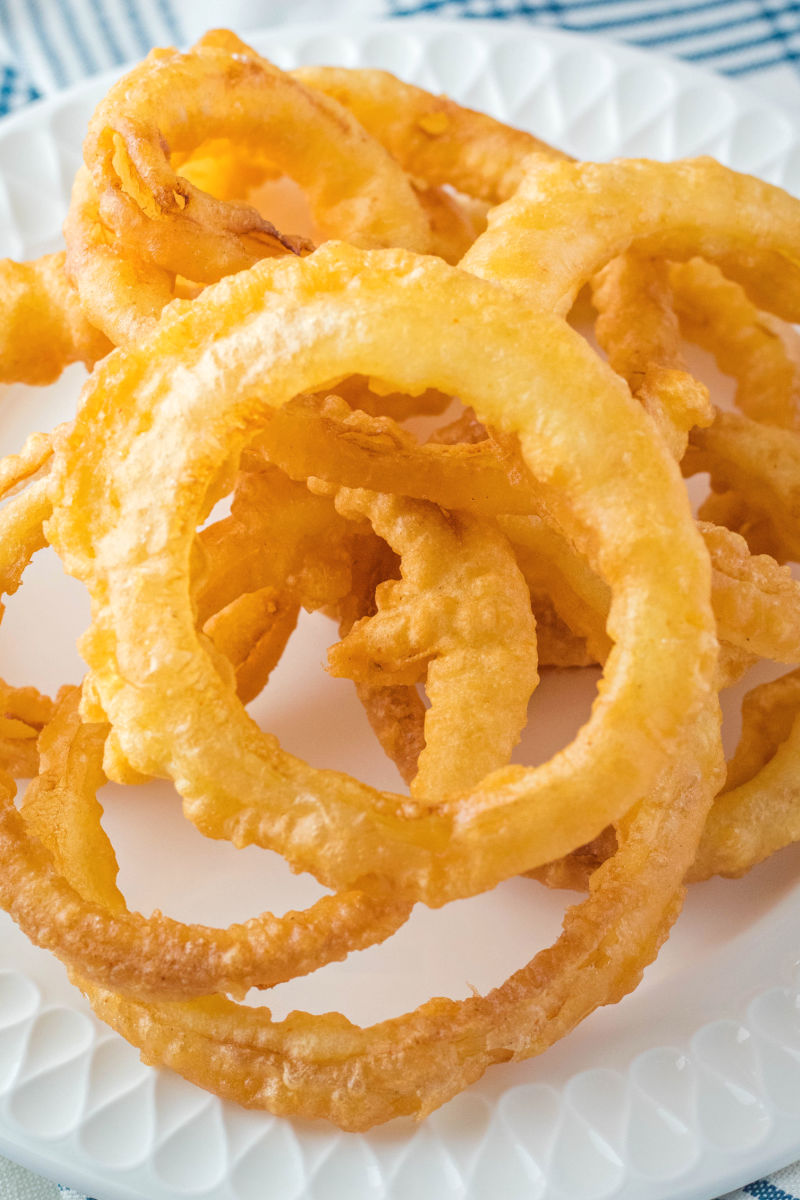
These crispy homemade onion rings are golden, crunchy, and honestly better than most restaurant versions. They’re made with sweet onions dipped in an easy seasoned batter and fried until perfectly crisp in about 30 minutes.
I started making these when I got sick of paying for soggy restaurant onion rings that lost their crunch before they even hit the table. Once I figured out the right onion ring batter and oil temperature combo, that was it for me. These come out crispy, golden, and they actually stay that way long enough to pile onto burgers, dunk into sauce, or eat straight off the cooling rack while nobody’s looking.
And apparently I’m not the only one obsessed with them. This recipe has 4.91 stars from 21 votes, and readers regularly say they’re the best onion rings they’ve made at home.
If you’ve never made onion rings from scratch before, don’t worry. The batter is simple, the ingredients are pantry staples, and the whole process is way easier than it sounds. The key is to get the oil hot enough and not overcrowd the pan. Once you nail those two things, you’re in business.
Why This Onion Ring Recipe Works
There’s a reason I keep coming back to this onion rings recipe whenever burger night rolls around.
- The batter fries up light, crisp, and golden without feeling heavy or greasy.
- Unlike panko-breaded onion rings, these use a smooth seasoned batter that fries into a light, crisp shell. No crumble, just crunch.
- Sweet onions soften just enough while still keeping a little bite in the center.
- Baking powder helps create that airy restaurant-style coating that shatters when you bite into it.
- The seasoned salt gives the batter flavor all the way through instead of relying on dipping sauce to do all the work.
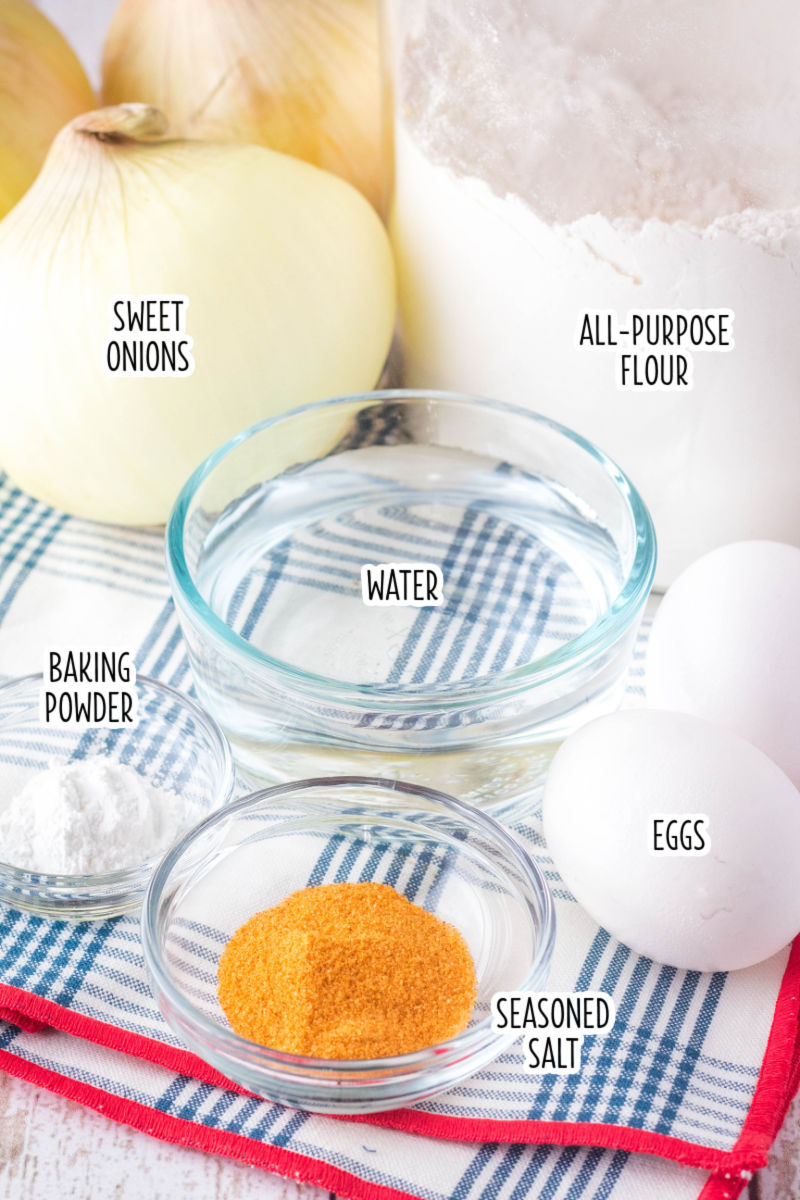
Ingredient Notes
You don’t need anything fancy here, which is one of the reasons I make these so often.
Pantry Ingredients
You’ll need all-purpose flour, seasoned salt, baking powder, and vegetable or canola oil for frying.
Baking Powder: This ingredient does a lot of heavy lifting in the batter. Baking powder creates tiny air pockets as the onion rings fry, which helps keep the coating light and crispy instead of dense and chewy. It’s one of the easiest ways to get that restaurant-style crunch at home.
Seasoned Salt: Seasoned salt gives the batter flavor right from the start. Plain batter can taste kind of flat once it fries, but seasoned salt adds savory flavor and helps the coating stand out even before you dip the onion rings into sauce.
Wet Ingredients
The batter uses water and eggs to thin out and bind everything together. If you want beer-battered onion rings instead, swap the water for a red lager or another flavorful beer. I’ve done this for game day plenty of times, and the beer adds an extra layer of flavor while making the batter even crispier.
Onions
Yellow onions or sweet onions are my favorite options for this recipe.
- Sweet onions are my top choice because they get mellow and slightly caramelized as they fry. They balance out the salty batter really well.
- Yellow onions have a little more bite and onion flavor, which also works great if you want something more savory.
- White onions will work too, but they’re sharper and more pungent.
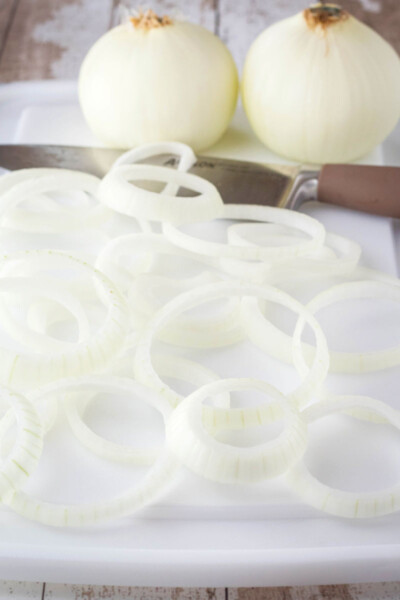
How to Cut Onion Rings
PEEL the onions by cutting off the top of the onion – NOT the root end – and then peeling the outer papery layer off.
CUT the onions into 1/4-inch slices. Be careful since there’s no flat bottom to keep it from rolling. Then discard the roots. For thicker diner-style rings, cut closer to 1/2 inch – just expect a slightly longer fry time.
SEPARATE the onion slices into individual rings. You can discard the very center rings or fry them up, too.
Cutting Tips
- If you have trouble holding on to the onion while slicing, use a fork to gently poke into the onion a little farther back than you’re slicing, so your hand is out of the way.
- You can slice your onion while it is frozen if you have trouble with your eyes watering, but let the slices come up to room temperature and thaw completely before dipping and frying.
- If your onions taste especially sharp, soak the separated rings in ice water for 10 to 15 minutes, then dry them thoroughly before dipping. Wet rings won’t hold the batter.
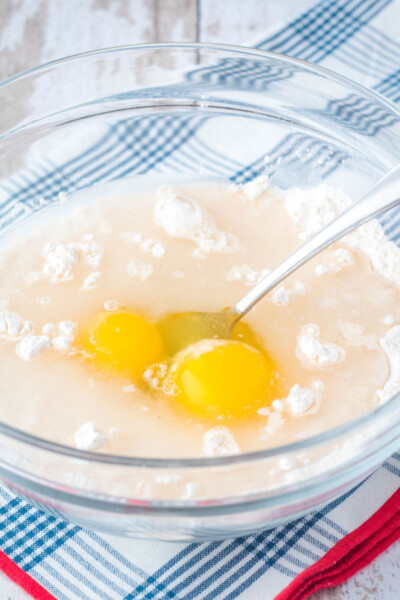
How to Make Onion Ring Batter
Making onion ring batter is super easy. Just whisk a few ingredients together until smooth and dip! It’s also easy to tweak an ingredient or two, so your batter is just how you like it.
Want to customize the batter?
- Extra crispy: Use cold sparkling water or club soda instead of regular water.
- Beer battered: Swap the water for a red lager or your favorite beer for extra flavor and crispiness.
- Spicy: Add a teaspoon of hot sauce, Sriracha, or Sriracha salt.
WHISK together the batter ingredients until smooth. The batter should be thin enough to drip back into the bowl in ribbons. If it clings in a thick layer, the rings will fry up heavy instead of light.
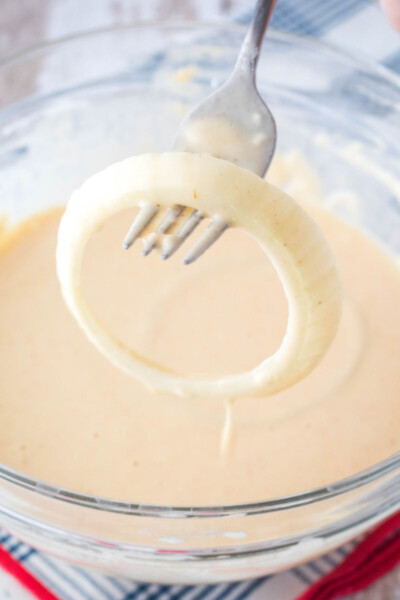
DRY the onion rings by patting them with paper towels before dipping. Extra moisture prevents the batter from clinging evenly.
DIP an onion ring into the batter. Lift and let any excess batter run off back into the bowl. It won’t seem like the onion is very well coated, but it’ll be good.
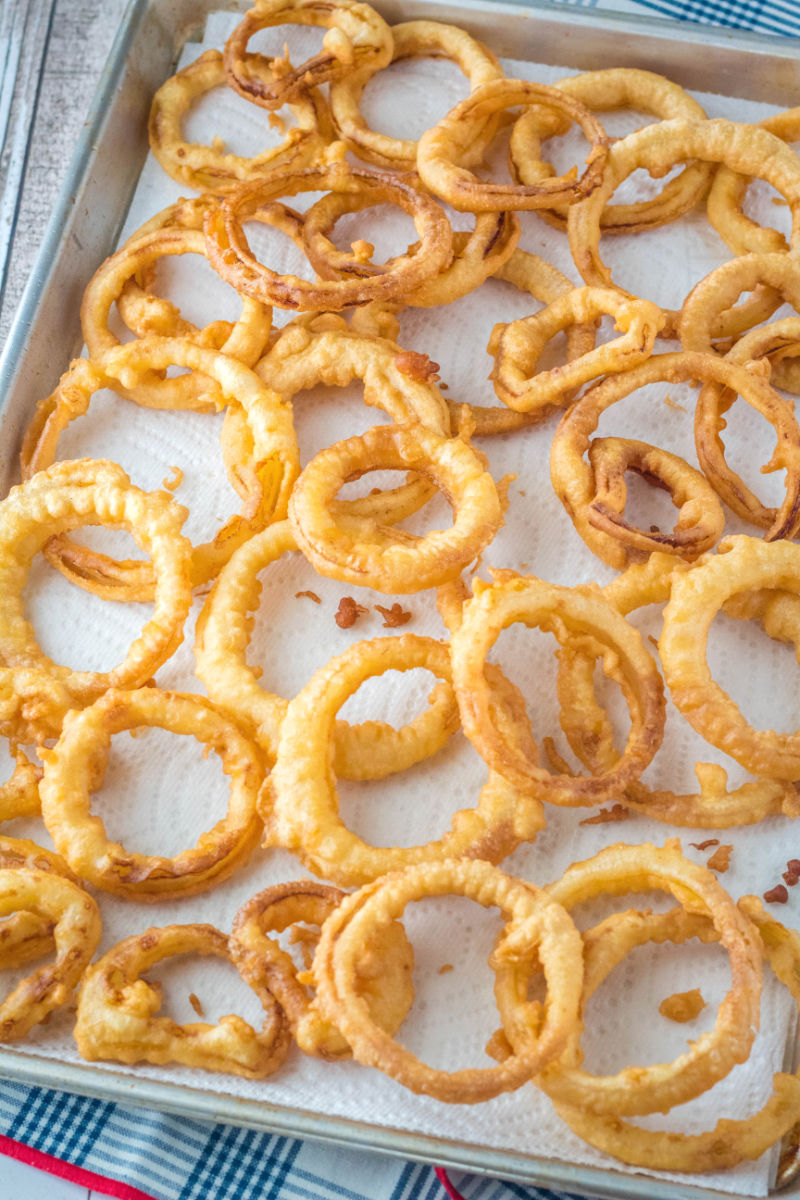
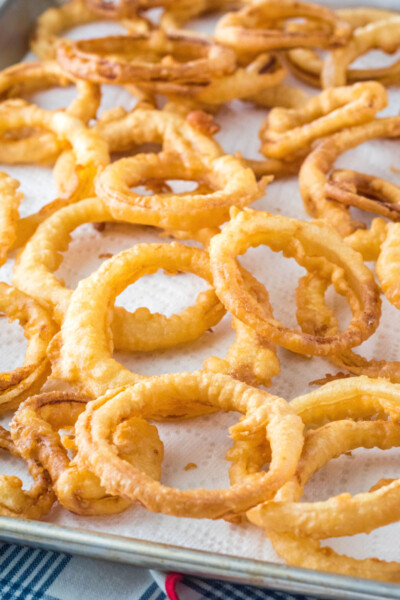
FRY the battered onion in hot oil until golden and crispy, flipping once during cooking. Once they’re done, transfer the onion rings to a paper towel-lined baking sheet to drain.
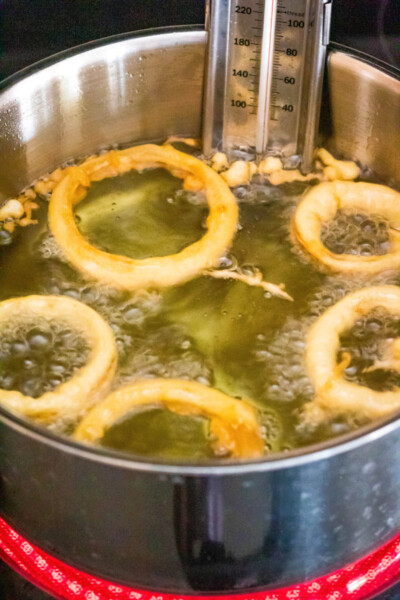
Oil Temperature for Perfect Onion Rings
If there’s one thing that makes or breaks homemade onion rings, it’s oil temperature.
The sweet spot is 375°F. That temperature gets the batter crispy fast without soaking the onion rings in oil. If the oil is too cool, the batter absorbs oil before it crisps, and you end up with greasy onion rings. If the oil is too hot, the outside browns too quickly before the onions soften inside.
I highly recommend using a thermometer here. A long-stem frying thermometer or instant-read thermometer makes a huge difference, especially if you fry foods often.
The temperature will naturally drop when the onion rings go into the oil, which is why batch size matters too. Fry only a few onion rings at a time so the oil can stay hot enough to crisp everything properly. Then, let the oil come back up to temperature between batches. It takes an extra minute or two, but the texture payoff is absolutely worth it.
Tips for Perfect Onion Rings
A few things make the difference between good and great.
- Slice the onions evenly so they cook at the same rate. Uneven slices can leave you with some onion rings overcooked, while others stay too firm.
- Don’t skip letting the excess batter drip off before frying. Too much batter can turn gummy instead of crisp.
- Keep the oil temperature steady between batches for the crispiest texture.
How to Keep Onion Rings Crispy
Fresh onion rings are at their absolute best right out of the fryer, but there are a few tricks that help them stay crispy longer.
First, avoid piling hot onion rings directly onto paper towels in a stack. The trapped steam softens the coating pretty quickly. This starts to happen after the first couple of batches are cooked. So you have two options here:
- Have a second baking sheet lined with paper towels on hand so the onion rings can stay spread out.
- Place them in a single layer on a wire rack set over a baking sheet. Air can circulate underneath, which helps keep the crust crisp all around.
Keep the cooked onion rings warm in a 200°F oven on a lined baking sheet while the rest fry. Just don’t cover them with foil or they’ll steam themselves soft.
Common Mistakes to Avoid
Homemade onion rings are easy, but there are a few things that can throw them off quickly.
Batter That’s Too Thick: The batter should be fairly thin and runny. Thick batter can turn doughy once fried.
Undercooking the Onion: If the onion slides out of the coating when you bite into it, the onion didn’t cook long enough. Let each batch fry until the onion softens and the outside turns golden.
Overcrowding the Pot: Adding too many onion rings at once drops the oil temperature too quickly. Fry in smaller batches for better texture.
Oil That’s Too Cool: This is probably the biggest issue with homemade onion rings. Cool oil leads to greasy batter that never gets properly crisp.
Skipping the Drain Step: Letting the onion rings drain properly after frying helps keep them crisp instead of oily.

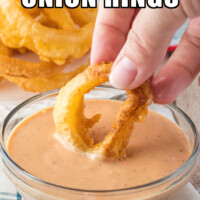
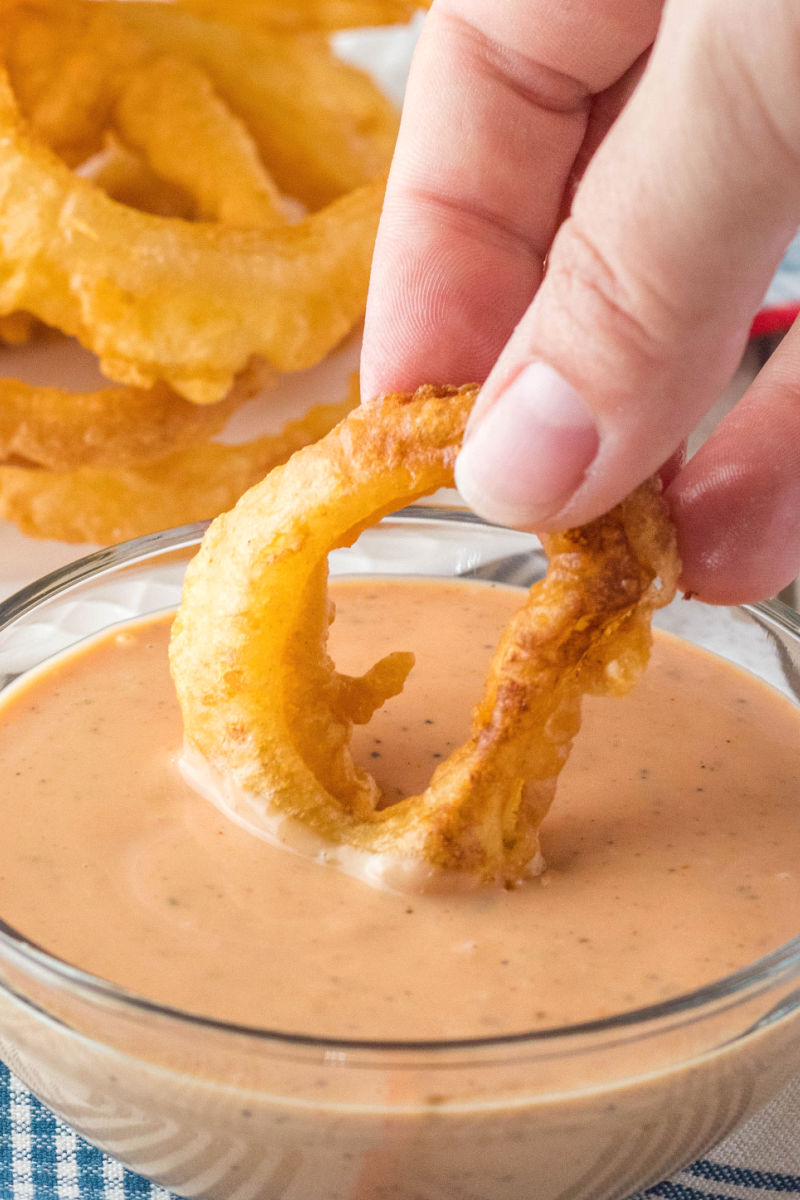
Onion Ring Sauce
These are ridiculously good on their own, but dipping sauce takes them over the top. My personal favorites:
- Blue cheese dressing
- Fry sauce
- Ranch dressing
- Ketchup
- BBQ sauce
- Sriracha mayo
Storage and Reheating
Store any leftovers in an airtight container in the refrigerator for up to 3 days.
For reheating, skip the microwave completely. It softens the coating almost immediately. Instead, cook in a 375°F oven for about 8 to 10 minutes or air fry at 375°F for about 4 to 6 minutes.
Crispy Onion Rings Recipe
Ingredients
Equipment
Instructions
- Cut off the tops of 2 large sweet onions and peel away the skin. Using a sharp knife, cut the onions into 1/4-inch slices (or thicker if you prefer). Separate the individual onion rings from each slice, discarding the centers. Set aside.
- In a medium mixing bowl, whisk together 1 cup all-purpose flour, 1 1/2 teaspoons seasoned salt, and 3/4 teaspoon baking powder. Add in 1 cup cold water and 2 large eggs. Mix until the batter is smooth. It should be thin enough to drip back into the bowl in ribbons.
- Heat 2 inches of vegetable oil in a large pot to 375 degrees F over medium-high heat. Use an instant-read thermometer to monitor the oil's temperature.
- Pat the onion rings dry with paper towels if needed to remove any excess moisture. Dip the onion slices in the batter with a fork, and let any excess batter drip back into the bowl.
- Carefully lower the onions into the hot oil. Do not overcrowd the pot. Cook for 2 to 4 minutes per side, or until golden brown.
- Use tongs to remove cooked onion rings to a paper towel-lined baking sheet. Repeat with the remaining onion slices and onion ring batter. Serve immediately with your favorite dipping sauce.
Notes
- Store leftovers in an airtight container in the refrigerator for up to 3 days.
- To reheat, cook in a 375°F oven for about 8 to 10 minutes or air fry at 375°F for about 4 to 6 minutes.
Nutrition
Tried this recipe?
If you made this recipe, leave a comment and star rating to let others know how it turned out.Onion Ring FAQ
What kind of onions are best for onion rings?
Sweet onions are my favorite because they mellow and sweeten as they fry. Yellow onions are also great if you want a stronger onion flavor.
What oil is best for frying onion rings?
Use a neutral high-heat oil like vegetable oil or canola oil. Both handle frying temperatures well without overpowering the flavor.
Why are my onion rings not crispy?
Usually, the oil temperature is too low, or the pan is overcrowded. Both issues cause the batter to absorb oil instead of crisping quickly.
How do you keep batter from falling off?
Make sure the onion slices are dry before dipping them into the batter, and let excess batter drip off before frying.
Are these battered or breaded onion rings?
These are battered. The coating is smooth and light rather than crumbly like panko-breaded versions.
What to Serve with Homemade Onion Rings
These are especially good piled onto a burger with barbecue sauce and melty cheese. I’ve done this with pulled pork sandwiches, too, and it’s always a ridiculous mess in the best possible way. If you’re building out a full burger night, game day spread, or backyard barbecue, these BBB favorites fit right in:
Very good… light & crispy!
Made these, delicious and so quick and easy!!! Will be my go to!! TY!
I made this with gluten free flour, and it was amazing! It coated very well, and tasted so good 😊
My sister and I made these for supper and was wonderful we used the purple onions
I’m 74 and first time making Onion Rings Simply Amazing had them with Ravioli what a great meal Used leftover batter to do Zucchini that worked well also!! Thanks 🙏 🙏🙏👁
I didn’t really like onion rings, until I made them myself using this recipe!
I think the best part is the batter. They came out so light and crispy. I highly recommend!!