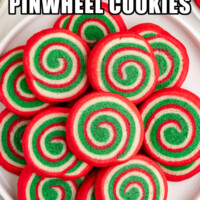
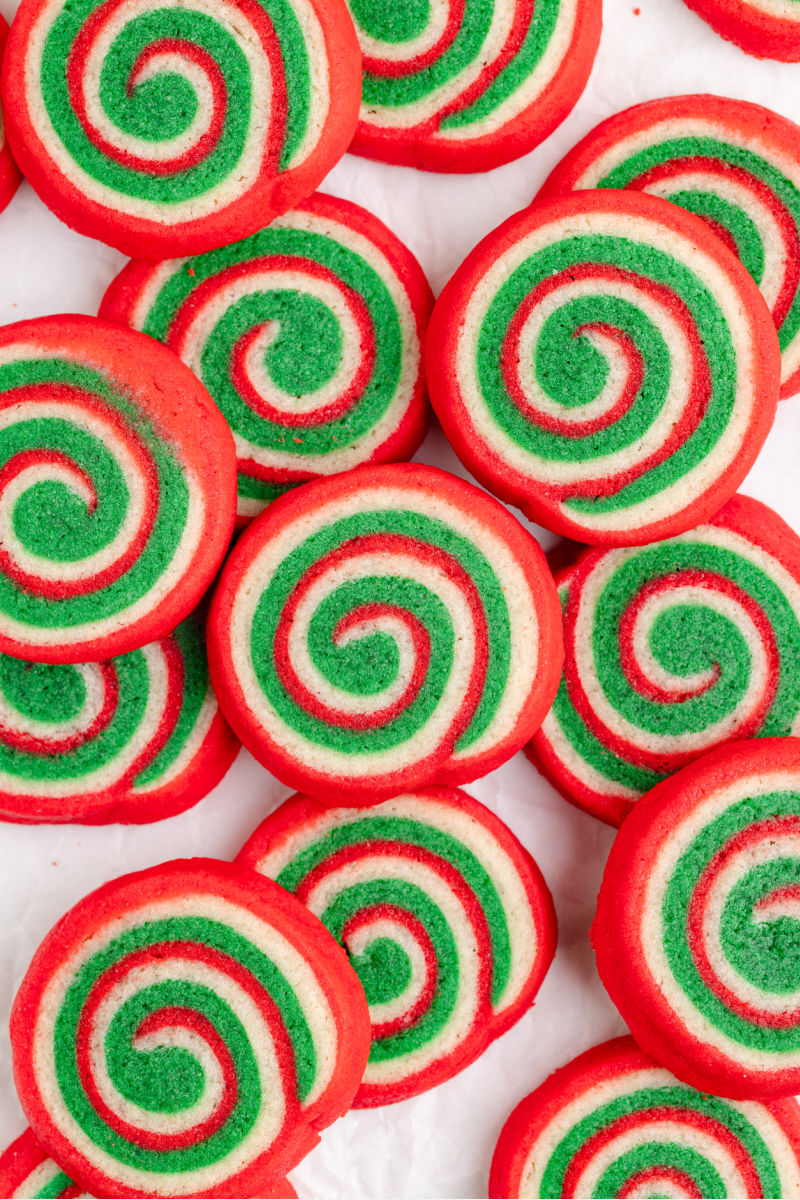
Christmas Pinwheel Cookies
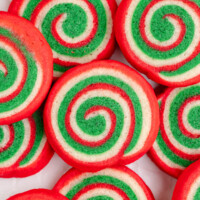


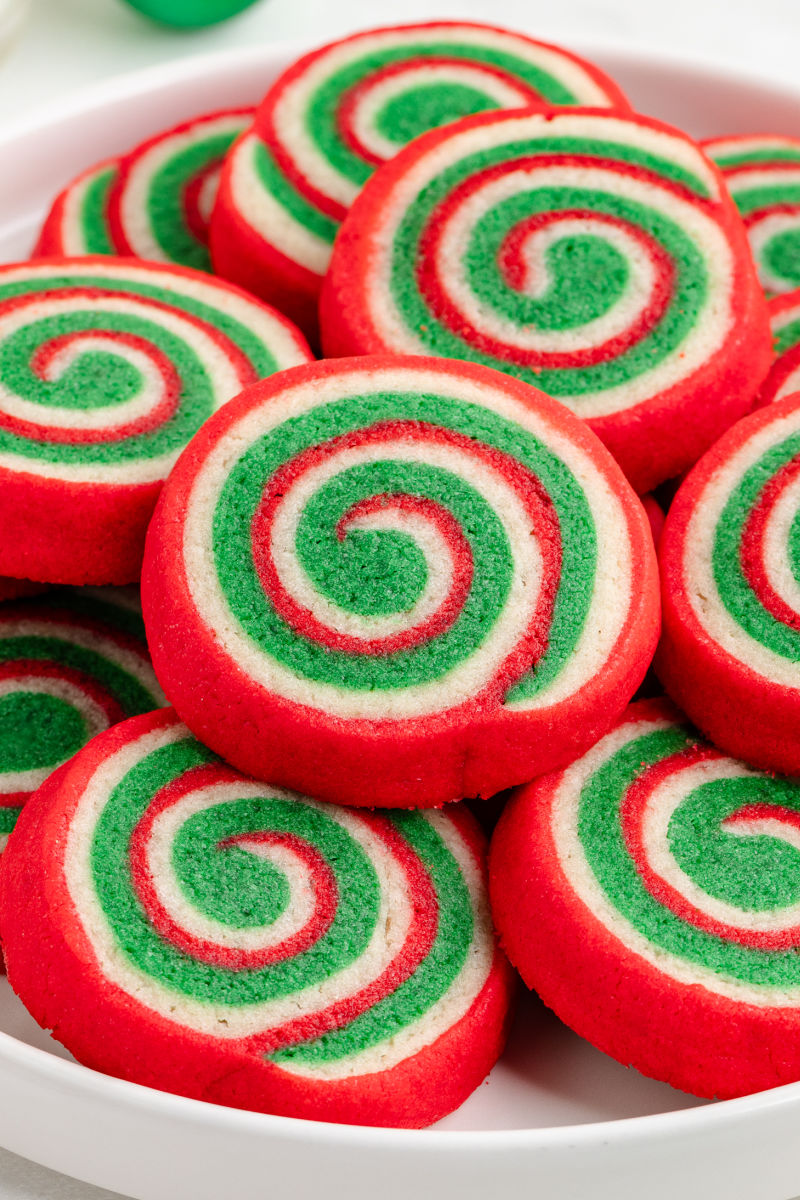
Christmas Pinwheel Cookies are bright and festive cookies that are so fun to make with the family for holiday gatherings and gifts!

Why We Love Christmas Sugar Cookie Pinwheels
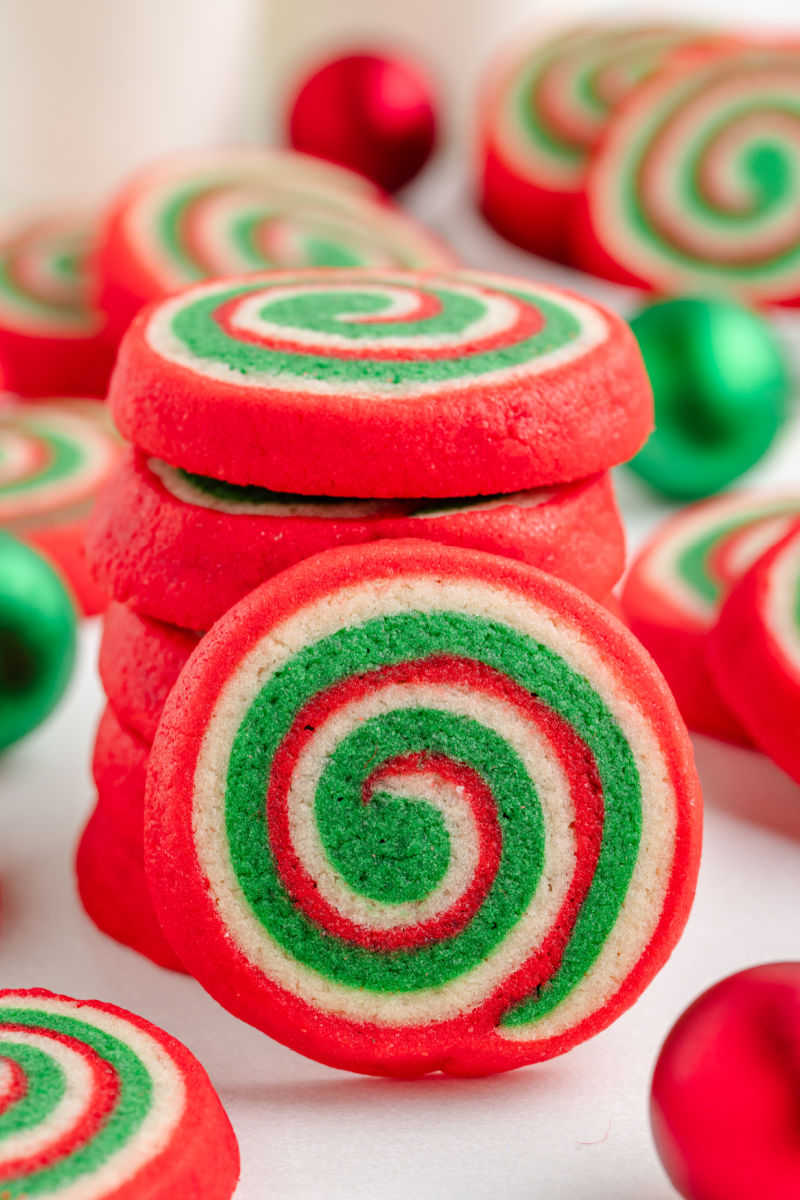
- Pinwheel cookies are a total crowd-pleaser for holiday parties and cookie exchanges. The bold colors stand out on any dessert table. They stack and travel like champs, and everyone loves that “wow” moment when the pinwheel pattern shows up on the plate!
- They’re a little time-intensive, but in the best way. The kind of cozy, holiday baking project that fills the kitchen with Christmas music, laughter, and kids sneaking dough scraps. The process is fun, hands-on, and totally worth it once you bite into those perfect spirals.
- Soft, buttery sugar-cookie goodness wrapped in bright red and green swirls that make any cookie tray instantly festive. They’re eye-catching, nostalgic, and guaranteed to become a tradition everyone asks for year after year.
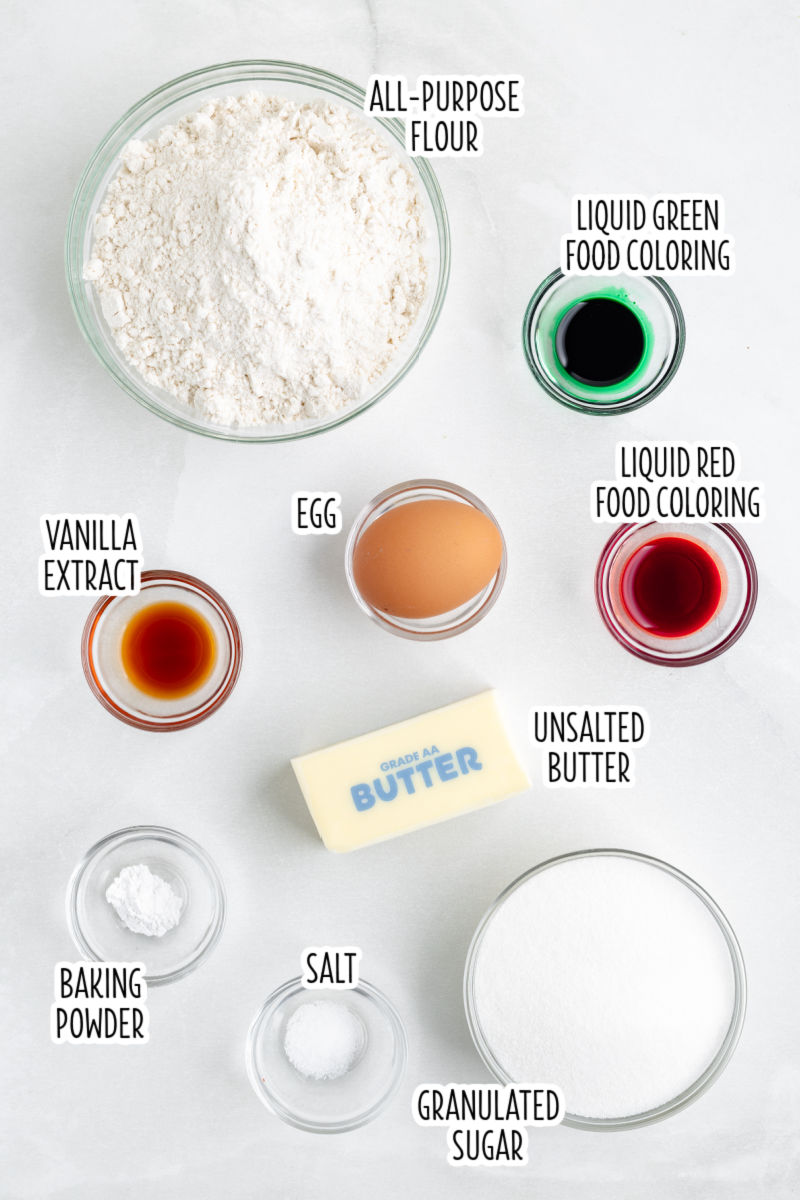
What Are The Ingredients In A Pinwheel Cookie?
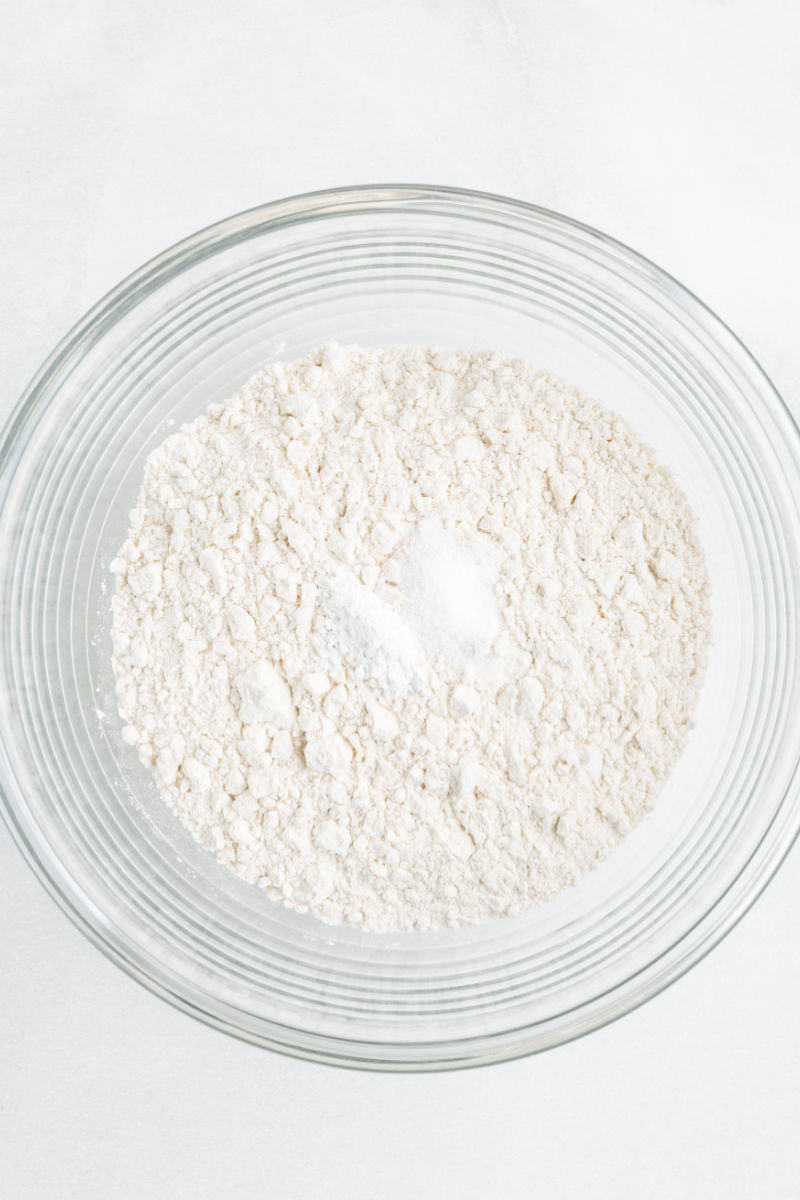
DRY INGREDIENTS: To make these cookies, you will need all-purpose flour, baking powder, salt, and granulated sugar.
WET INGREDIENTS: Set out unsalted butter to come to room temperature, along with an egg and vanilla extract.
FOOD COLORING: Make these cookies pop with red and green food coloring. You can use regular food coloring or gel food coloring in this recipe. Gel food coloring is typically more vibrant, and you’ll need less of it, but go with your preferred food coloring or what you have on hand.
How to Make Pinwheel Cookies
Jump to RecipeSTEP 1 Whisk together the flour, baking powder, and salt in a medium bowl and set that aside. Use a stand mixer or a large mixing bowl and a hand mixer to beat the butter and sugar until fluffy.
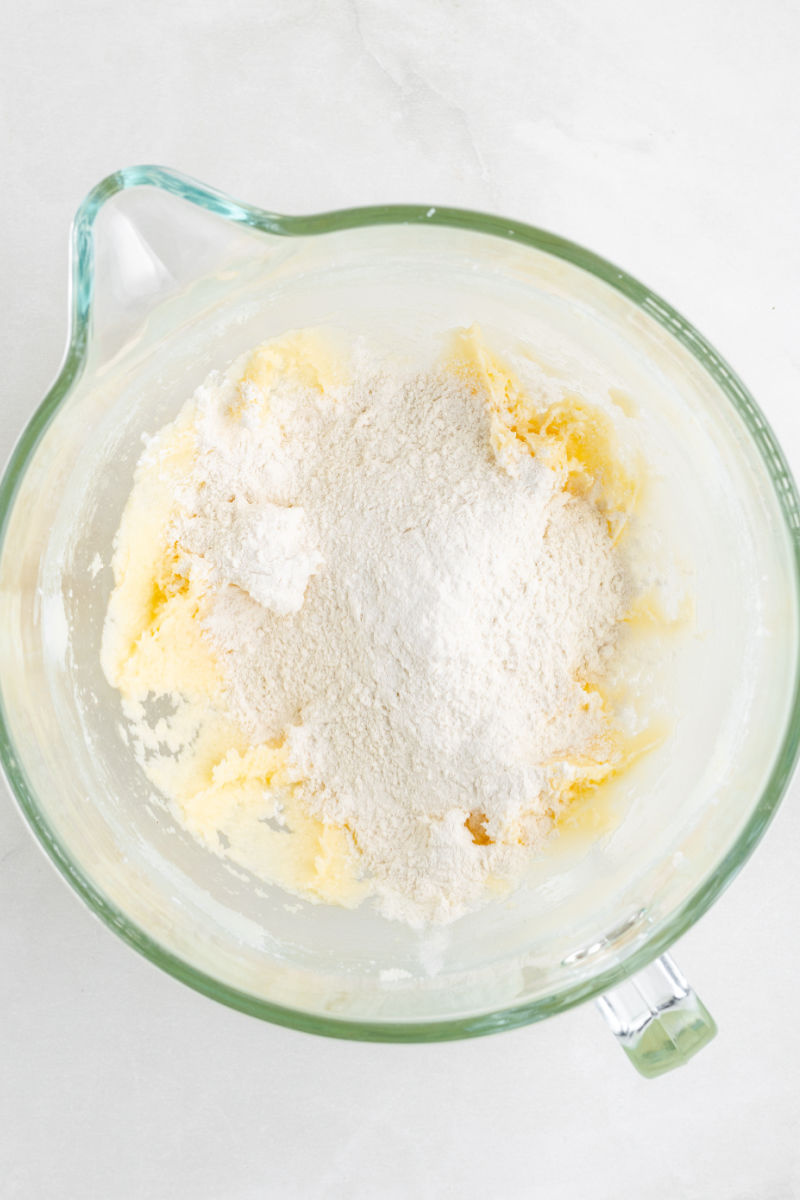
STEP 2 Add the egg and vanilla extract to the butter and sugar mixture and beat until mixed. Pour in half of the flour mixture and beat until just combined, followed by the other half. Then, remove the dough from the bowl and divide it into three equal pieces.
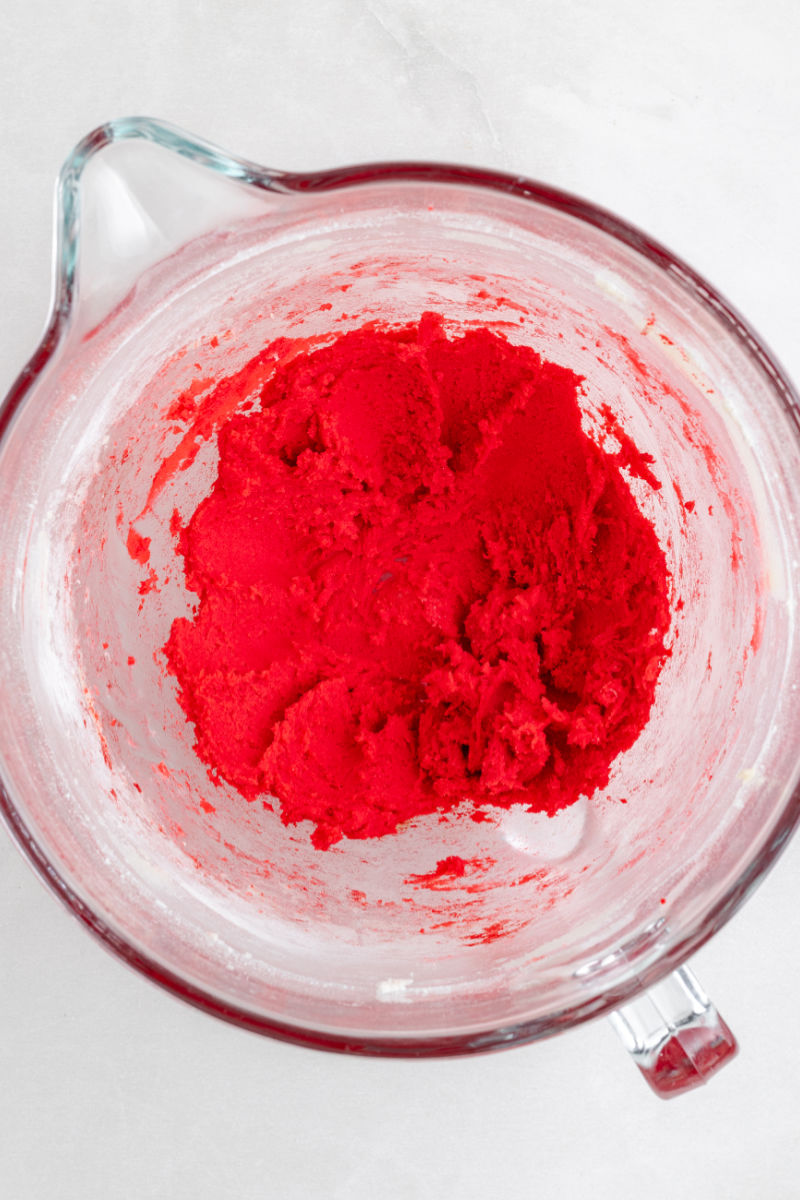
STEP 3 Place one ball of dough back into a clean mixer and add the red food coloring. Beat until the dough is red throughout. Clean the mixer and repeat with the second ball of dough and green food coloring. The third ball of dough will stay the color it is.

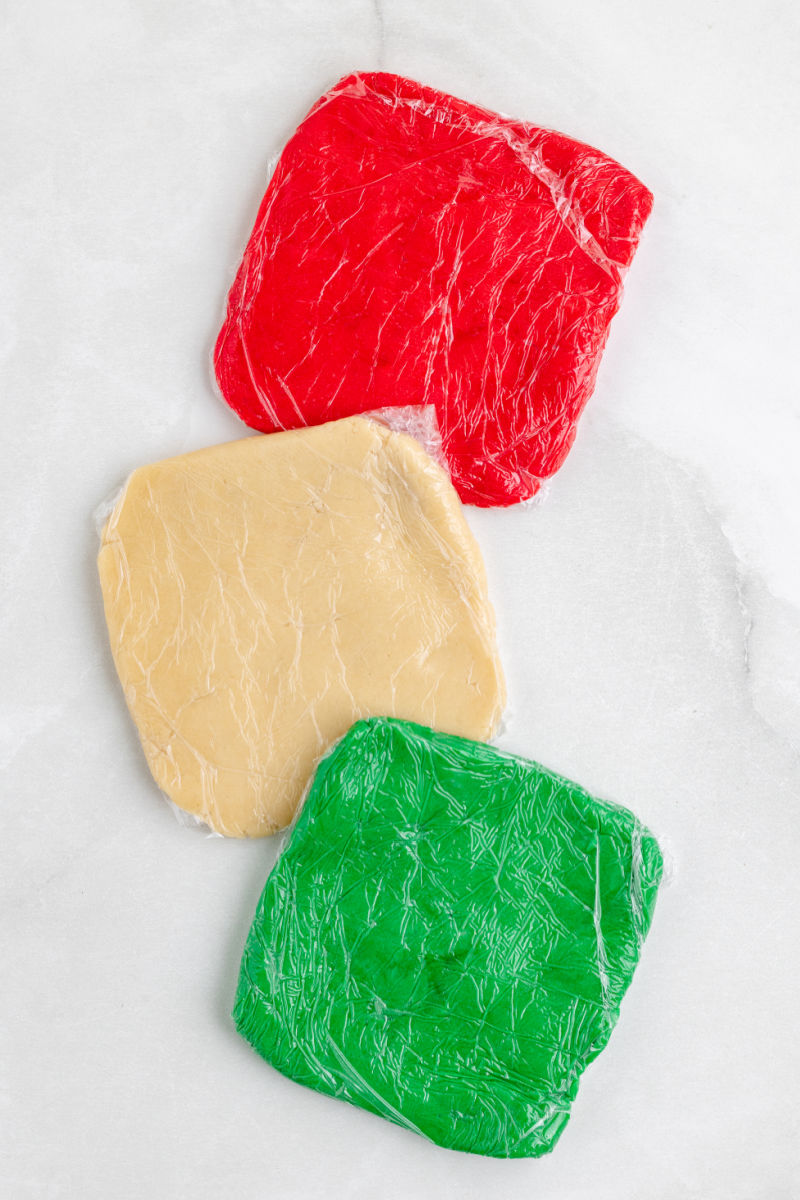
STEP 4 Fold each color of dough into a square and wrap each separately in plastic wrap. Refrigerate the dough for 1 hour.
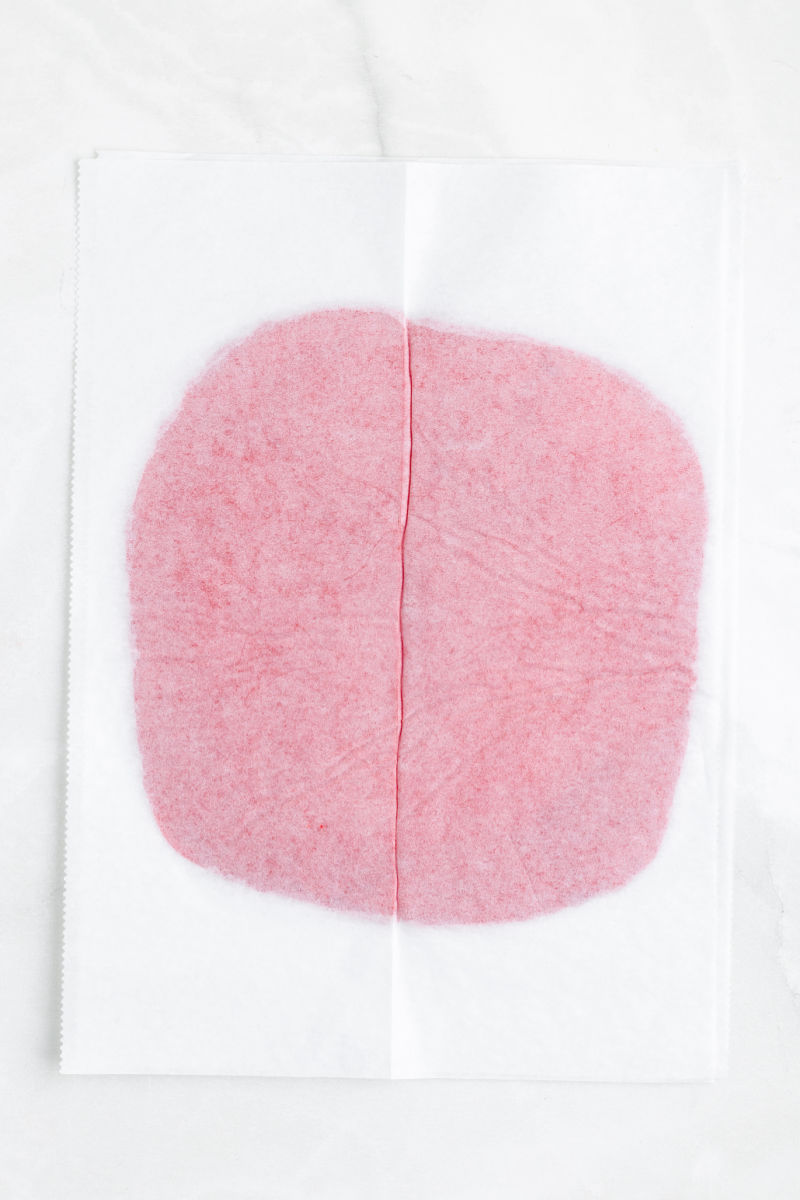
STEP 5 After an hour, remove the dough squares from the fridge and place each square of dough between two sheets of parchment paper. Roll out each color into a 10-inch square and then place the dough squares in their parchment paper back into the fridge for 30 minutes.
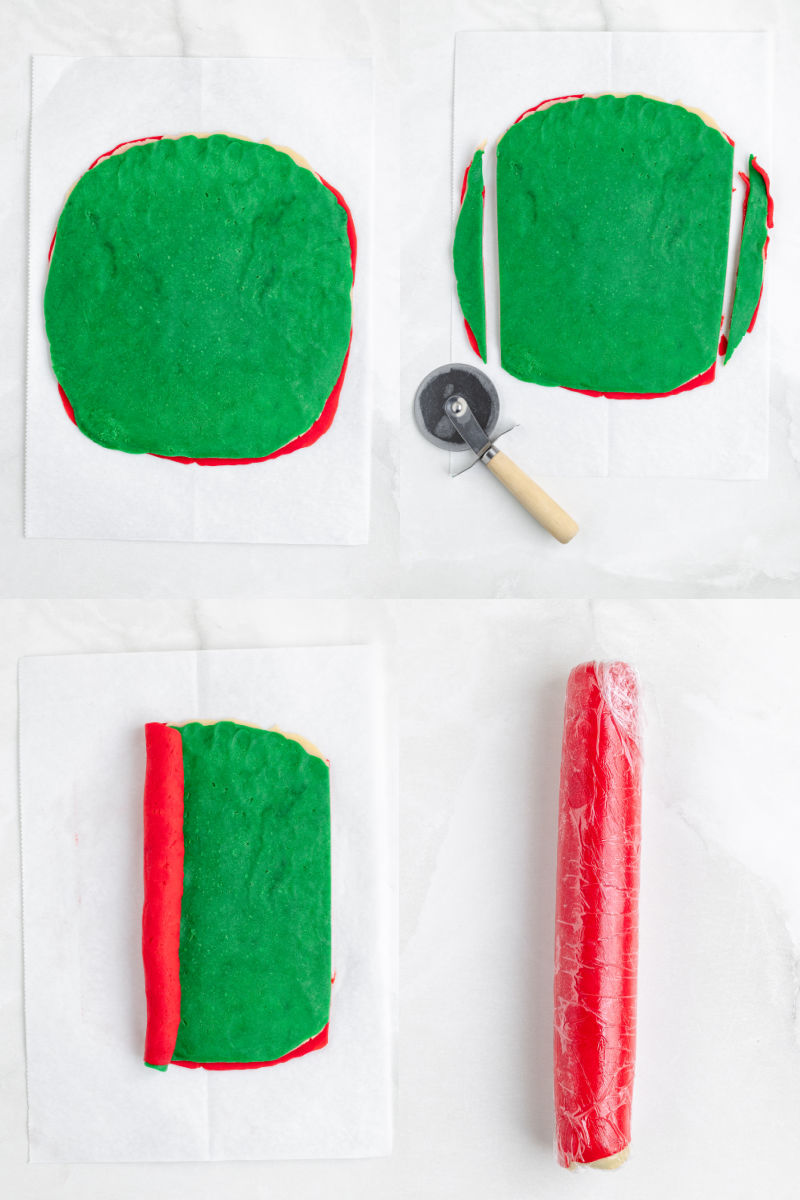
STEP 6 Remove the dough squares from the fridge and take off the top sheet of parchment paper from each square. With the red dough square on the counter, flip the white dough upside down and place it on top of the red dough. Be sure to line up the edges. Remove the parchment paper from the white dough. Flip the green dough over and place it on top of the white dough, and peel the parchment paper off. Trim the edges of the dough to create straight lines. Carefully roll the dough into a log shape, pressing the seams together at the end. Wrap the dough log in plastic wrap and refrigerate for 1 hour.
STEP 7 Preheat the oven to 350 degrees F and line a cookie sheet with parchment paper or a silicone mat. Slice the dough log into 1/4 inch slices and place them on the cookie sheet. Bake the cookies for 12-15 minutes, and once out of the oven, allow the cookies to cool for 5 minutes before transferring them to a wire rack to cool completely.

Tips & Tricks
- I wanted really bold colored pinwheel cookies, so I used a lot of liquid food coloring. You can start with 1/4 teaspoon of food coloring, and then add 1/4 teaspoon at a time until the color reach the vididness you desire.
- If you’re using gel food coloring instead of liquid, start with just a few drops and mix. Add a few drops at a time until the dough is the color you want.
- Easily change up the food coloring combinations for different holidays or celebrations! Choose red, white, and blue for the 4th of July, or green and purple, or orange and black for Halloween. For Valentine’s Day, go with red, pink, and white. You can even use your favorite sports team’s colors for an easy game day treat!
- If you like, you can add 1 teaspoon of another flavor extract when you add the vanilla extract. Seasonal flavors like peppermint or lemon can be used, or any other flavor you want to try.
- There is a lot of chill time for the dough throughout the process, but it is necessary. The dough only needs to chill long enough to firm up, so if it’s ready before the hour is up, then that’s ok, as long as it is hard enough to roll and then cut!
Christmas Pinwheels Cookies Recipe FAQ
What are the different types of pinwheel cookies?
There are so many delicious and different types of pinwheel cookies out there! Chocolate and vanilla are quite popular, as are jam or date-filled and cinnamon sugar pinwheels. Some recipes have chocolate chips, marzipan, or lemon curd fillings, while others are filled with nuts, coconut, or colored sugar. Peppermint or gingerbread extract is a Christmas-time favorite that’s easy to make. You can really make these cookies to reflect your perfect seasonal colors and flavors, so add what you like!
Can pinwheels be made ahead of time?
Pinwheel cookies are fantastic cookies to make ahead of time! Once you get the cookie dough layered, rolled, and wrapped up, you can chill it in the fridge for up to 1 week. For pinwheels with food coloring, I recomend baking within 3 days so the colors don’t bleed.
Well-wrapped cookie dough can also be frozen for up to 3 months before baking! If you choose to freeze the dough log, be sure to wrap them in pop it in a food storage bag and then thaw overnight in the fridge before slicing and baking.
Other Recipes You May Like
- Italian Ricotta Cookies
- Christmas M&M Sandwich Cookies
- Cranberry Orange Icebox Cookies
- Slice and Bake Swedish Christmas Cookies
- Brown Butter Sugar Cookies

Christmas Pinwheel Cookies
Ingredients
Equipment
Instructions
- In a medium mixing bowl, stir the flour, baking powder, and salt together. Set aside.
- In a large mixing bowl, beat the butter and sugar for 1-2 minutes, until pale and fluffy. Add the egg and vanilla and beat until combined. Add the dry ingredients to the wet ingredients in two additions, mixing until just combined after each addition. Scrape the sides of the bowl as needed.
- Divide the dough into 3 equal portions. (You can eyeball it or use a kitchen scale to measure the pieces.) Place ⅓ of the cookie dough back in the mixing bowl and add the red food coloring. Beat with your mixer until the color is completely incorporated. (Be sure to use a bowl that won't stain.) Clean the hand mixer blades (or stand mixer paddle) and wipe out the bowl. Place another ⅓ of the cookie dough into the bowl and add the green food coloring. Beat until the color is completely incorporated. Leave the third piece of dough as-is. You should now have red, green, and "white" cookie dough.
- Press each piece of dough into a flat square and wrap tightly in plastic wrap. Refrigerate the dough for 1 hour or until firm.
- Remove the cookie dough squares from the fridge. Place the red dough between 2 sheets of parchment paper or waxed paper. Use a rolling pin to roll the dough out into a 10-inch square. Leave the dough between the parchment paper pieces. Repeat with the red and white cookie dough. Refrigerate for 30 minutes.
- Remove dough from the fridge, and take the top layer of parchment paper off each sheet of cookie dough. Place the red dough on a work surface. Top with the white dough, non-paper sides touching, being sure to try and line up the edges of the dough as much as possible. Remove the other piece of parchment from the white dough. Place the green dough over the white dough, non-paper sides touching, while lining up the edges. Remove the parchment from the green dough.
- Use a pizza cutter or knife to trim the left and right edges of the cookie dough into straight lines. Very carefully, starting with one of the straightened sides, roll the dough into a log shape until you reach the other trimmed edge. Use the parchment paper to lift the dough and get things started. Once rolled, gently pinch the seam closed, along with any cracks in the outer red layer. Wrap the dough log in plastic wrap and refrigerate for 1 hour or until firm.
- Preheat your oven to 350 degrees F. Line a baking sheet with a silicone mat or parchment paper.
- Use a sharp knife to cut the dough log into ¼-inch thick slices, discarding the ends since they don't make a nice pinwheel design. (Or bake them off as a chef's snack!) Place the cookies on the prepared baking sheet and bake for 12 to 15 minutes, or until the cookies are set and the bottoms are barely golden.
- Carefully remove from the oven and let cool for 5 minutes on the baking sheet before transferring to a wire rack to cool completely. Serve immediately or store in an airtight container until ready to serve.
Notes
- I wanted very vibrant colors, so I used a lot of food coloring. You can start with 1/4 teaspoon for each color and add 1/4 teaspoon more at a time until you reach your desired color. If you are using gel food coloring, you will not need nearly as much. Start with a few drops, mix, and then add more color as needed.
- Once you layer and roll the cookie dough, it can be kept in the fridge for up to 3 days or frozen for up to 3 months. If freezing, wrap in plastic wrap and then place in a food storage bag. Thaw overnight in the fridge before slicing.
Video
Nutrition
Tried this recipe?
If you made this recipe, leave a comment and star rating to let others know how it turned out.This post first appeared on Yellow Bliss Road where I am a contributor.

- Christmas Pinwheel Cookies
- 5-Ingredient Vanilla Almond Snowball Cookies
- Chocolate Peppermint Crunch Cookies
- Christmas Crinkle Cool Whip Cookies
- Ugly Christmas Sweater Sugar Cookies
- Hazelnut Nutella Linzer Cookies
- Apple Cider Cookies
- Chocolate Andes Mint Cookies
- Dark Chocolate & Hazelnut Cookies
- Mexican Hot Chocolate Shortbread
- Loaded Cookie Butter Snickerdoodles
- Chocolate Oatmeal Cranberry Cookies
Hi, can we use icing colors?
Hi Aarti! What do you mean by icing colors?
Like the wilton icing colors. Link is attached.
https://jet.com/product/5-oz-12-pack-Icing-Colors/ffe9d0c047e8422e98196795a543508e
Hi! Just wondering what temperature the oven should be set at? Couldn’t find it in this post, thanks 🙂
Hi Mia! It’s 350 degrees F. The temp is way down in step 14 since there’s no point in turning the oven on before you really need to. 😉 Happy baking!!
Do these cookies freeze well??
Do these cookies freeze well? Thank you.
Hi Wendy! I haven’t tried freezing them because they never last more than a day or two at my house. I would think the baked cookies (once cooled) would be fine to freeze. Lay them out on a baking sheet until frozen and then transfer to a freezer ziploc bag for storage.
How far in advance can you make the dough before baking?
Hi Beverly! You could make and color the dough 2-3 days ahead of time. Wrap each color dough ball in plastic wrap and stick it in the fridge.
I want to try this recipe but I only have one stick of butter handy could I replay the rest with margarine without compromising the texture?
Hi Amanda! Margarine will change the texture of the cookies some since it’s oil based. I would hold out until you have a chance to grab another stick of butter. That being said, you could totally give it a shot with the margarine.
My only complaint about these cookies? They are so good there’s never any left to freeze! I have to make two batches just to have some left for Christmas Day!
Hi. What happens if you don’t have a silicone mat or parchment paper? What else could be used for baking them??
Hi Taylor! Be sure to spray your baking sheet with non-stick cooking spray. 🙂
Add a bit more sugar then it says, and make sure to roll the first fold tightly to avoid gaps in the middle of your swirls.
Can I freeze the log roll a couple weeks before Christmas then cut and bake after defrosting overnight in the fridge when I need them?
You sure can!
I’m also interested in freezing the log for a week or so rather than the baked cookies. This sounds like a dough that could be frozen…what do you think? The cookies look fantastic, I love that there are 3 colors not two
Hi Martha! You can definitely freeze the dough logs. Wrap them tightly in plastic wrap and then pop in a gallon-ziploc bag. Pop them in the fridge to thaw the day before, and then slice and bake the next day. 🙂
Getting ready for a cookie exchange and this is perfect! About how many cookies does this recipe make? Trying to see how many times I will need to make it.
Thanks!
Hi Christine. This recipe makes about 16 cookies.
just made these…turned out really well! super fun n tasty recipe!
Hi! Have you tried making this with any gluten free flour? What would you recommend?
Hi Stefanie! I have not tried this recipe with GF flour, but let me ask some of my friends who bake with it and see if they have any insight. 🙂
Could you roll the roll in crushed peppermint candy?
Hi Joe! You could, but… The candy canes will get melty in the oven. I haven’t tested this, so I’m not sure if the cookies bake long enough to completely melt them. I would do a test batch. Cut the dough log in half (or even 1/4) and then roll it, slice, and bake before rolling the rest of the dough. Hope this helps!
I’m baking them to day I’ll let you know. If it works I’ll send you a photo.
That would be fantastic Joe! Thank you!!
Hi did the candy cane work well?
Could I use almond flavoring in these cookies?
Hi Lori! You can absolutely use almond extract instead of vanilla… or even a combination of the two. 🙂
Made these for the first time. Used gel coloring and non-perils. They are awesome and they taste good too! Definitely on my baking list for Christmas 🎄
These turned out wonderfully! It indeed does take planning ahead, but worth it. Thank you! I added sprinkles on the edge after rolling it all up.
Hello
i was wondering 2 things, after i make it into a log and i freeze the raw dough log?
and i have made other pinwheels but i like this recipe the best i want to make chocolate pinwheels will it change the texture or will it be dry..the dough
thank you
Linda
Hi Linda! I think I read your comment right but bear with me. 🙂 You can freeze the dough log. Be sure to wrap it in plastic wrap and then foil before freezing. Thaw in the fridge overnight before slicing into cookies. As far as chocolate pinwheels go, cocoa powder adds fat content to the dough. Since baking is a very particular science, I would find a chocolate pinwheel recipe rather than just adding in some cocoa powder. This one is from Becky: https://www.thecookierookie.com/chocolate-vanilla-pinwheel-cookies/
I can work on chocolate pinwheels for you soon though!
Made these earlier today and to my amazement they are gorgeous. I had a hell of a time rolling out the dough as the parchment-on-counter was a complete slip n’ slide fiasco , so my ’10×10′ squares were more like giant nondescript alien blobs of varying shapes… and I slapped them together as best I could. I thought for sure it was to be a giant fail, but the results are beautiful and they are YUM. Am still stunned 🙂
Oh, I added a touch of peppermint oil to the green, and some raspberry to the red and rolled the roll in some Xmas sprinkles before chilling, prior to cutting. Was worried they’d melt, but nope, and looks quite pretty,.
Thanks for the challenge!
Can you please explain the hour of refrigeration needed between the initial flat square and the rolled out version? I get why you would need to get it cold before stacking (crisper lines?), and after rolling (so they don’t spread), but what is the first refrigeration for? Thanks!
Hi Irene. The extra chilling step is just to help keep the dough cold through out the rolling/layering process. I find having the dough cold when rolling it out and working it helps make that process easier for me. You’re welcome to try skipping the initial chill and go right into rolling to 10-inch squares of dough if you like. I think of it like chilling cut-out sugar cookie dough before rolling it out. 🙂