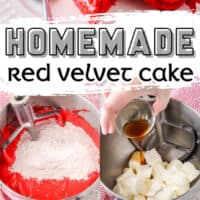
Homemade Red Velvet Cake

This is a sponsored post written by me on behalf of Albertsons. All opinions are 100% mine.
Nothing says I love you like a homemade cake. Red Velvet Cake is a Southern favorite and a deliciously indulgent way to end your favorite meal!

Red velvet cake is the stuff of dessert dreams. It’s tender, moist, tangy, has a hint of chocolate, and is about the best thing since sliced bread. Maybe I love it so much because I had a Southern grandma who loved to cook and bake. This cake reminds me of being in her kitchen. Or maybe it’s the decadent pairing of cake and cream cheese frosting. Al I know is that you need this cake in your life.
It’s February and that means Valentine’s Day is the name of the game in every store’s seasonal aisle. Everything is red and pink and hearts are all over the place. But I’m going to let you in on a secret… I’m not a Valentine’s Day kind of girl. I’ve never been obsessed with getting a gift just because it’s February 14th. Bring me a debi lilly™ flower bouquet or debi lilly™ roses on a Tuesday just because, and I’m a happy girl.
But I will say this… When I was younger, I would ride my bike to the shopping center across from our house to hook up my mom. It was just the two of us and some years she’d have to work a 12-hour shift at the hospital on Valentine’s Day. So I would go to the store, pick out some flowers, grab a chocolate bar I knew that she liked, and a balloon. She’d get home after I was in bed and find a little surprise on the counter waiting for her. That was my idea of Valentine’s Day. Taking care of the woman who took care of me.

My husband totally knows I’m not super into the holiday, but he always gets me a card. It’s pretty cute. The cards are totally squishy or flirty and chosen based on our sense of humor and they make me smile. So this year I’m surprising him with a little something too – red velvet cake. Next to angel food cake, it’s one of his favorite desserts.
I headed over to our local Safeway to grab everything I needed to get baking. When I walked in, I couldn’t help but notice the gorgeous debi lilly roses. There were bouquets of red, pink, and these really cool orange roses just begging to be brought home. So I did! (I’m totally in the habit of buying myself flowers.) Then I grabbed a teardrop vase to put the roses in. I loved the shape, I like having shorter vases, and red’s my favorite color. #winning
I shopped at Safeway, but you can also find debi lilly™ flowers, candles, vases, and more at the Albertsons Companies family of stores, including Albertsons, Safeway, ACME Markets, Jewel-Osco, Vons, Randalls, Shaw’s Supermarket, Star Market, Tom Thumb, and Vons.

The florist was super nice and grabbed me some baby’s breath and leather leaf to finish off my bouquet. If you don’t see any out, just ask. When I got home from the store, I went to work arranging the roses. I learned some great floral arranging tips back in December on a call with Debi Lilly herself. So I took what I learned and put together this little bouquet. Happy just because I like flowers day! Haha. I love having fresh flowers in the house to bring the outside indoors.
The debi lilly chop and drop bouquets are great for everything from “ooooh pretty” to Galentines and birthdays. You can easily make two smaller bouquets from one set, which is awesome when you have a cake to decorate and want your family date night table to be pretty. Yup, we’re having a family date night for Valentine’s Day. Everyone is getting their favorite meal and then we’re having the best red velvet cake around for dessert.

What is red velvet cake?
Red velvet cake is a dessert that is said to have originated in Maryland in the early 1900’s… even though most of us consider this recipe a Southern dessert. It’s made with standard cake ingredients like butter, sugar, eggs, flour, and baking soda. But it also includes buttermilk, vinegar, and cocoa powder to give that signature red velvet flavor.
Red velvet cake traditionally didn’t use red food coloring for the deep red-brown color. Instead, the non-Dutched anthocyanin-rich cocoa powder gave it a slightly red color. To frost your cake, I recommend going with a cream cheese frosting (my husband’s favorite), ermine icing (the traditional red velvet frosting), or even buttercream.
No matter which one you choose this cake will be moist, rich, and everything you want red velvet cake to be!
Is red velvet cake chocolate?
Sort of. There is a little bit of cocoa powder in the cake batter. This gives a hint of chocolate flavor with a tangy finish from the buttermilk and vinegar and a rich cream cheese frosting. Chocolate cake uses chocolate and red velvet cake uses cocoa powder. That’s the main difference between the two; along with the quantity of chocolate/cocoa powder used.

Homemade Red Velvet Cake Ingredients
Let’s address the elephant in the room. Yes, you can grab a box of red velvet cake mix at the store and follow the packaging directions. It’ll be fine. Heck, you could even use a can of cream cheese frosting.
You could. But why would you when it’s just as easy to make a homemade batter that has SO much more flavor?! And nothing beats cream cheese frosting from scratch. I promise.
CAKE FLOUR: Yep, we’re using cake flour for this red velvet cake recipe. Cake flour has less gluten in it than regular all-purpose flour. This makes your cake soft and tender. It’s crazy, but there is totally a difference.
You can get away with using all-purpose flour in this recipe. Everything will be just fine. Or you can use a flour + cornstarch “cake flour substitute” to get a crumb more like what I have here. (I left notes about the amounts in the recipe card below.)
COCOA POWDER: I used a Dutch-processed cocoa powder for this cake. It’s a lot easier to find than non-Dutched anthocyanin-rich cocoa powder. This does been I’ll need to use some food coloring, but I’m okay with that.
BUTTERMILK: So important!! This is part of what gives red velvet cake that great tangy taste. If you don’t want to buy buttermilk just for this recipe, you can make sour milk instead. I’m not here to judge, I do this all the time for other recipes.
Combine 1 cup of milk with 1 tablespoon of lemon juice or white vinegar. Give this a stir and let it sit for about 5 minutes. That’s it. You’ll want to stick with 2% or whole milk for this cake, and you could even get away with cider vinegar since that’s what we’re using in this recipe anyway.
FOOD COLORING: You want to use liquid food coloring for this recipe. It’s super easy to find at any store, and you’re going to need an entire bottle. Yeah. I was freaking out about adding so much red, but it’s only 2 tablespoons of food color if you measure it out.
If you only have liquid gel or gel paste food coloring on hand, that’s totally fine. The colors are strong in this type of food coloring so you won’t need quite as much (by volume). Just add in color until your batter is the desired color. You can get an idea of how red my cake batter was below.

How to Make Red Velvet Cake
- Start by preheating your oven to 350 degrees F and placing a rack in the bottom 1/3 of your oven. Then grab two 9-inch cake pans. Grease the inside of the pans, line the bottoms with parchment paper and grease the paper. Set the pans aside for now.
Pro Tip: I like to use homemade pan release to grease my cake pans. It’s a combination of 1 tablespoon flour + 1 tablespoon vegetable oil + 1 tablespoon shortening, and you just whisk that all together. My cakes come away from the pan perfectly every time. - Then in a medium mixing bowl, stir together the cake flour, baking soda, and cocoa powder. Set this aside.
- In a large mixing bowl, beat together the butter, oil, and sugar on medium-low speed for 5 minutes, until really pale.
- Next, add in the eggs one at a time beating after each addition. Then pour in the food coloring, vinegar, and vanilla and mix for 1 to 2 minutes until the batter is bright red. Be sure to scrape the sides of the bowl and mix once more.
- After that, add half of the flour mixture to the wet ingredients and mix until it’s almost all mixed in. Pour in the buttermilk and mix until smooth. Then add the rest of the flour and mix until just combined. Scrape the side of the bowl and mix one last time. Your batter will be light and airy.
- Now it’s time to pour half of the cake batter into each of the prepared cake pans. Give them a little tap on the counter to smooth out the tops of the cakes.
- Place the cake pans into the oven and bake for 40 to 50 minutes. The cakes are done when a toothpick inserted in the center comes out clean.
- Remove the cake from the oven and let them cool in the pans for about 15 minutes. Then remove the cakes and let them cool on a wire rack to room temperature.

How to Make Cream Cheese Frosting
- Start by grabbing a large mixing bowl or your stand mixer. Add the butter, cream cheese, and vanilla to the bowl and mix until evenly combined and smooth. This should take about 3 minutes.
- Then add the powdered sugar 1 cup at a time, mixing after each addition until the sugar is incorporated. I usually need between 5 and 6 cups (depending on the weather). Add more sugar as needed until your desired consistency is reached.
- After that, beat the frosting for 5 minutes until it’s nice and fluffy.

You have a number of options when it comes to decorating your red velvet cake. I went with a “naked” look for something a little different today. You can totally frost the layer and outside completely or pipe frosting in between the cake layers and sprinkle powdered sugar on top. There’s no wrong answer here.
Here are the decorating basics:
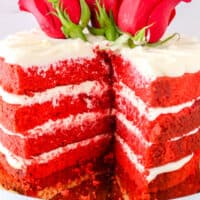
- Once the cakes are cooled, use a cake leveler or serrated knife to cut any domed section of the cake from it rising. This will flatten the top of the cakes. (You can keep the extra pieces for snacking, or grate them to decorate your cake.) Then cut the two cakes into two layers each for a total of four layers.
- Place one cake layer on a plate or cake stand. Frosting the top of the cake layer with cream cheese frosting going all the way out to the edges. Repeat laying cake and frosting until all four layers are stacked up.
- Then frost the outside and top of the cake. You can scrape off any excess frosting for the naked look (some cake showing through the frosting), or use an offset spatula to smooth out the icing on the side and top.
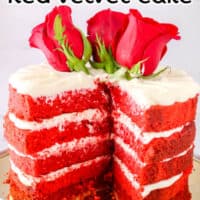
- From here you can add any other decorations you like – cake crumbs, sprinkles, pipe some frosting around the top edge of the cake, and even stick some fresh roses into the top! (Just be sure to wrap the stems in a little plastic wrap, foil, or floral tape and pinch the ends close to seal off the stem.)

I had 4 roses and some baby’s breath leftover from making my bouquet from the debi lilly dozen roses. That was perfect for the top of our cake. Just a little something extra on top. Let me tell you friends, this cake may seem fancy, but it’s about the easiest decorating I’ve ever done.

The biggest tip I can give you when making this cake is to let the cakes cool COMPLETELY and maybe even chill the frosting some.
If you don’t keep things cool, the frosting will squish out of the sides a bit and the cake will sag. No one likes saggy tiers. I’ve rushed this process before and my cake was sad. It tasted fantastic but didn’t look as amazing as possible.
If you have the time, bake your cakes the day before and then assemble the day you want to eat. It’s worth spacing things out to get the perfect slice.

Want more delicious cake recipes?
- Samoa Poke Cake
- New York Style Cheesecake
- Mom’s Best Ever Coconut Cake
- Lemon Raspberry Cake
- Brown Sugar Bacon Chocolate Cake
- Rum Soaked Honey Pound Cake
- Homemade Carrot Cake
- Applesauce Oatmeal Cake
- Dessert recipes

Homemade Red Velvet Cake
Ingredients
Instructions
- Preheat oven to 350 degrees F. Grease two round 8-inch cake pans. Line the bottom of each pan with parchment paper and grease paper. Set aside. (Do not skip the parchment!)
- To a medium mixing bowl, add cake flour, cocoa powder, and baking soda. Stir to combine. Set aside.
- To the bowl of a stand mixer, add butter, oil, and sugar. (You can use a large bowl and hand mixer too.) Beat for 5 minutes on medium-low speed until smooth and fluffy.
- Add eggs one at a time, beating after each addition. Add food coloring, vanilla, and vinegar. Mix until combined. Scrape sides of the bowl as needed.
- Add half of the flour mixture to the wet ingredients. Mix until just combined. Pour in buttermilk and mix. Add remaining flour and mix until just combined. Scrape sides of bowl and mix by hand if there's any flour stuck to the sides.
- Divide batter evenly between prepared baking pans. Use the back of a spoon to even out the tops.
- Bake for 40 to 50 minutes or until a toothpick inserted in the center comes out clean.
- Remove cake from oven and let cakes cool for 15 minutes in the pan before removing from pans to cool completely on a wire rack. (If your cakes aren't cooled all the way, they will melt the frosting. Then everything will start to slide and get uneven, You don't want that.)
- Add butter, cream cheese, and vanilla to a large mixing bowl or stand mixer. Beat for 3 minutes until smooth and fluffy.
- Add powdered sugar to the bowl 1 cup at a time. Beat after each addition until sugar is combined. Scraper side of bowl as needed. Once all sugar is added, beat for 5 minutes until fluffy.
- Add 1/3 of the frosting to a piping bag or ziptop plastic bag with a corner cut off.
- Once cakes are cooled, use a serrated knife or cake leveler to cut off the top of the cakes and make them flat. Cut each cake in half to create 4 layers.
- Place one cake layer on a serving plate or cake stand. Spread about 1/3 to 1/2 cup frosting over the top of the cake almost to the edges. Pipe frosting dollops around the edge of the cake. Use an offset spatula to smear the dollops toward the center of the cake. (This will keep them from oozing out.) Repeat with remaining layers.
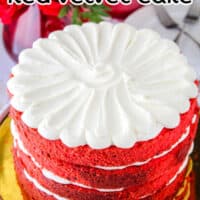
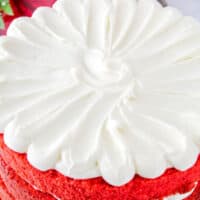
- For the top cake layer, decorate the same way. Be sure the pull the frosting all the way to the center of the cake with the offset spatula. Then give the center a little swirl.
- Once the top layer of cake is frosted, wrap the stems of a few roses in floral tape, plastic wrap, or foil. Gently insert the roses into the top of the cake. Add baby's breath if desired.
- Serve immediately or chill until ready to serve. Cut into 12 slices and enjoy!
Notes
- Do not use self-rising flour. If you can't find cake flour (or just don't want to buy it), you can substitute 2 1/2 cups all-purpose flour + 2 tablespoons all-purpose flour + 6 tablespoons cornstarch.
- If you don't have buttermilk on hand, you can substitute sour milk. Combine 1 cup 2% or whole milk with 1 tablespoon of lemon juice or white vinegar. Stir and allow to sit for 5 minutes. This will mimic the acidity of buttermilk, but it won't have quite the same tang.
Nutrition
Tried this recipe?
If you made this recipe, leave a comment and star rating to let others know how it turned out.