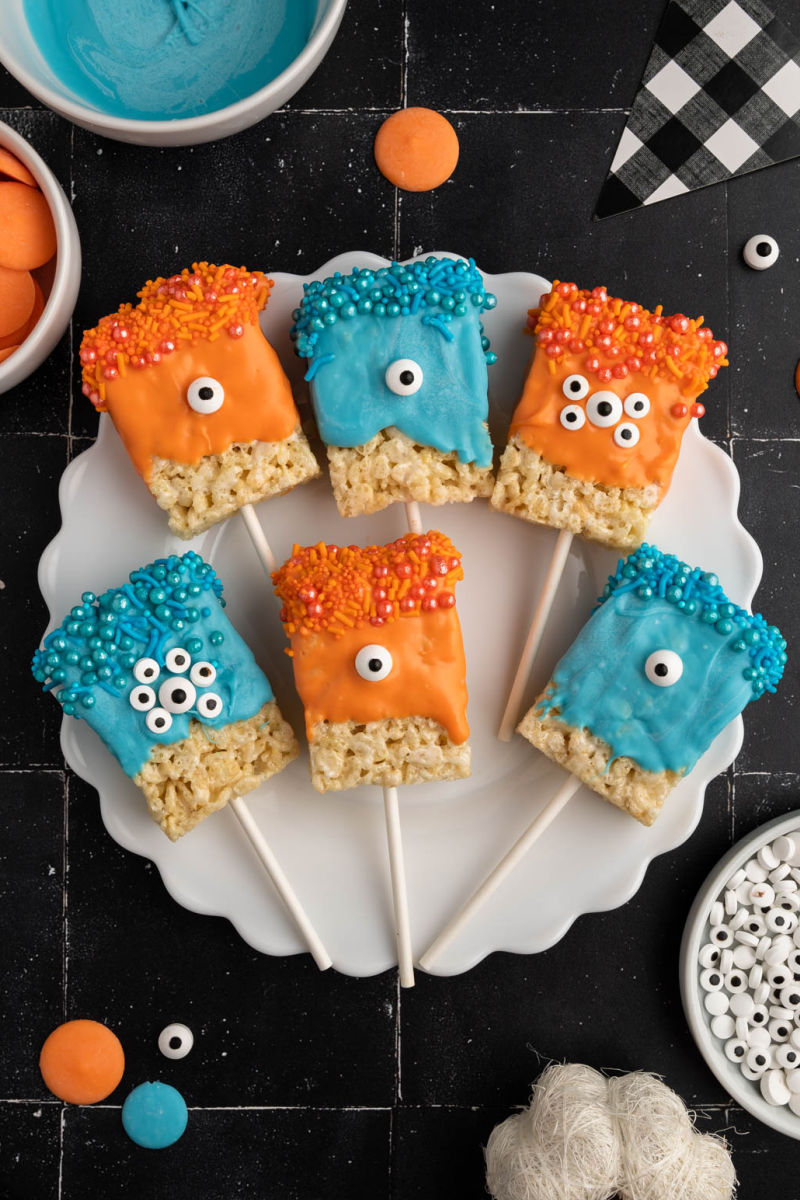
Monster Rice Krispie Treats


Kooky and creepy, these Monster Rice Krispie Treats are deliciously cheeky! Have a blast with the fam creating creatures good enough to eat!
Why We Love Monster Rice Krispie Treats
- Monster Rice Krispie Treats are super fun to make and to gift to family, friends, and classroom parties!
- Using pre-made rice krispie treats means these treats are pretty fast to make. Unwrap the treats, melt the chocolate and then you and the kids are ready to create your favorite ghoulish snack!
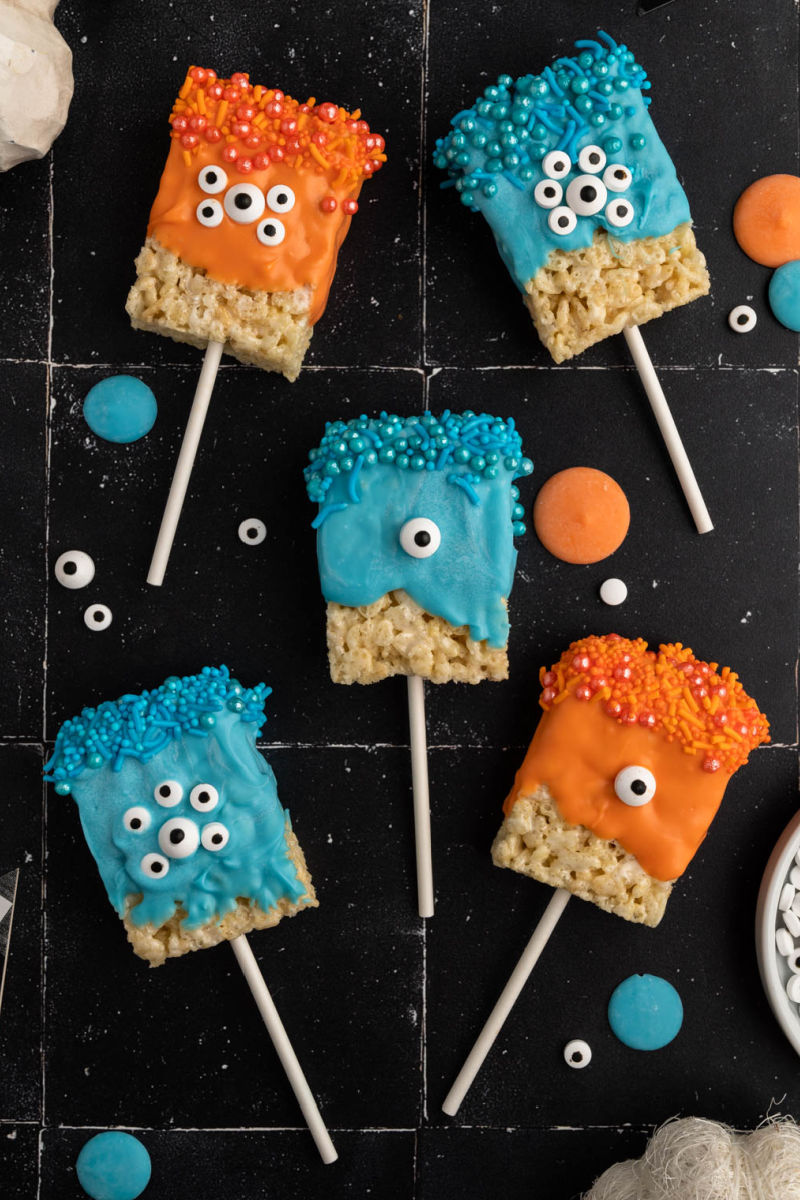
- Mix and match colors and sprinkles to make creatures that really stand out, especially with wacky candy eyes!
- Halloween Monster Rice Krispie Treats are the perfect way to celebrate but these treats are scary good all year long!

Ingredients You’ll Need to Make Monster Rice Krispy Treats
RICE KRISPIE TREATS: Grab a box of pre-made rice krispies treats from the store to make this dessert come together quickly. You can also use your favorite homemade rice krispie treat recipe if you prefer.
CANDY MELTING WAFERS: To decorate the treats you will need both blue and orange candy melting wafers, or use your favorite colors instead. You can also use white dipping chocolate colored with a few drops of food coloring to make the colors you want.
SPRINKLES: Pick up blue and orange sprinkles or other complementing colors to match the candy melt colors you chose. Green and purple sprinkles on black candy melts look really cool!
CANDY EYES: Make this Halloween rice krispie treats recipe even more fun by purchasing packages of two different-sized candy eyes.
STICKS: You will need cake pop or lollipop sticks if you want to serve these treats as a pop. It makes them extra fun to eat, but you can totally skip the sticks if you want.

How to Make Monster Rice Krispie Treats
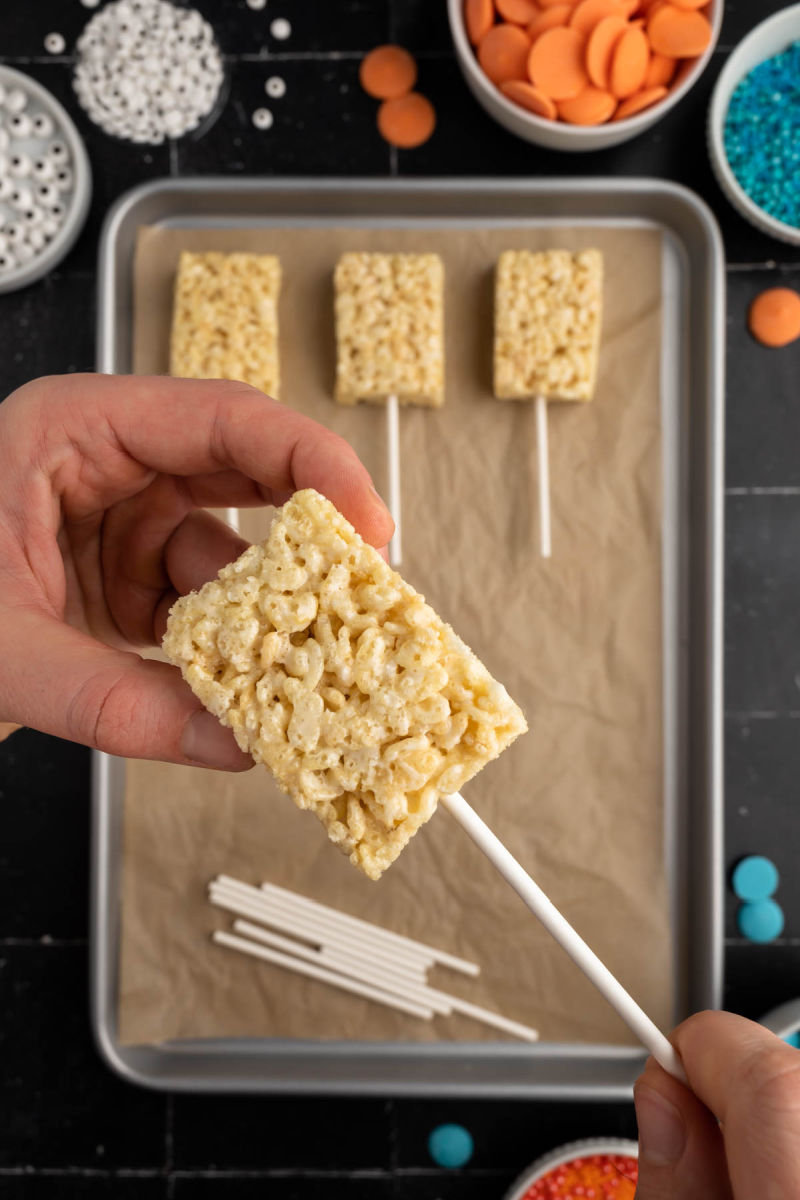
Jump to RecipeSTEP 1 Unwrap each rice krispie and insert a cake pop stick into the short end of each treat, about halfway through the rice krispie treat. Line a tray or workspace with parchment paper. Pour each color of sprinkle into its own bowl. Pour one color of the candy melt into a microwave-safe bowl and microwave at 15-second intervals, until the chocolate is melted and smooth. The candy melts will dry quickly so working with one color at a time is recommended.
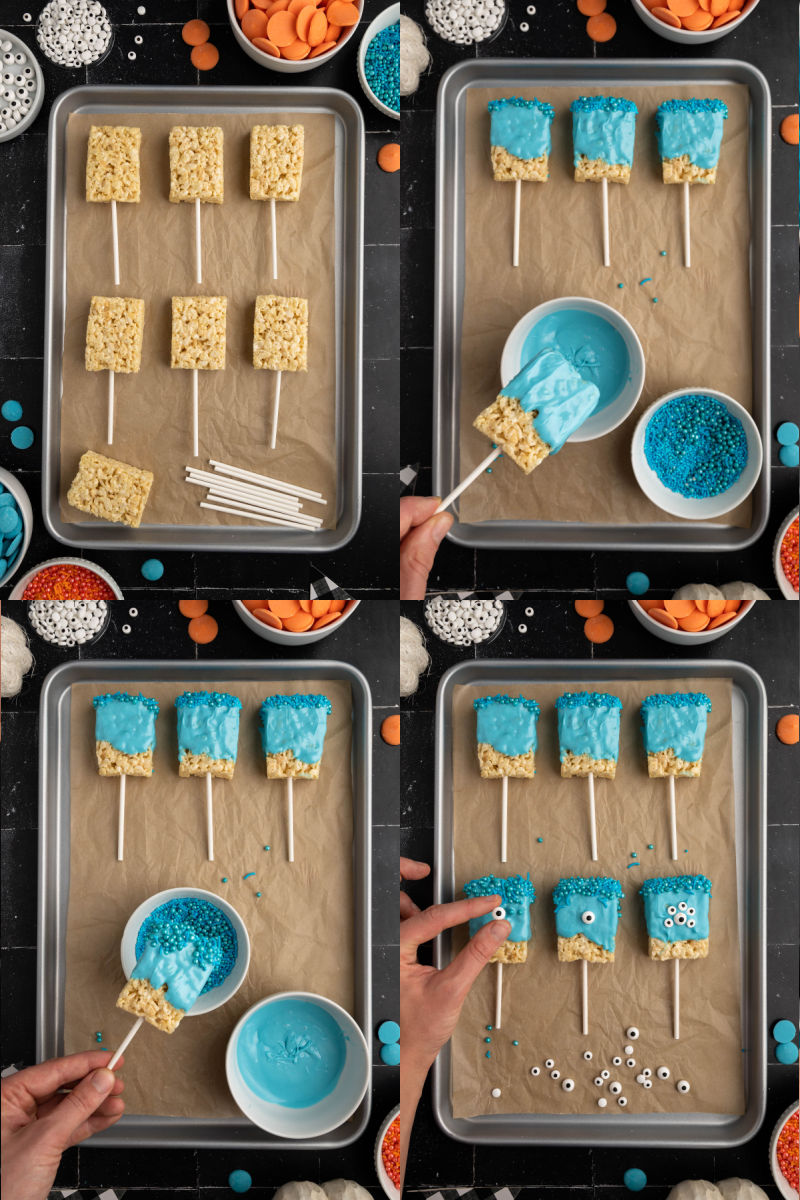
STEP 2 Dip the treats one at a time into the candy melt, covering about 2/3 of the treat in chocolate. hold the treat upside down to allow the excess to drip off. Dip the top of the treat into a bowl of sprinkles and then let the treat dry on the parchment paper. Before the chocolate hardens, place the candy eyes on the treats.
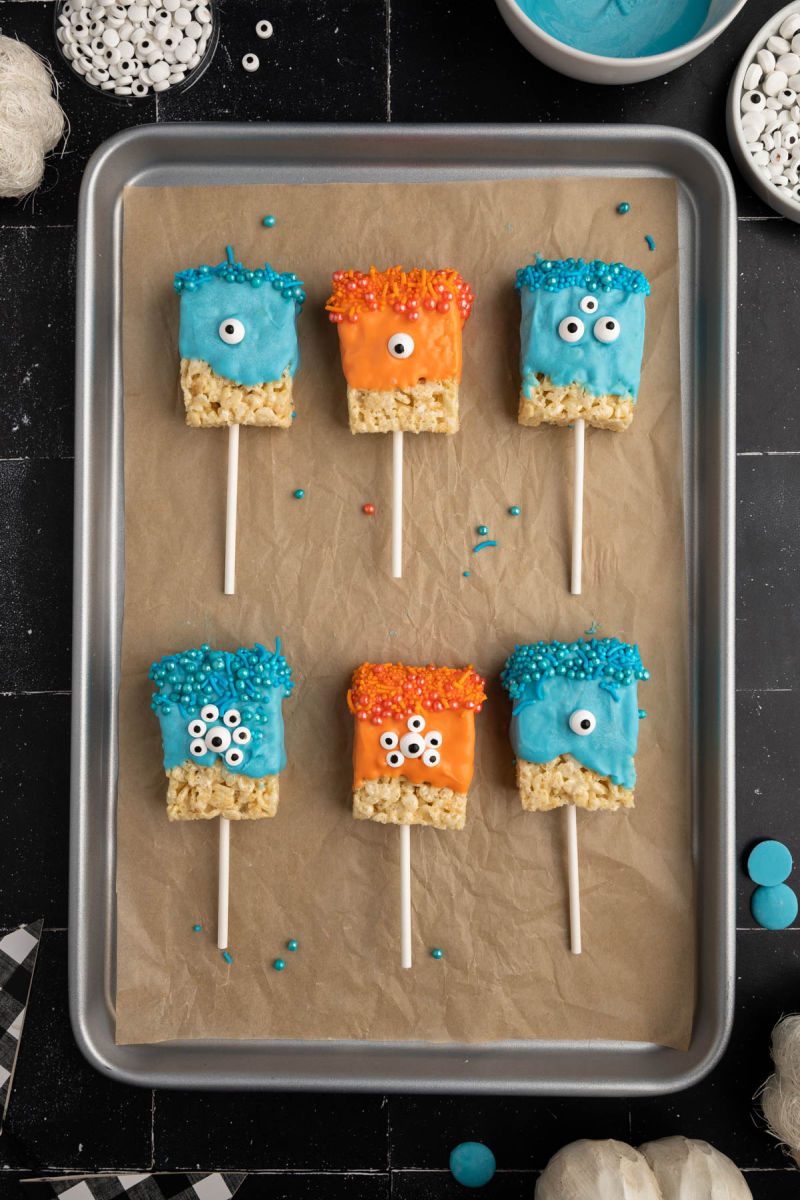
STEP 3 Repeat these steps with the other color(s) of candy melts and sprinkles. Let the monster treats dry for 10-15 minutes before enjoying or storing them in an airtight container.
Tips & Tricks
- Using store-bought Rice Krispies Treats is a real-time saver but you can also use homemade Rice Krispie Treats! Make sure the treats are fully set before cutting and decorating. You want to cut rectangles and not squares for the best-looking monsters.
- Candy eyes and melting wafers can be found in the baking section of any craft store or online. If you can’t find melting wafers you can use white chocolate instead and color the chocolate with food coloring. The white chocolate may need to be tempered first, which is really easy. Chop up the white chocolate and melt it in a double boiler or in a stainless-steel bowl over a saucepan filled about 1/3 full with water. Bring the water to a simmer and stir the chocolate until it is melted and smooth.
- If you’re using white chocolate but don’t want to temper it, try adding 1 teaspoon of coconut oil to the chocolate to help it melt smoothly when using a microwave to melt it.
- Choose whatever colored melting wafers and sprinkles you love best for making your tasty monsters and don’t forget to mix and match for a truly spook-alicious treat!

Recipe FAQ
Why are my rice krispie treats hard?
Homemade Rice Krispy treats are a favorite for both the young and not-so-young but require a little patience to make! Cooking the butter and marshmallows over high heat can make the process quick but will result in a hard rice krispy treat. The high heat causes the sugar in the marshmallows to harden so cooking the butter and marshmallows over a low heat will take longer but your treats will turn out perfectly soft.
How do you wrap rice krispie treats for a party?
If you want to treats on display, stick the monster part into a clear cellophane treat bag so that the opening of the bag is at the bottom of the monster’s face. Then tie the bag closed with a ribbon around the stick. If you’re not using sticks, place the monster in the bag with the opening at the top of its head and then tie the bag closed.
Pro Tip: Wrapping the treats in a strip of parchment paper or wax paper before being placed into a treat bag prevents the Monster Rice Krispie Treat from sticking to the treat bag, making it way more fun to eat! But it does cover the actual monster and only leaves a hint of the color, so it’s up to you.
Other Recipes You May Like
- Hocus Pocus Chocolate Cupcakes
- Witches Brew Halloween Punch
- Halloween Graveyard Chocolate Poke Cake
- Candy Corn Oreo Truffle Bark Recipe
- 31 Halloween Party Ideas
- 50 Halloween Party Ideas

Monster Rice Krispie Treats
Ingredients
Equipment
Instructions
- If you're using store-bought rice krispies treat unwrap them. Then skewer each treat with a lollipop stick pressing it into the short end of the treat until it's about halfway in.
- Line 2 baking sheets with parchment paper or a silicone baking mat or lay the parchment paper out on the counter. (see note) Pour each color of sprinkles into its own separate bowl. Set the bowls next to the parchment paper workspace.
- Pour the candy melts into microwave-safe bowls, adding only one color to each bowl. Place one candy melts bowl in the microwave and cook on high for 30 seconds, remove, and stir. Continue to microwave in 15-second increments, removing each time to stir before heating for another 15 seconds. Repeat until all the wafers are completely melted. (You'll only work with one color of candy melts at a time to make sure the coating stays melted. Repeat these steps for additional colors when each set is finished.)
- Once melted place the candy melts next to the sprinkles bowl. Then dip a rice krispie treat into the melted candy so that about 2/3 of the treat is coated. Hold the treat upside down by the stick and let most of the excess candy drip back into the bowl, for about 5 seconds. (When you get low on candy melts you can use a spoon to help cover the treats.)
- After dipping in the chocolate, dip the top of the treat into the same color sprinkles. Then lay the treat down on the parchment paper. While the coating is still soft, carefully place the eyes. You can make some monsters into cyclopes, and others can have multiple eyes. Repeat with the remaining treats.
- Let the coating sit for about 10-15 minutes to dry and harden. Once set, store the treats in an airtight container or resealable zipper bag at room temperature. For best taste, eat within 3-4 days.
Notes
- Nutritional information is based on using store-bought Rice Krispies Treats.
- You will need space to decorate all 20 treats at the same time or you will have to work in batches, letting each batch set completely before moving on.