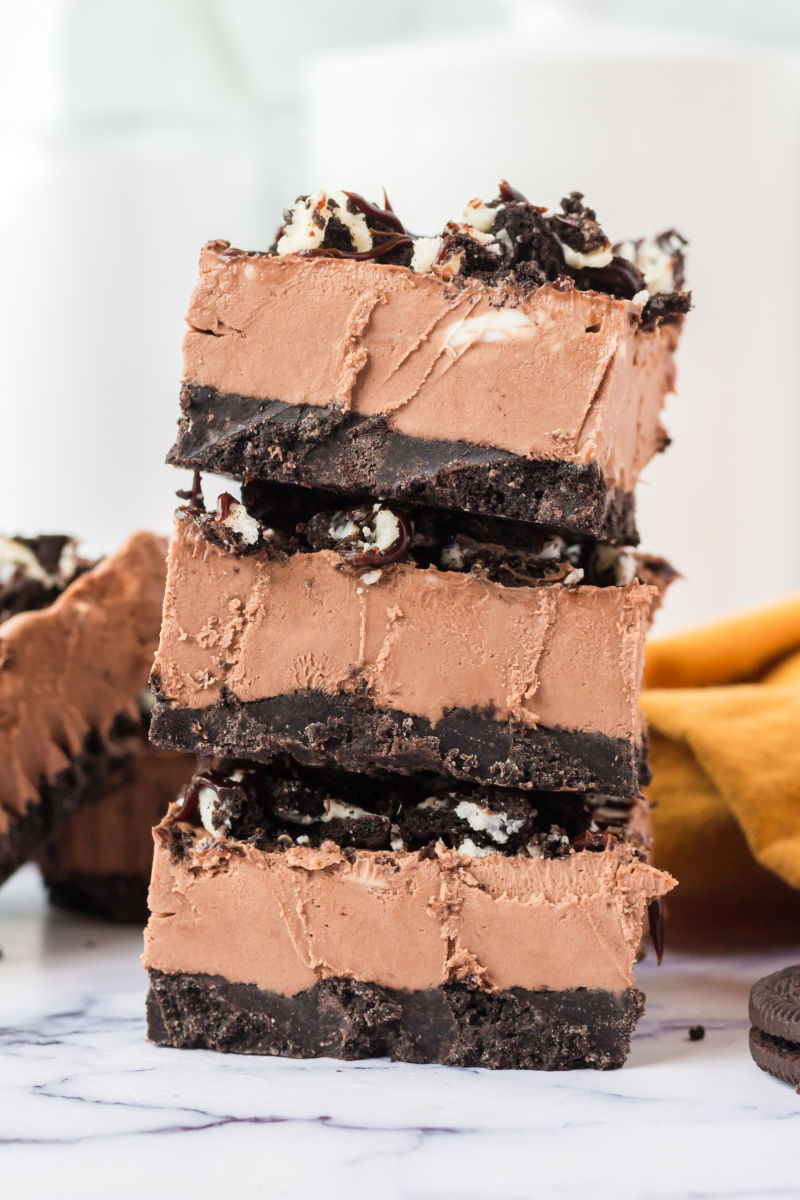
No Bake Chocolate Cheesecake Bars

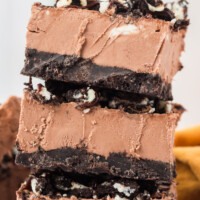

Get your chocolate fix with these deliciously easy No Bake Chocolate Cheesecake Bars! Make them ahead of time and enjoy when you’re ready!

Why We Love Hot Fudge Cheesecake Bars
- This is a great recipe for hot days or when you don’t what to put a lot of effort into dessert. These chocolate cheesecake bars can be whipped up in about 15 minutes, and then they hang out in the fridge for a few hours. Super easy.
- Since you don’t have to actually cook anything, these cheesecake bars are great for kids to make. The Oreo can be crushed in a ziploc bag with a rolling pin or in a food processor for older bakers.
- I like to make two pans and freeze one for later. That way when my family inhales the first round I’m not sad that all the chocolatey goodness is gone.
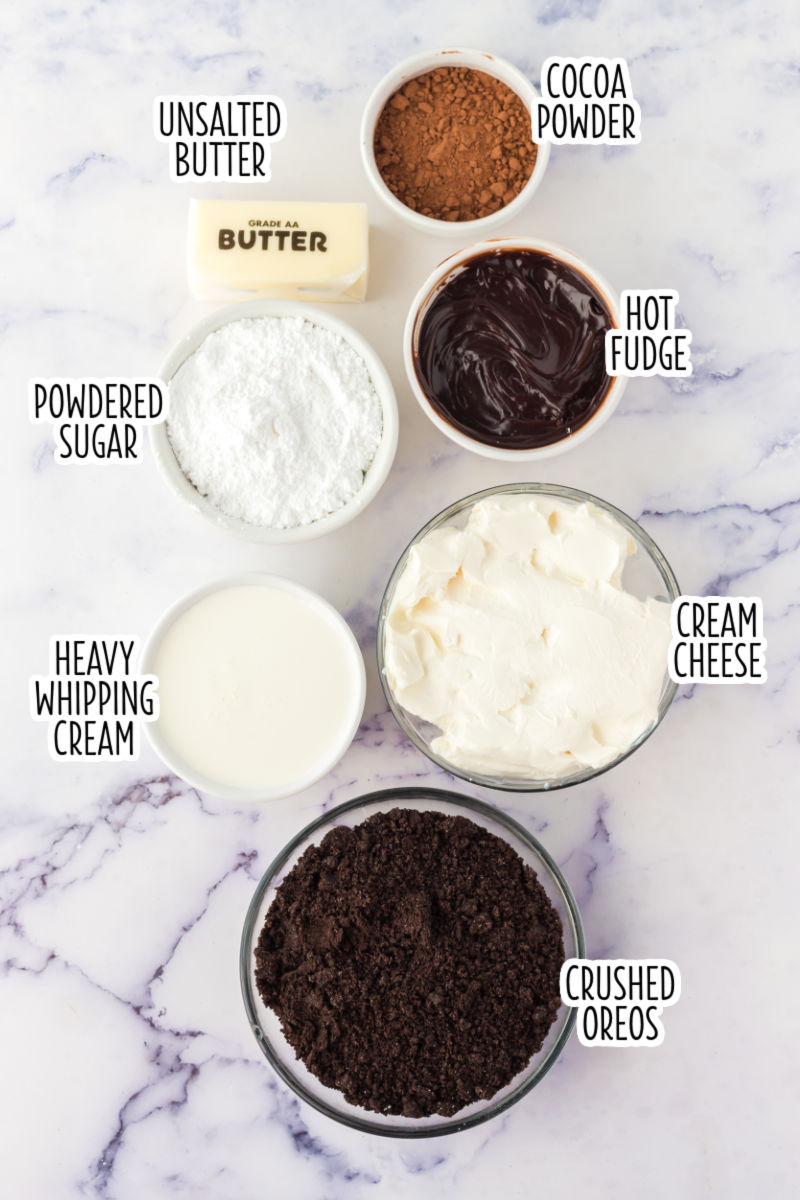
Ingredients You’ll Need to Make No Bake Chocolate Cheesecake Bars
DAIRY: As is the case with pretty much any cheesecake, you’ll need cream cheese for the base. This recipe also uses unsalted butter (salted is fine too if that’s what you have on hand) and heavy whipping cream.
PANTRY ITEMS: For dry ingredients, you’ll need Oreo cookies (a 14.3-ounce package will have enough), powdered sugar, cocoa powder, and a jar of hot fudge.
You don’t want to get chocolate sauce. It’s thinner and will run over the top of the bars and thin out the filling a bit. Hot fudge will hold its shape when drizzled and keep your cheesecake nice and thick.
How to Make Chocolate Cheesecake Bars
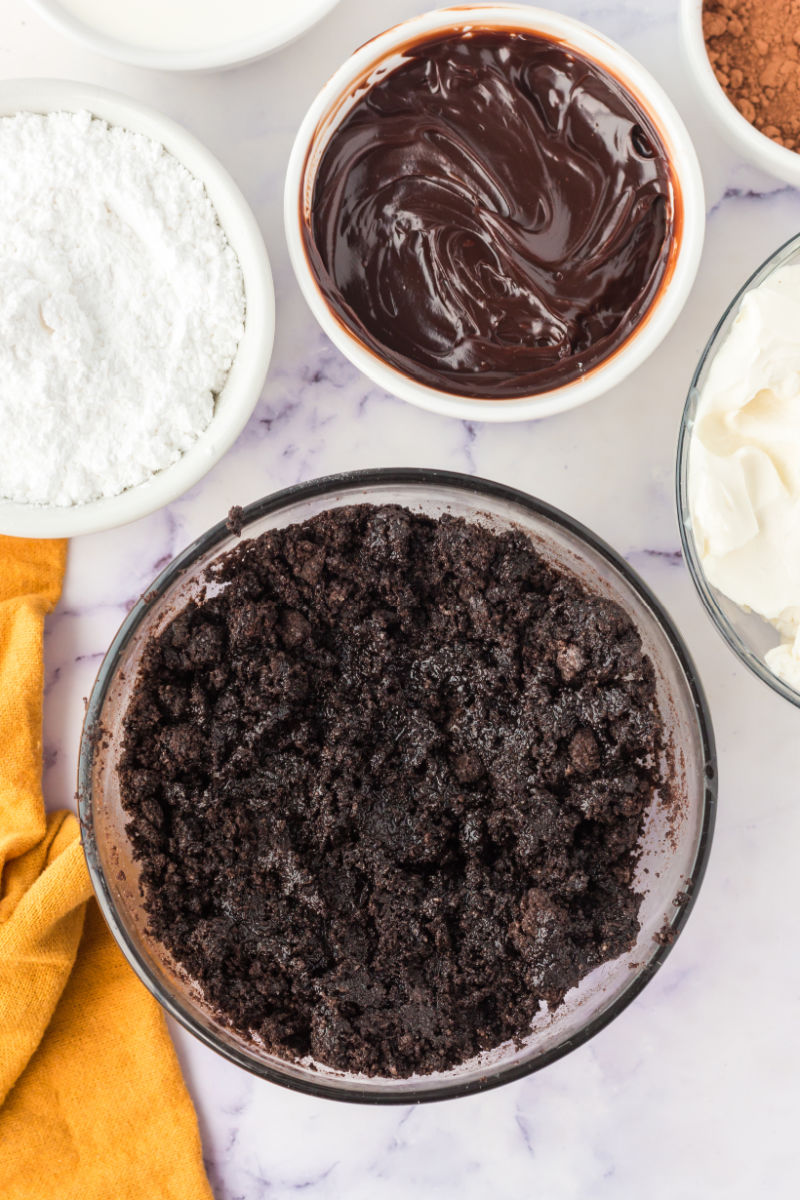
Jump to RecipeSTEP 1 Add the melted butter and Oreo crumbs to a medium mixing bowl. Stir them together until the crumbs are like wet sand. Then press the crumbs into the bottom of an 8-inch x 8-inch square baking dish to make the crust for the cheesecake. Set aside the dish for now.
STEP 2 In a large mixing bowl, beat the cream cheese until it’s fluffy, about 2 minutes. Then beat in the hot fudge and heavy cream until is nice and smooth.
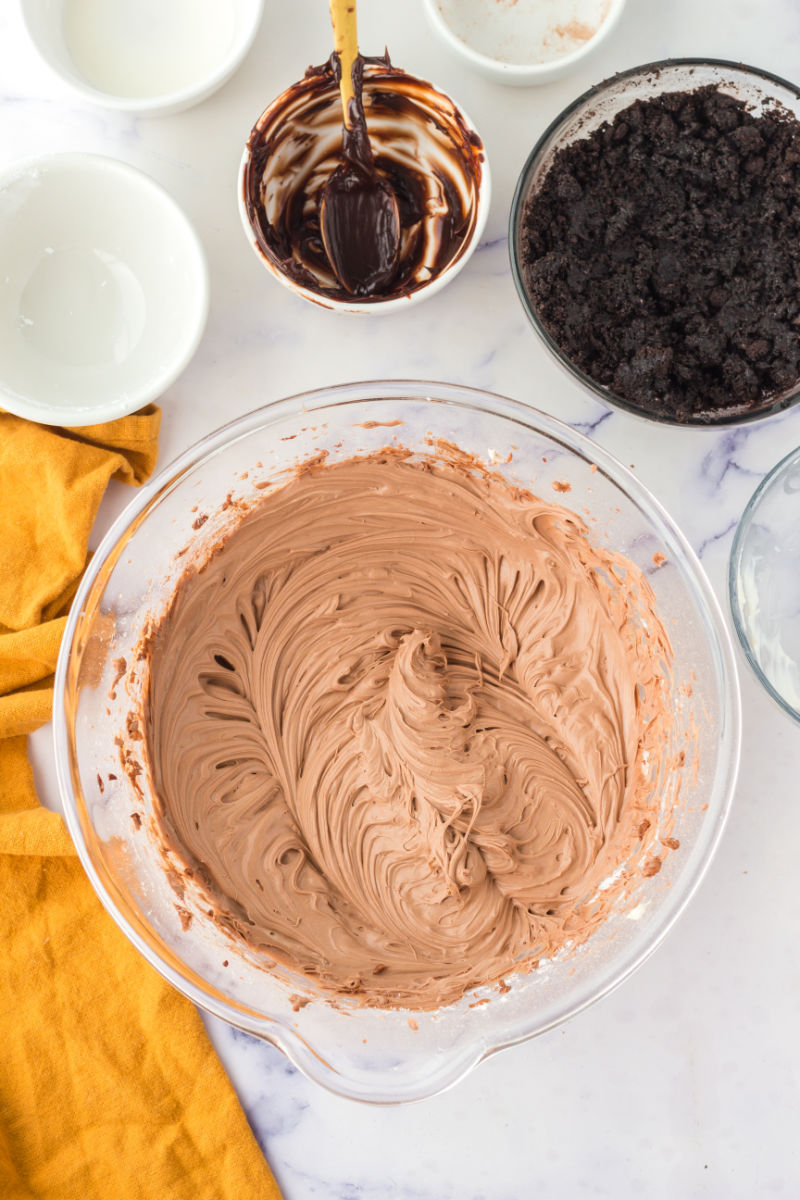
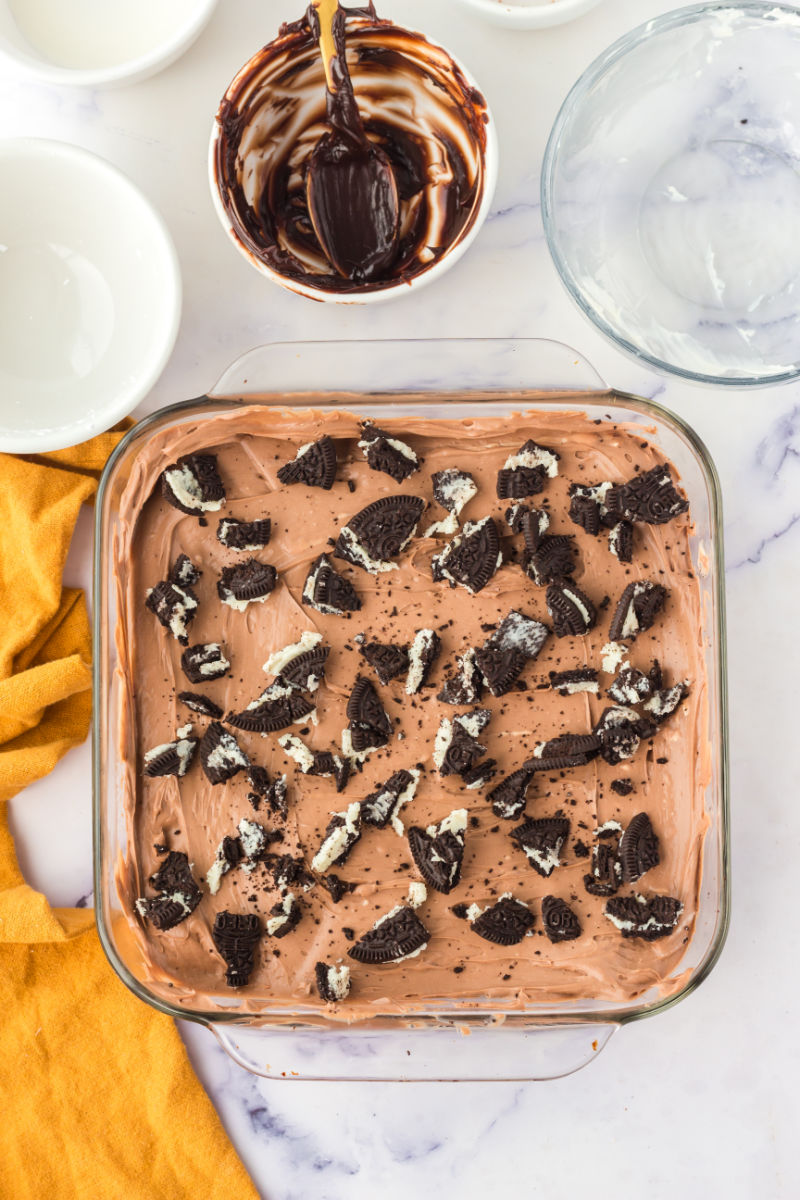
STEP 3 Mix in the powdered sugar and cocoa powder. Then pour the cheesecake mixture over the Oreo crust. Use the back of a spoon or a rubber spatula to spread it into an even layer.

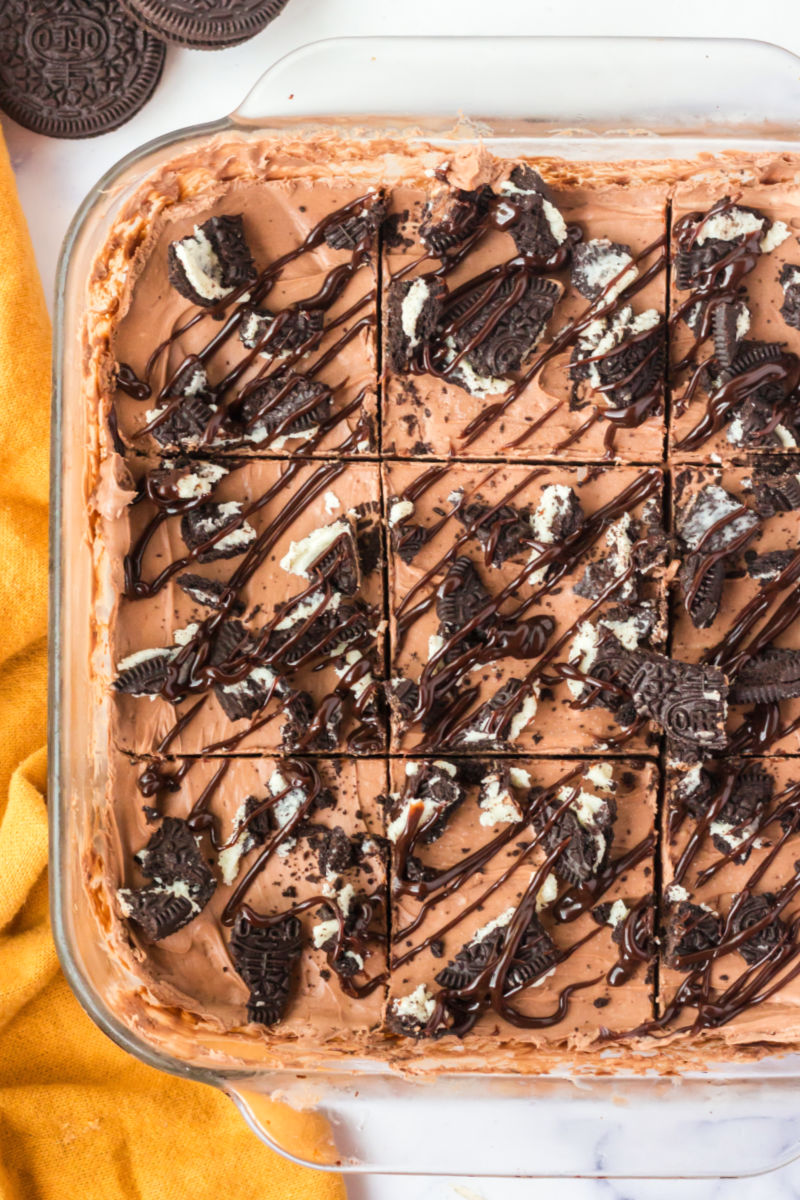
STEP 4 Top the cheesecake with a drizzle of hot fudge and some crumbled Oreos. The topping is optional, but make these bars pretty!
STEP 5 Chill the cheesecake for at least 4 hours in the fridge. When you’re ready to eat, cut the cheesecake into 9 squares and enjoy!
Tips & Tricks
- It’s important to let the cream cheese come up to room temperature before using it. This helps so there are no clumps of cream cheese in the cheesecake mixture. You want the cheesecake to be smooth and creamy.
- To get a nice drizzle on top of the cheesecake, I put some hot fudge into a ziploc bag and then snip off one of the bottom corners. Then I can use the bag to pipe the hot fudge onto the cheesecake in a nice zig-zag pattern instead of having big dollops from a spoon.
- I like to let these bars sit on the counter for about 10 minutes before cutting them. It makes them easier to slice, but you can cut them right after taking them out of the fridge too.
- You can mix up the flavors of these cheesecake bars too! Add fun things like peanut butter chips in the filling and a melted peanut butter drizzle on top for chocolate peanut butter cheesecake bars. For chocolate mint cheesecake bars, add 1/4 teaspoon peppermint extract to the filling and even some chopped-up Andes mints. Then you can use mint Oreos for the crust or on top for extra minty flavor.

Chocolate Cheesecake Bars Recipe FAQ
How do you cut cheesecake bars neatly?
The easiest way to get a nice clean cut with no bake cheesecake bars is to freeze them and then cut them into bars. If you don’t want to wait and the bars were in the fridge to chill, you can dip a knife into hot water and then cut the cheesecake into bars. Just be sure to clean the knife and redip it into the hot water after each cut.
Can you freeze homemade cheesecake?
Yes. The denser the cheesecake the better it’ll freeze – so New York Style Cheesecake does really well with freezing. No bake cheesecakes are usually safe to freeze since they need to be chilled anyway.
You can freeze a whole cheesecake or cut it into slices to be frozen individually. Just be sure to wrap the cheesecake in plastic wrap and then foil or store it in an airtight freezer-safe container.
Why do you put sour cream in cheesecake?
Adding sour cream to cheesecake filling helps to soften the texture of the finished cake so it’s more tender vs dense. It also gives a little extra tangy flavor and helps to moisten the cheesecake for a rich and creamy texture that’s SO good.

Other Recipes You May Like
- Sopapilla Cheesecake
- Mini Baileys Cheesecakes
- Hazelnut & Dark Chocolate Cheesecake Bars
- Mini S’mores Pies
- No Bake Chocolate Lasagna
- Chocolate Pudding Cake
- Rocky Road Brownies

No Bake Chocolate Cheesecake Bars
Ingredients
Equipment
Instructions
- Add the crushed Oreos and melted butter to a medium mixing bowl. Mix until the crumbs are moistened. Press the crumbs into the bottom of an 8-inch x 8-inch square baking dish and set aside.
- In a large mixing bowl, beat the cream cheese for about 2 minutes until smooth. Add the hot fudge and heavy cream and mix until smooth and creamy.
- Add the powdered sugar and cocoa powder and mix until completely incorporated into the cheesecake filling.
- Pour the cheesecake over the Oreo crust in the baking dish. Use the back of a spoon or a rubber spatula to spread the cheesecake into an even layer. Top with a drizzle of hot fudge sauce (see note) and crumbled Oreo cookies.
- Chill in the fridge for at least 4 hours.
- When you're ready to serve, cut the cheesecake into 9 even squares and serve immediately. Store any leftovers covered in the fridge, or wrap tightly in plastic wrap and freeze for up 1 month.
Notes
- It’s important to let the cream cheese come up to room temperature before using it. This helps so there are no clumps of cream cheese in the cheesecake mixture. You want the cheesecake to be smooth and creamy.
- To get a nice drizzle on top of the cheesecake, I put some hot fudge into a ziploc bag and then snip off one of the bottom corners. Then I can use the bag to pipe the hot fudge onto the cheesecake in a nice zig-zag pattern instead of having big dollops from a spoon.
- I like to let these bars sit on the counter for about 10 minutes before cutting them. It makes them easier to slice, but you can cut them right after taking them out of the fridge too.