Homemade Chocolate Cake Recipe
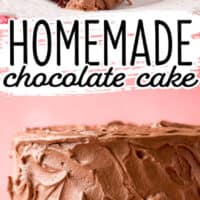
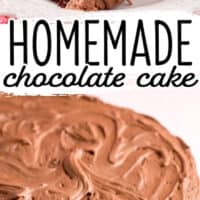
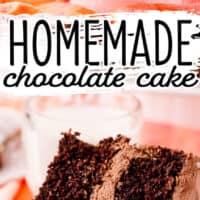
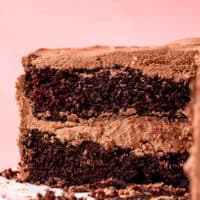
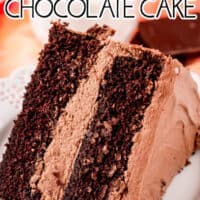
You’ll never need another recipe for a homemade chocolate cake once you try this one! This cake is everything – rich, moist, and full of flavor!

I know my cakes and desserts and this one is as rich and delicious as my signature New York Cheesecake. Both are perfectly executed and the perfect way to finish up a great night with friends and family. A decadent dessert closes out a fantastic dinner perfectly, don’t you think?
This chocolate cake that is made completely from scratch will please every chocolate lover. I use a secret ingredient to add to the depth of flavor. Bonus… I even have an amazing chocolate frosting recipe to go with it!
Making a homemade chocolate cake from scratch is a labor of love, but it doesn’t have to be intense physical labor. I give you every tip and trick I know and detailed steps to walk you through this process flawlessly. With some patience and following basic instructions you can make a bakery-quality chocolate cake all by yourself. Your friends are going to be begging you to make this one for their birthdays this year once they taste it.

Why We Love Homemade Chocolate Cake
This is a recipe for an epic classic dessert that you can have confidence in and be proud of making whenever you need to. With the tips and tricks included and the easy-to-follow recipe, you will be ready to keep this one in your favorites file and go back to it each time you’re called on for dessert.
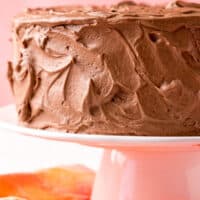
You can make the best chocolate cake recipe around in a variety of cake pan sizes to fit your needs. I usually go with 8-inch cake pans and make a two-layer cake. You can also bake up 24 cupcakes or a 6-inch cake with four – count them – FOUR layers!
This easy chocolate cake recipe can be made ahead of time and kept in the refrigerator and then set out to come up to room temperature while you are cooking and eating your meal. It will be just as delicious and moist as if you had just made it.
I love to make this recipe ahead of time when my son requests a chocolate birthday cake. No frosting and freaking out at the last minute. Just add sprinkles and candles and you’re good to go!
Chilling the cake also makes it easier to cut. So you’ll look like a pro when you serve your masterpiece. If you’re nervous about your first time making a cake and frosting from scratch, just make cupcakes instead, they are easy to decorate and who doesn’t love a good cupcake?!

Ingredients
All-Purpose Flour: Different kinds of flour create different types of texture in your cake, so you need to use the specific flour for the recipe.
Cocoa Powder: You can’t have a chocolate cake without chocolate can you? You want unsweetened dutch process cocoa powder.
Eggs: I know what you’re thinking, and yes, room-temperature eggs will make a difference in the texture of your cake.
Buttermilk: you must use buttermilk, it will interact with the baking soda and baking powder to keep it moist and fluffy. If you don’t have buttermilk on hand, I have a note in the recipe card below on how to make sour milk as a substitute.
Espresso/Coffee: I always use espresso or coffee in my chocolate cake. It’s my secret ingredient! The coffee makes a rich chocolate flavor that you just don’t get when using water.

How to Make Chocolate Cake from Scratch
PREHEAT your oven to 350 degrees F and make sure your cold ingredients have come up to room temperature.
PREP your pans with cooking spray and parchment paper. This is the key to not having cake stuck in the pan! (If you’re making cupcakes, line 24 muffin tin cups.)
WHISK your dry ingredients well so all of the ingredients are evenly dispersed.
BEAT the wet ingredients into the dry ingredients until the batter is smooth and runny. You can do this in a stand mixer or in a large bowl with a hand mixer.
POUR the cake batter into your prepared cake or cupcake pans.
BAKE your cakes until a toothpick inserted in the center comes out clean.
COOL your cakes COMPLETELY. Let the cakes rest for 10 minutes in the pan and then transfer to a wire rack.
WHIP up the frosting while the cakes are baking. It’ll need 1 hour to cool, just like the cakes.
FROST the top of one cooled cake layer, and place the second layer on top. Add a thin coating of frosting all over the cake.
CHILL the cake and crumb coat for 30 minutes. Then frost the top and outsides with the remaining frosting before slicing!

Tips & Tricks
- Use a baking spray that has flour in it like Baker’s Joy to spray your pans evenly before adding the parchment paper. The parchment paper will make sure there is NO chance of the cake sticking to the bottom of your pans.
- Turn and rotate your cake pans halfway through baking so they bake evenly, all ovens have hot spots.
- Don’t overbeat your frosting, if it isn’t stiff enough to hold shape then chill it for about 20 minutes and re-whip just a little to fluff it back up.
- Use a spatula to gently fold the frosting after whipping it, this removes the air bubbles caused by whipping so you get pockets of air as your frost. (Folding is gently bringing the frosting on the bottom up to the top and lightly stir once or twice per fold.)
- Take the time to do a crumb coat. What’s that? It’s a thin layer of frosting on the top and sides of your cake that keeps the crumbs from getting into the final layer of frosting. It’s so thin, the cake will show through a little. Then you’re going to chill the cake before covering the top and sides with the rest of the frosting.

How do you keep a chocolate cake moist?
The key to keeping a cake moist is keeping air from getting inside it. Frosting does a lot of this work, by sealing the cake from the outside, but once you cut it you need to help it out. Keep your cake in an airtight container, and try to keep the cut edges pushed up together if you can so they are not exposed to the air. When you make a cake adding fats (oil) will give the cake more moisture.

How do you store a homemade chocolate cake?
You can keep your cake on the counter at room temperature in an airtight container for up to three days. You can refrigerate it in an airtight container for up to seven days. It is possible to freeze sliced cake if you can chill it for a few hours, then wrap tightly in plastic wrap, then place inside an airtight container and it will keep frozen for up to six months.

Making your first chocolate cake fully from scratch is a big achievement, and I want to celebrate with you when you do, so make sure you come back here to the comments and tell me all about how it went and how you felt when you made your cake!
More delicious baking recipes
- Cookies and Cream Oreo Cupcakes
- Samoa Poke Cake
- Brown Sugar Bacon Chocolate Cake
- Chocolate Andes Mint Cookies
- Homemade Carrot Cake

Homemade Chocolate Cake Recipe
Ingredients
Equipment
Instructions
- Preheat oven to 350 degrees F. Grease two 9-inch round cake pans with butter and flour or cooking spray and line the bottoms with parchment paper. For best results, use bake-even strips. (see note)
- In a large bowl or stand mixer fitted with a whisk attachment, whisk together the sugar, flour, cocoa powder, baking soda, baking powder, and salt.
- Beat in the eggs, buttermilk, espresso, oil, and vanilla to the dry ingredients. Beat on medium speed for 2 minutes, the batter is going to be very thin.
- Divide the batter evenly between the two prepared 9-inch pans.
- Bake the cakes for 40 to 45 minutes until a toothpick inserted in the center comes out clean.
- While the cakes are baking, begin preparing your frosting since it will also need to cool for 1 hour.
- Cool the cakes in pans for at least 10 minutes. Then loosen from the sides of the pans before transferring to a cooling rack to cool completely, about 1 hour. (If your baked cakes have a domed top, use a serrated knife or cake cutter to cut the domed section and create a flat top.)
- After the cakes have cool and the frosting has been prepared, place one of the cake layers on a cake stand or serving plate.
- Pipe or spread a thick layer of the frosting all over the top of the cake layer to create the filling layer.
- Top the filling with the other cake layer and frosting the entire cake with a thin layer of frosting. (This creates a crumb coat and keeps any crumbs from getting into the frosting on the final coating.)
- Chill the cake for 30 minutes.
- Once the crumb coat is set, frost the top and sides of the cake with the remaining frosting. You can pipe decorative designs or even use the back of a spoon to create swirls on top.