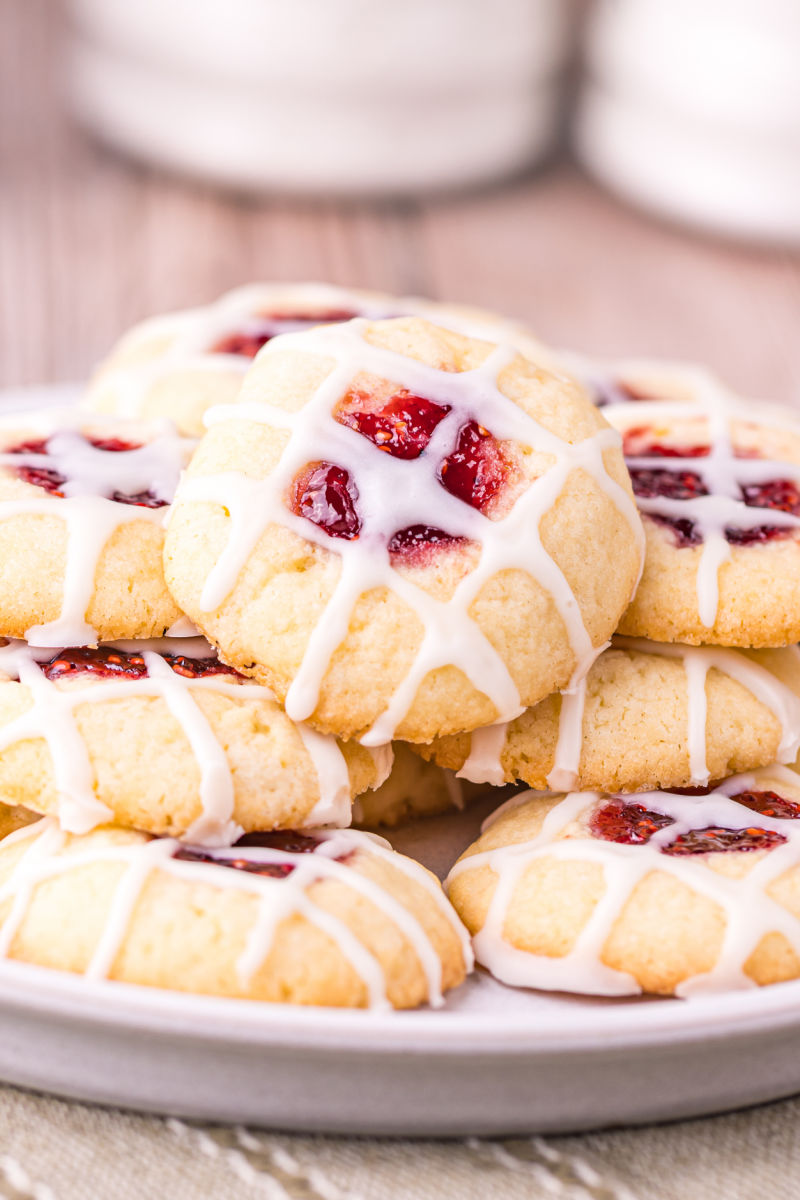
Raspberry Thumbprint Cookies
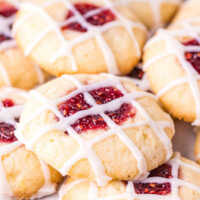


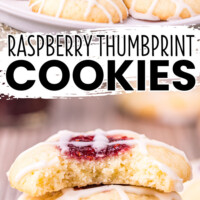
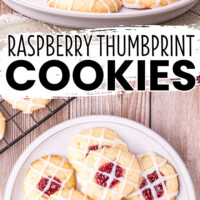
Homemade Raspberry Thumbprint Cookies are irresistibly soft, buttery cookies filled with a dollop of raspberry jam for a treat everyone loves!
Why We Love Raspberry Thumbprint Cookies
- I used to make these poppable and tasty thumbprint jam cookies with my mom growing up! I would ask for them all the time. So get ready to treat yourself because these cookies just don’t quit.
- These cookies are great for beginning bakers to make. My kids can practically make them alone – apart from the whole putting cookie trays in and out of the oven thing.
- Who doesn’t love sticking their thumb into a ball of cookie dough? It’s so fun! These cookies look great on Christmas cookie plates too, or make a big batch for a cookie swap. They freeze great for later!
Ingredients You’ll Need to Make This Thumbprint Cookies Recipe
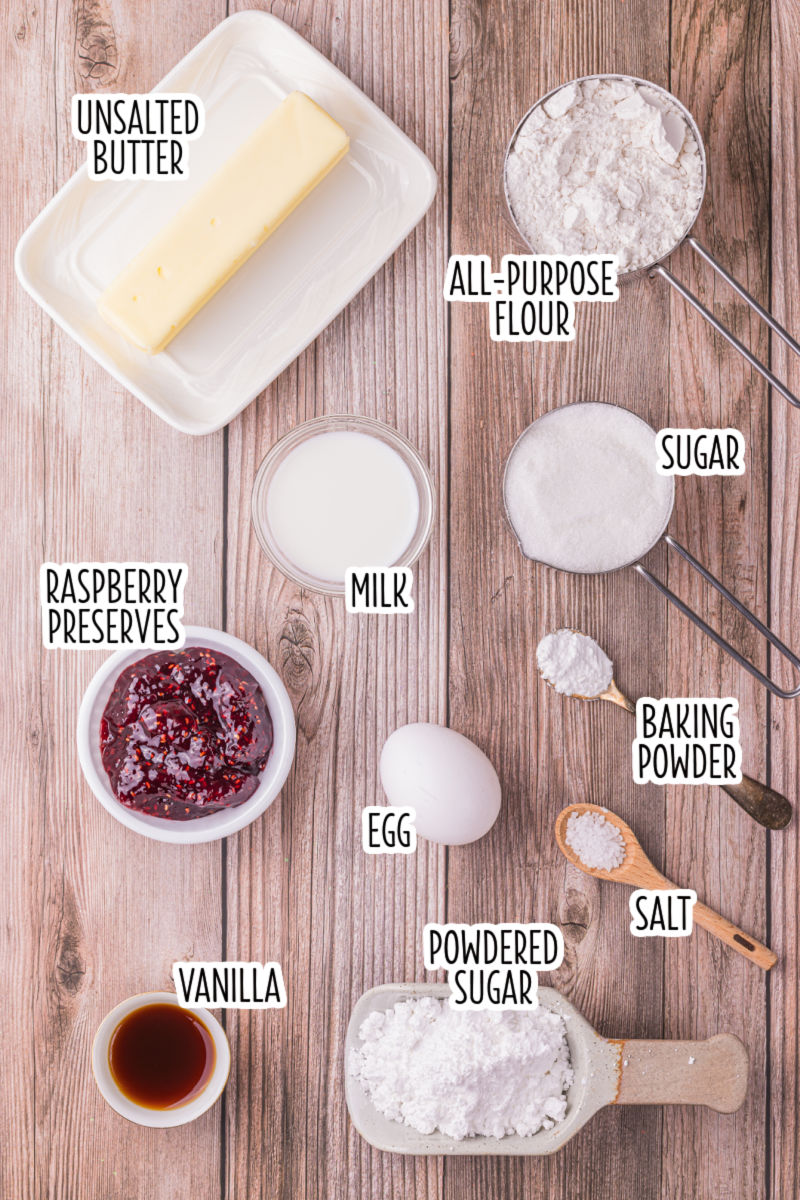
DRY INGREDIENTS: From the pantry, you’ll need all-purpose flour, baking powder, salt, and sugar.
WET INGREDIENTS: You will need unsalted butter (if all you have is salted just skip adding in the salt), an egg, and some raspberry preserves or jam.
GLAZE: This is a basic glaze recipe that uses powdered sugar, milk, and vanilla extract.
How to Make Thumbprint Cookies
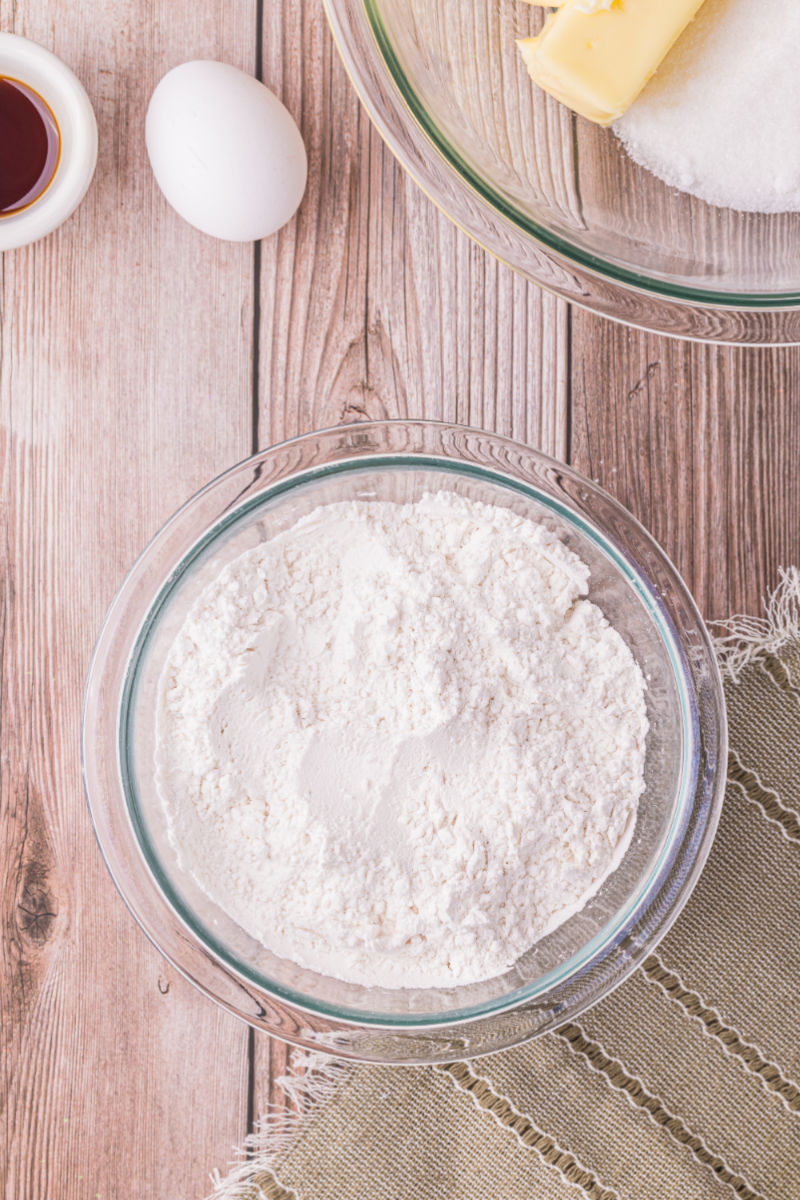
Jump to RecipeSTEP 1 Preheat your oven to 350 degrees F and line a baking sheet with a silicone mat or some parchment paper. Then, mix the flour, baking powder, and salt in a medium mixing bowl. Set that aside for now.
STEP 2 In a large mixing bowl, beat together the butter and sugar for about 1 minute until it’s fluffy. Then add the egg and vanilla and mix to combine. Add the dry ingredients to the wet ingredients and mix until combined. be sure to scrape the sides of the bowl as needed.

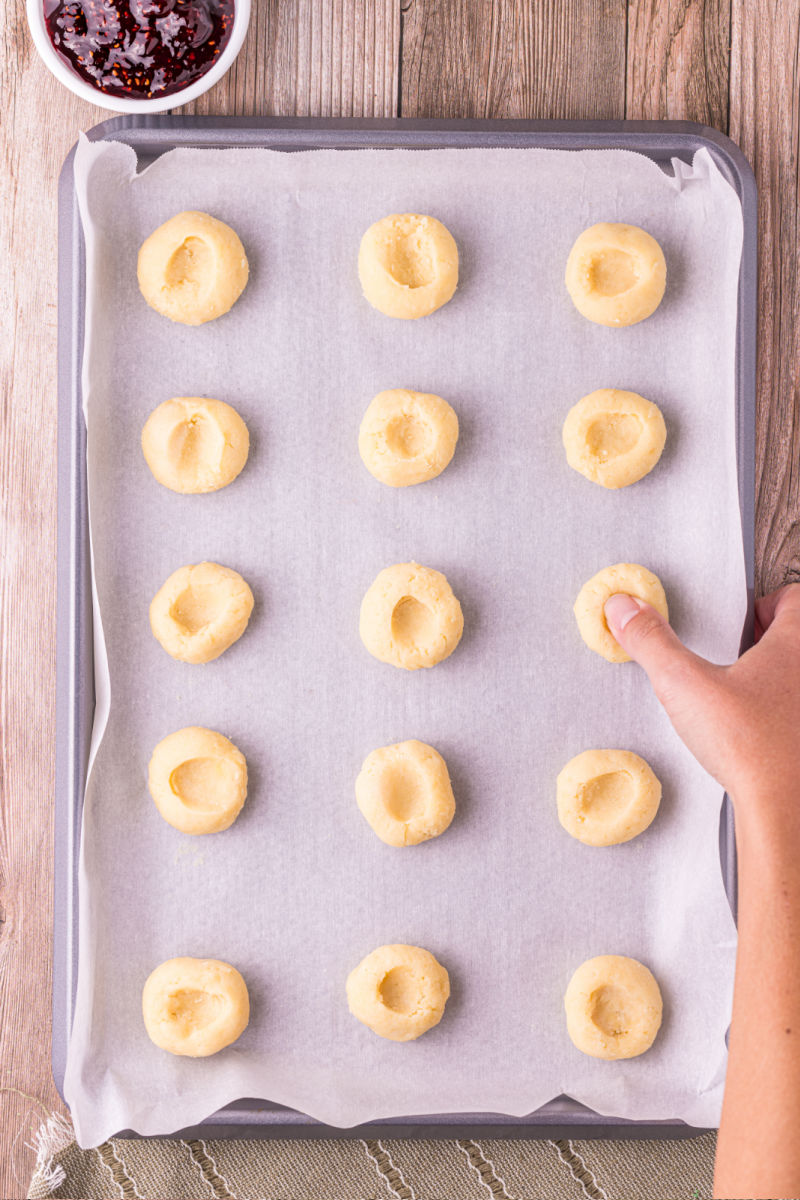
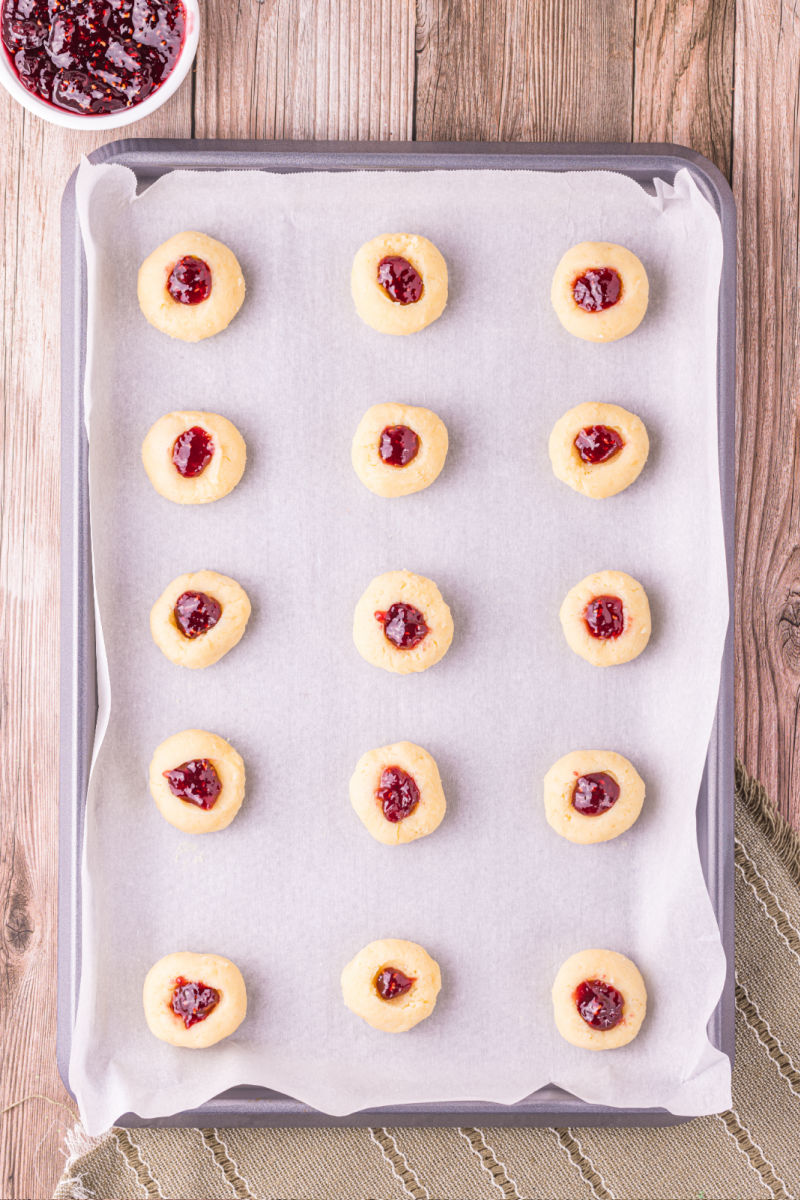
STEP 3 Use a cookie scoop or measuring spoon to portion the cookie dough onto the prepared baking sheet. Use your hands to roll each dough portion into a ball. Then use your thumb to make a divot in the top of each cookie.
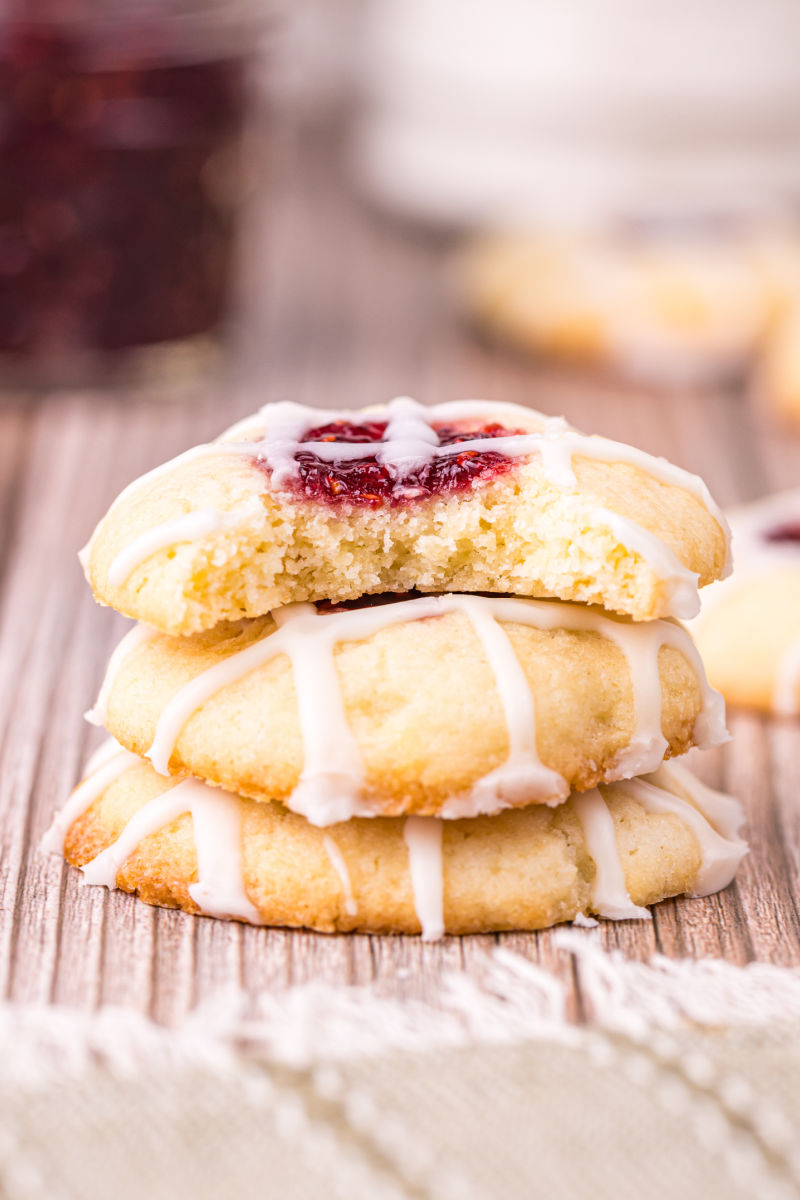
STEP 4 Add 1/2 tablespoon of raspberry preserves to each divot. Then bake for 13 to 16 minutes until the cookies are just beginning to turn golden brown around the edges.
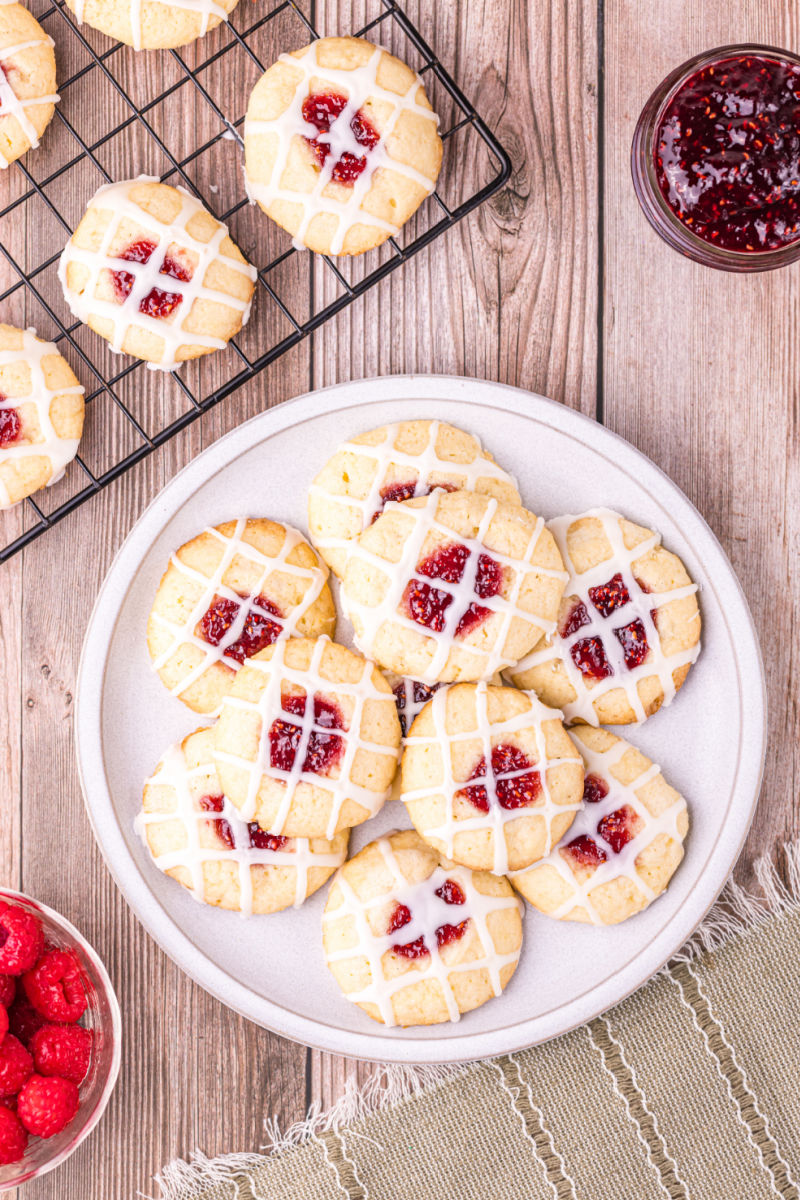
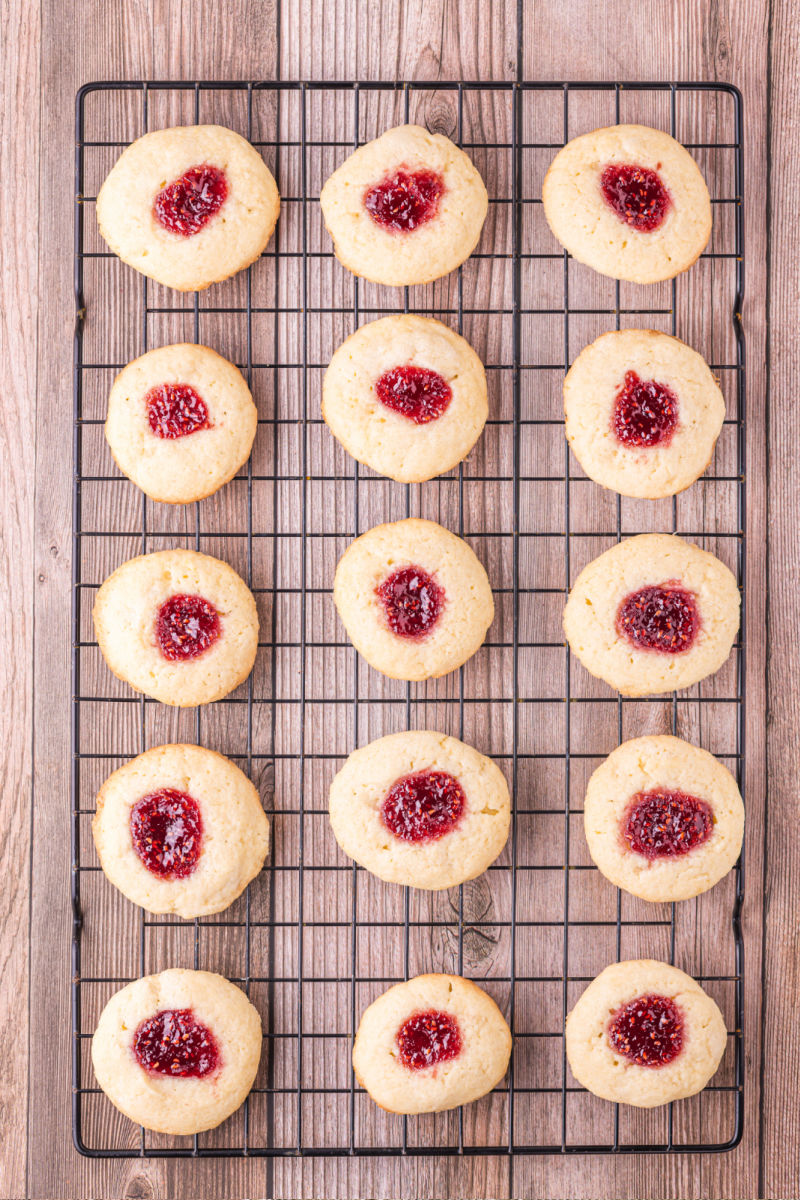
STEP 5 Remove the cookies from the oven and let them cool on the baking sheet for 5 minutes before transferring them to a wire rack to cool completely.
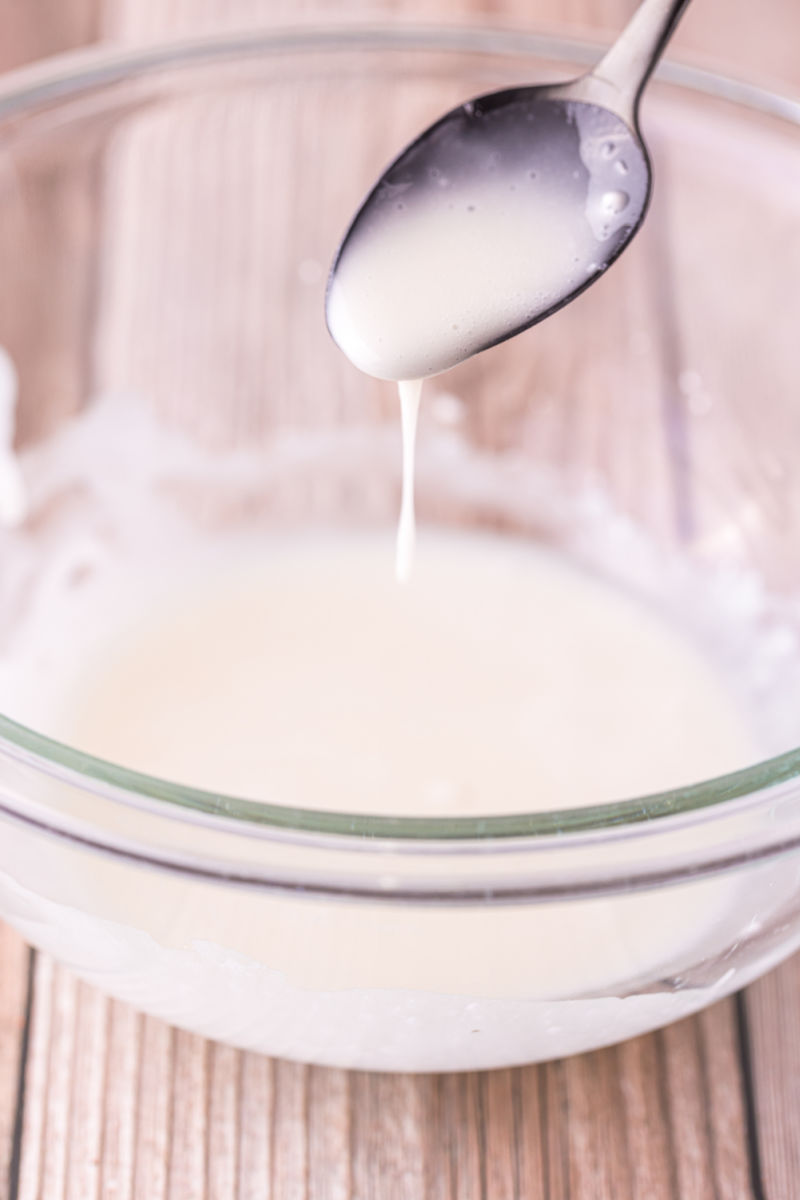
STEP 6 If you want to make your thumbprint cookies with icing, stir together the powdered sugar, milk, and vanilla in a medium mixing bowl until everything is combined and smooth. You can add more powdered sugar to thicken the glaze or more milk to thin it out as needed.
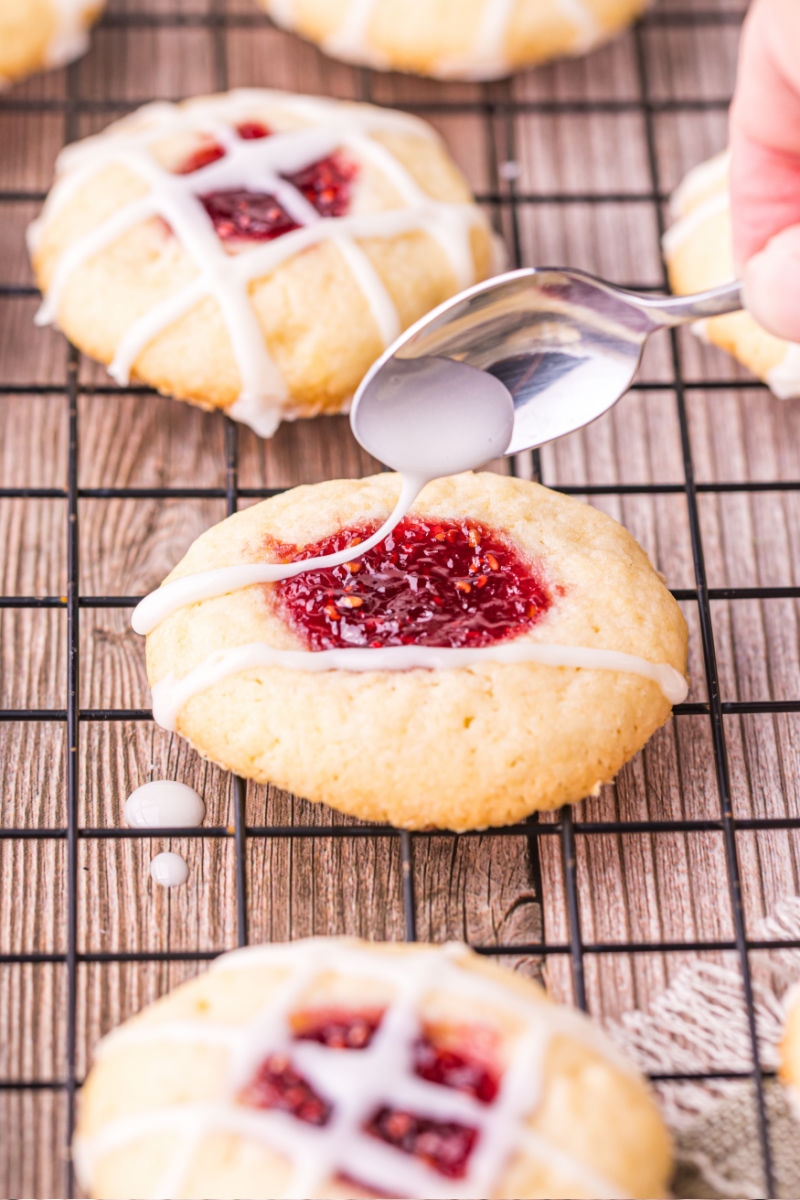
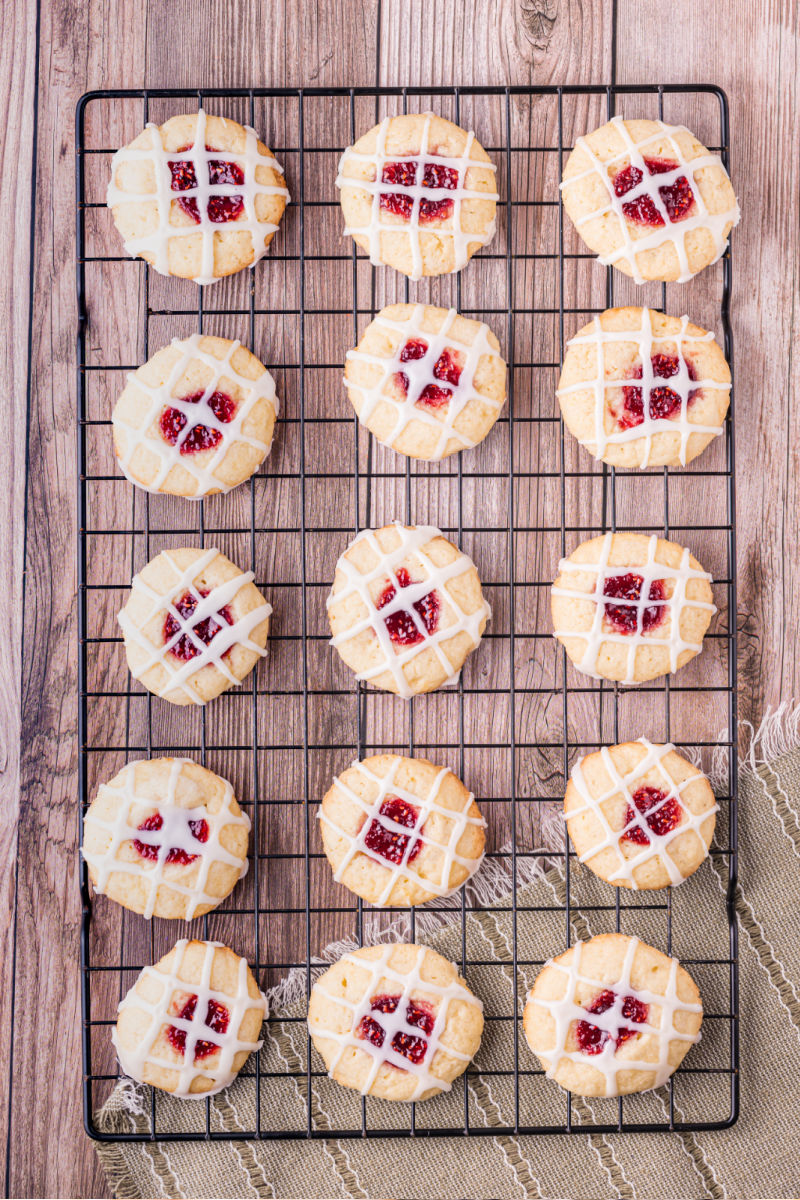
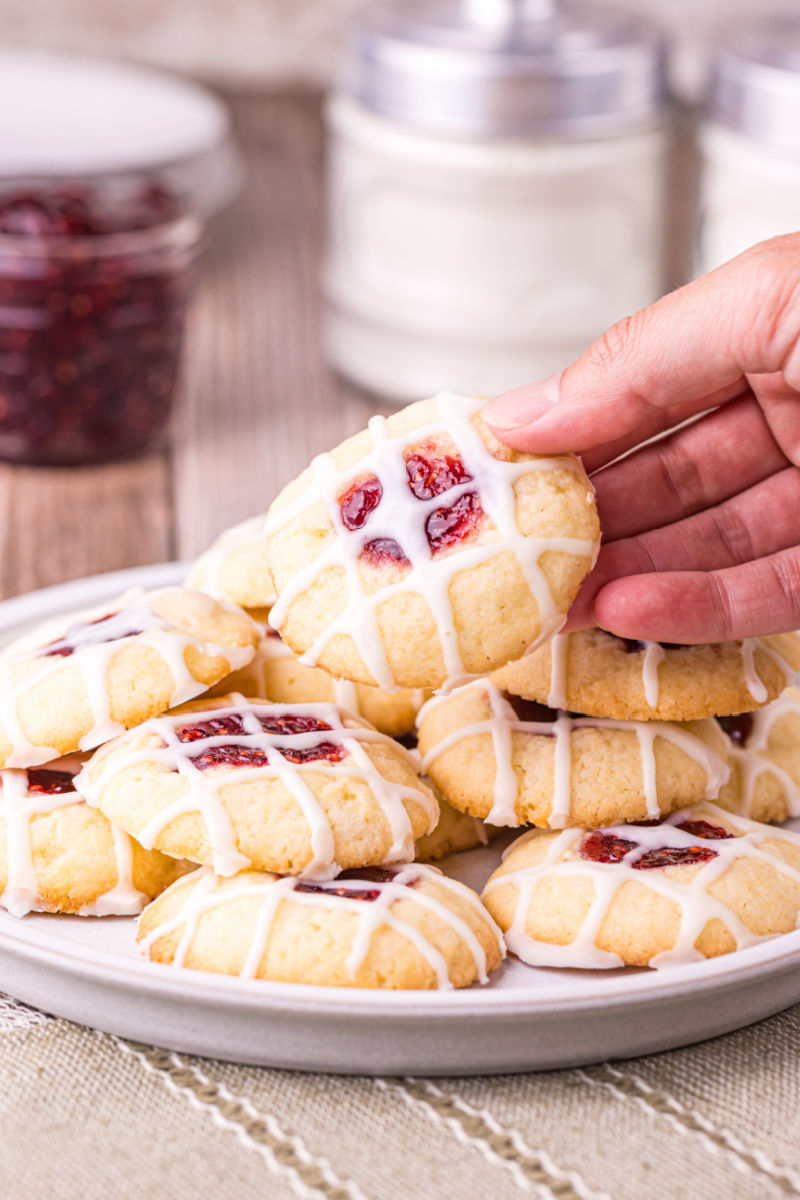
STEP 7 Use the spoon to drizzle the glaze over the cooled cookies in a criss-cross pattern. Let the glaze set up for 30 minutes and you’re ready to eat!
Tips & Tricks
- Want to change up the filling? Grab any flavor of jam or preserves that you enjoy. My go-to’s are strawberry and grape, but apricot and orange are popular too.
- You don’t have to glaze these cookies. They’re delicious just as they are from the oven. But a little extra kiss of sweetness is nice sometimes, and you can drizzle the glaze in a pretty pattern.
- Store any leftovers in an airtight container for up to 5 days.
Thumbprint Cookie Recipe FAQ
What are thumbprint cookies?
Thumbprint cookies are a buttery sugar cookie that has an indent on the top that’s traditionally made with your thumb. The indent is then filled with jam or preserves.
These cookies are called Hallongrotta or “raspberry caves” in Swedish and Jam Drops in Australia.
Should I refrigerate thumbprint cookies?
No, you don’t need to refrigerate baked thumbprint cookies. It doesn’t matter if they’re glazed or not either. Just be sure to keep them in an airtight container so they don’t dry out.
Can you freeze thumbprint cookies?
You can absolutely freeze these cookies. The only decision is if you want to freeze them before or after baking.
To freeze the dough: Form the dough into a square, wrap it in parchment paper or plastic wrap, and chill in the fridge for 1 hour. Then wrap it in plastic wrap (yep another layer) and put it in a freezer storage bag. Freeze for up to 3 months. Thaw in the fridge overnight or on the counter for 1 hour until soft enough to slice. Cut into 32 pieces, roll into balls, and bake as directed.
To freeze baked cookies: Let the cookies cool completely. If adding glaze, do so and then let the glaze set up all the way. Place the cookies in a freeze storage bag and freeze for up to 3 months. (I like to put waxed or parchment paper between the layers of cookies.)
Other Recipes You May Like
- Eggnog Thumbprint Cookies
- Lemon Raspberry Cake
- Berry Galette
- Strawberry Crisp
- Chocolate Oatmeal Cranberry Cookies
- Vanilla Almond Snowball Cookies

Raspberry Thumbprint Cookies
Ingredients
Equipment
Instructions
- Preheat your oven to 350 degrees F. Line a baking sheet with parchment paper or a silicone mat. Set aside.
- In a medium mixing bowl, stir together the flour, baking powder, and salt. Set aside.
- In a large mixing bowl (or in your stand mixer), beat together butter and sugar with a hand mixer until fluffy, about 1 minute. Add the egg and vanilla and mix until combined, scraping the sides of the bowl as needed. Add the dry ingredients to the wet ingredients and mix until just combined.
- Use a small cookie scoop (or 1 tablespoon measuring spoon) to portion the dough onto the prepared baking sheet. Use your hands to roll the dough into balls. Press your thumb into the center of each ball to create a well. (It's okay if the edges crack a little.)
- Add 1/2 teaspoon of raspberry preserves to the well in each cookie. You may need a little more or less depending on how big the thumbprints are.
- Bake for 13 to 16 minutes, or until the cookies are set and just beginning to turn golden around the edges. Remove from the oven and cool on the baking sheets for 5 minutes. Then transfer to a wire rack to cool completely.
- In a small mixing bowl, use a spoon to mix the powdered sugar, milk, and vanilla until smooth. The glaze should easily drizzle off the spoon without being too liquidy. (If needed, add more powdered sugar to thicken, or more milk to thin the glaze.)
- Using the spoon, drizzle a little of the glaze over the cooled cookies in a criss-cross pattern. Let the glaze dry for 30 minutes to set.
Notes
- To freeze the dough: Form the dough into a square, wrap it in parchment paper or plastic wrap, and chill in the fridge for 1 hour. Then wrap it in plastic wrap (yep another layer) and put it in a freezer storage bag. Freeze for up to 3 months. Thaw in the fridge overnight or on the counter for 1 hour until soft enough to slice. Cut into 32 pieces, roll into balls, and bake as directed.
- To freeze baked cookies: Let the cookies cool completely. If adding glaze, do so and then let the glaze set up all the way. Place the cookies in a freeze storage bag and freeze for up to 3 months. (I like to put waxed or parchment paper between the layers of cookies.)
I make these every Christmas different flavors to
This is a huge hit with my husband and my co-workers!!