Plastic Pumpkin Bucket Makeover
This Plastic Pumpkin Bucket Makeover is a great dollar store craft that’ll let you move your decor from Halloween to Fall in a snap!

Happy almost-Halloween, everyone! It’s Jenn from Endlessly Inspired. Have you ever had an idea, and it looks so perfect in your head, and then when you go to actually do it, it not only turns out as well as you had pictured but actually even better?
LOVE THIS PROJECT? PIN IT FOR LATER!
Follow Bread Booze Bacon on Pinterest
Yeah, me either. Until today, and this pumpkin bucket makeover. It looks so completely different than what it started as, it was easy, and I got to recycle a bunch of stuff in the process. I could not be happier with the way this turned out. That almost NEVER happens to me, so I may or may not be doing a little happy dance.
Anyhoo, enough about me, let’s get to the action!
Burlap Plastic Pumpkin Bucket Equipment
- Plastic pumpkin bucket
- Old newspapers, plastic bags, paper, etc. for stuffing the pumpkin
- Duct tape
- Spray paint
- Hot glue gun
- Burlap – I used burlap fabric, which is crazy cheap, but if you don’t feel like cutting burlap (because it can be a giant pain in the butt) you can always use burlap ribbon instead.
- Jute cord
- Needle and thread (optional)
How to Make a Burlap Plastic Pumpkin Bucket
Want step-by-step photos too? I’ve got you covered!

Around this time of year, you can hardly walk into a store without seeing one of these plastic pumpkin buckets. Every time I am in a thrift store, I see them for less than $1. This one was $.69 at Goodwill.
And actually, now that trick-or-treating is almost done, you may have one lying around the house, begging for a little Extreme Makeover Pumpkin Edition action.
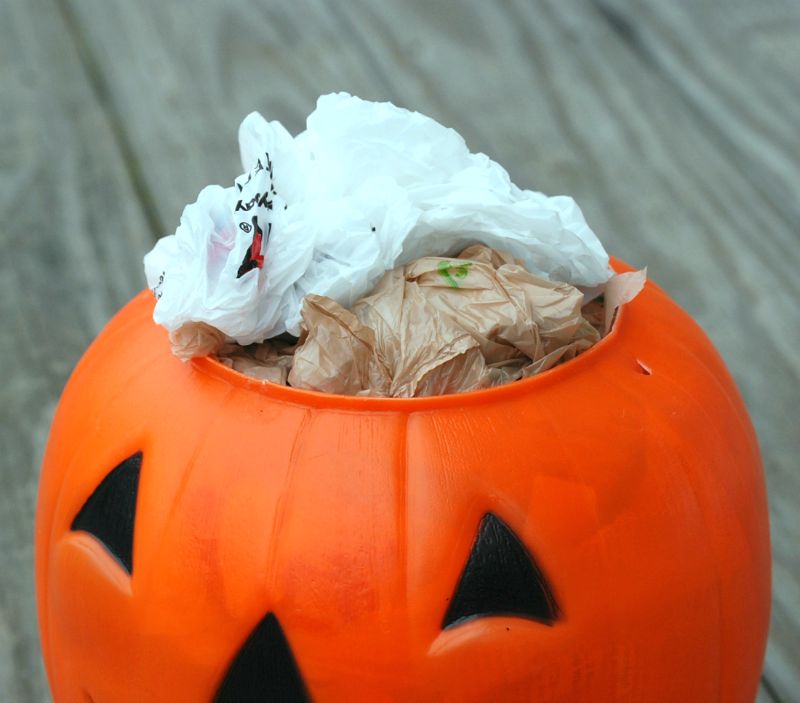
To get started, you’ll want to remove the plastic handle and stuff the pumpkin with whatever you have.
I used old newspapers and some of the approximately 4,987,382 plastic grocery bags that we have in the closet. Whatever you use, you want to really pack it in there, because you’re creating a little dome on top, to make it look like it’s the shape of an actual pumpkin.
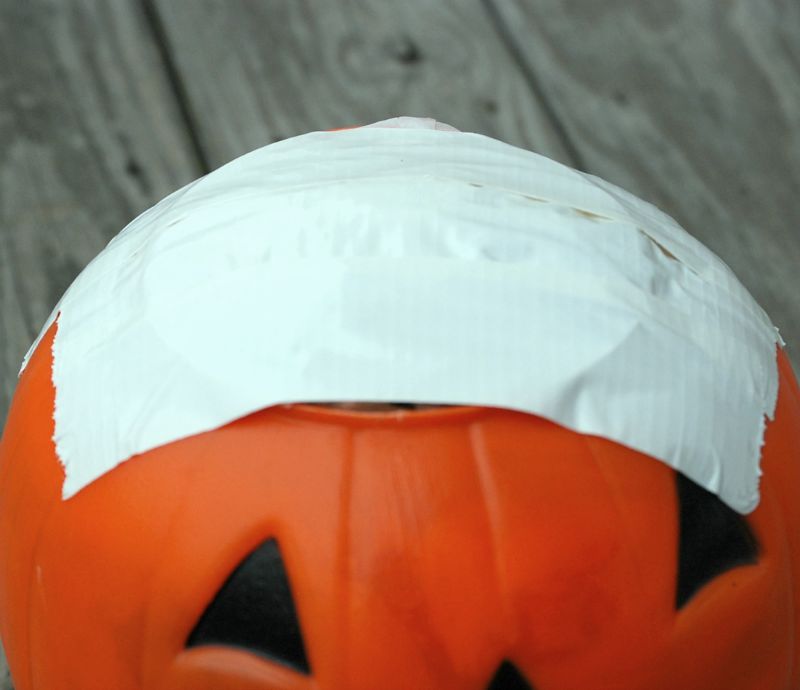
Once you have everything jammed in there, tape it down with some duct tape.
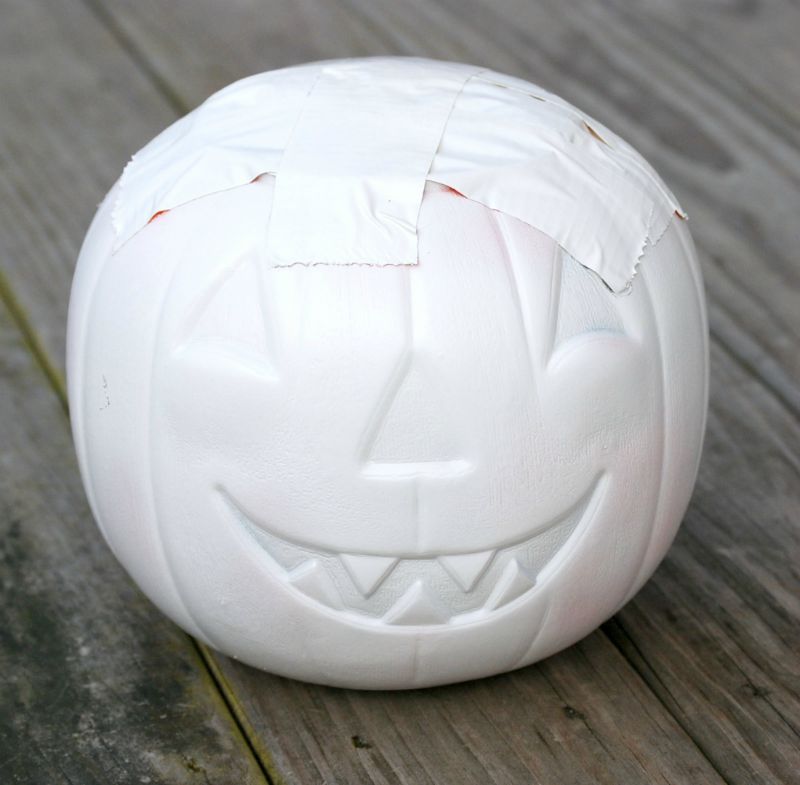
Because burlap is a pretty wide-weave fabric, you’ll be able to see through it, so cover it with a coat of spray paint. I happened to have white on hand, but you could use whatever neutral color you have.
And because you’re covering it up, you don’t need to make it look perfect, just try to mostly cover up the orange.
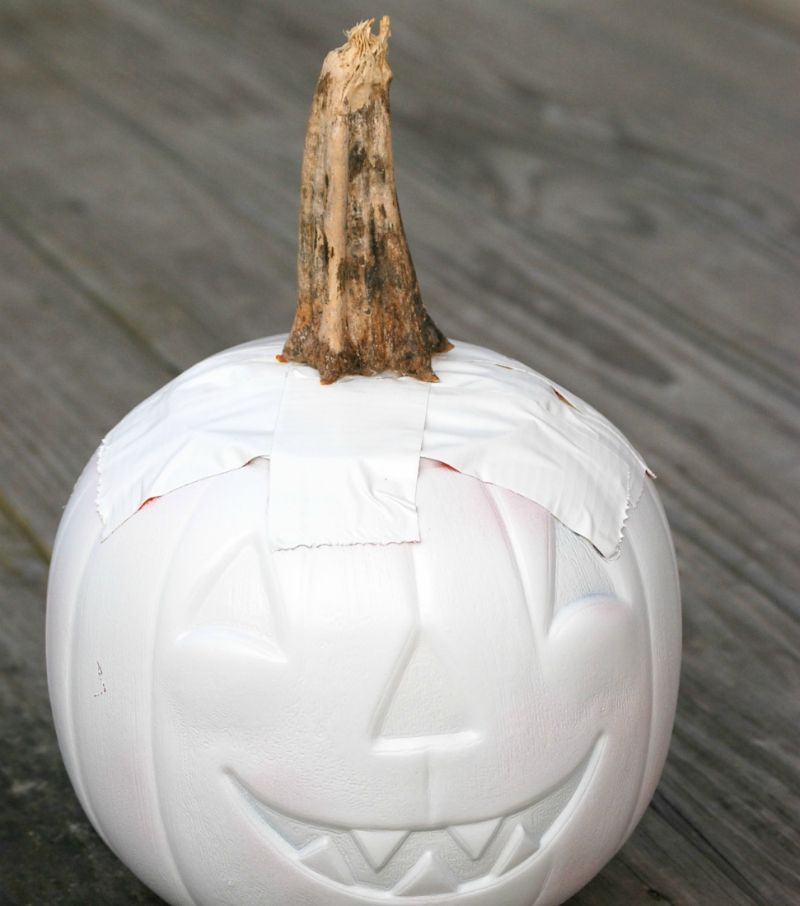
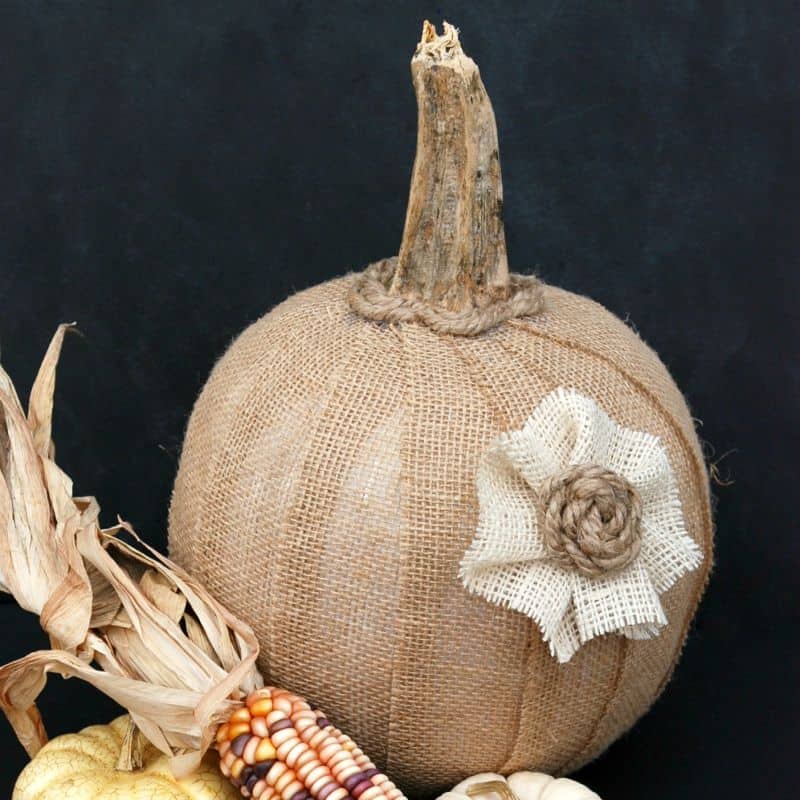
Here’s one of those moments where things worked out even better than I had thought. I had originally planned on using a bunch of twigs or a branch as the stem, but then I was moving a pumpkin that my son had painted, and I dropped it and the stem broke off.
As I was about to throw it in the trash, I looked at it and thought, “Wait a minute!” So I hot glued that bad boy on top of the pumpkin and did another happy dance. (My kids are so embarrassed by me, there aren’t even words.)
If you want to make a fake pumpkin stem, this tutorial is great.
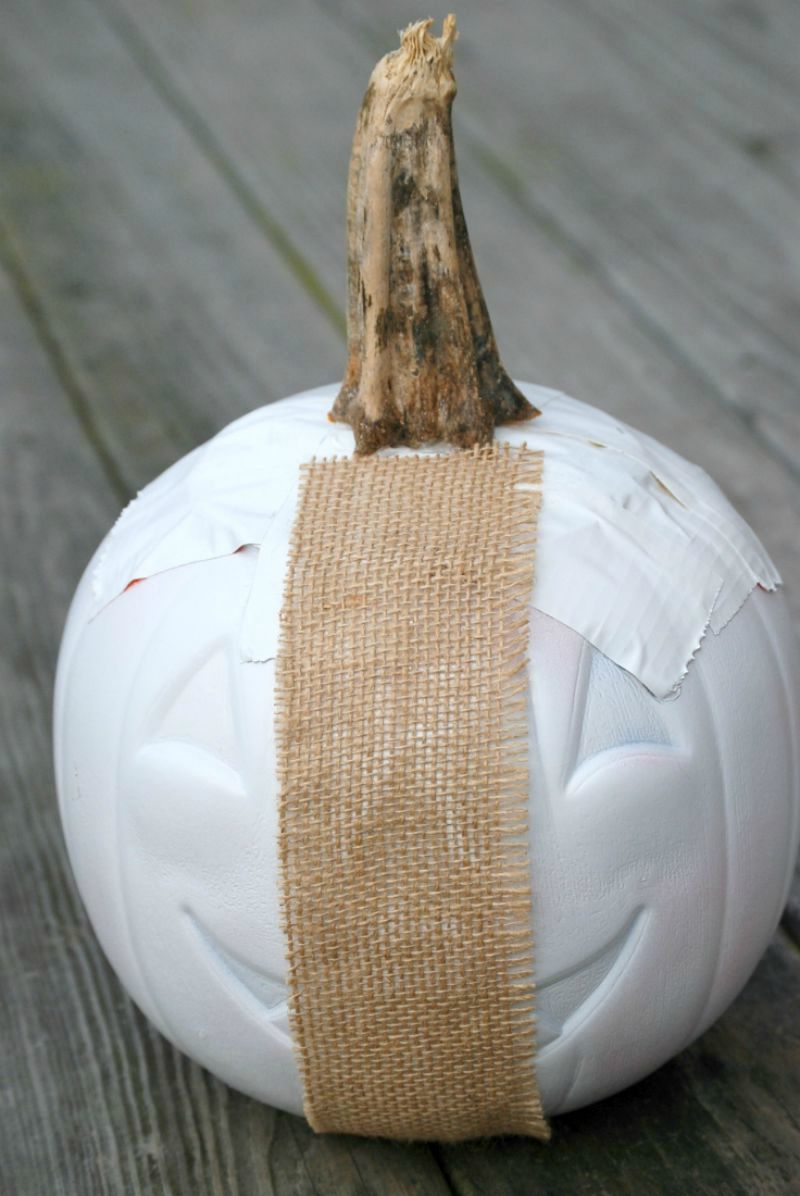
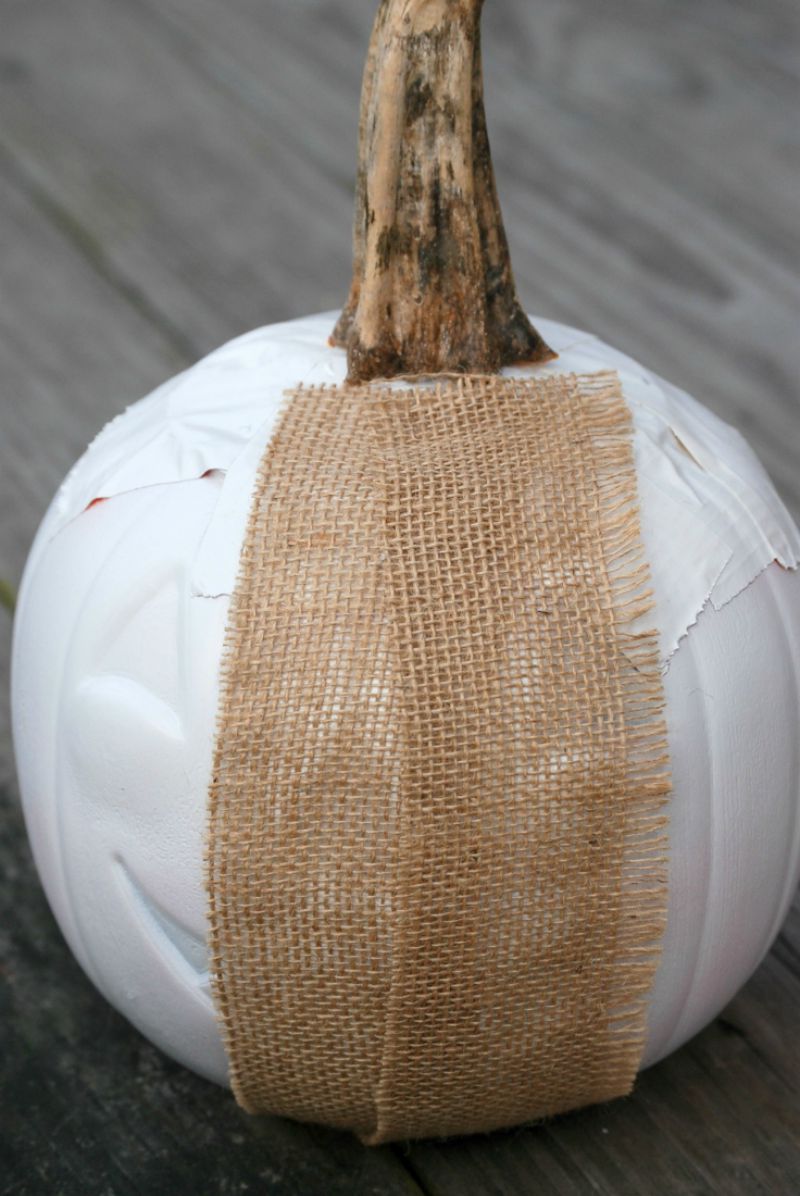
Now it’s time to wrap your pumpkin. I cut my burlap into ribbon about 2 1/2-inches wide. Check out this great tutorial to learn how to create your own burlap ribbon! Then glue the ribbons up near the stem and then down again at the bottom.
Don’t worry about getting it too close to the stem, you’re going to cover all that up in a few minutes.
Move over a bit and overlap your next strip with the first one, and again glue it down at the bottom.
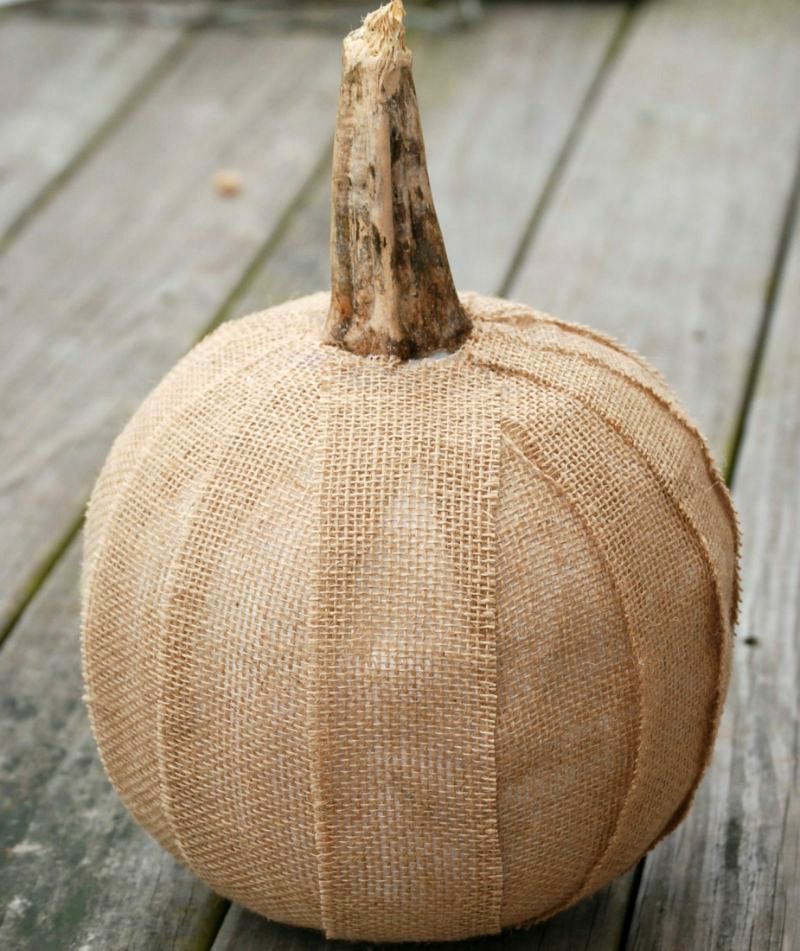
Just keep wrapping your strips all the way around the pumpkin, covering up all the white.
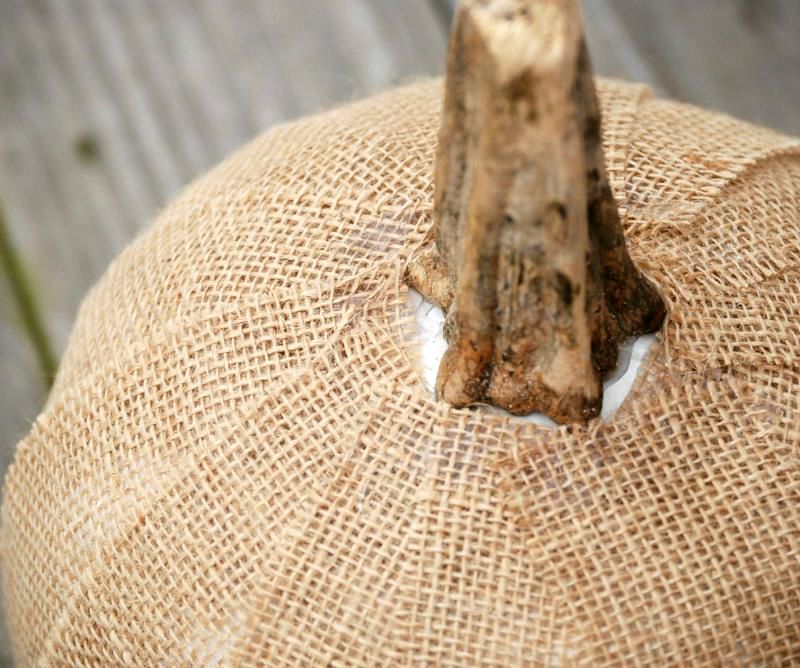
When you’re done, you’ll have a bit of a mess at the top and on the bottom. Get some thick jute cord and start wrapping and gluing it around the base of the stem.
No one will see the bottom fo your pumpkin, but if you’re really worried about it you can cut a circle of felt and glue it to the bottom to cover everything up.
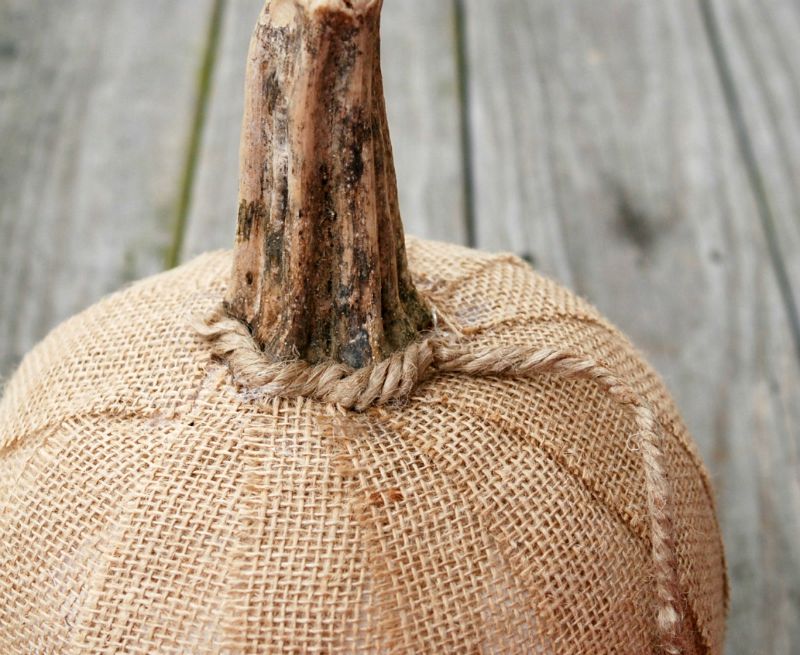
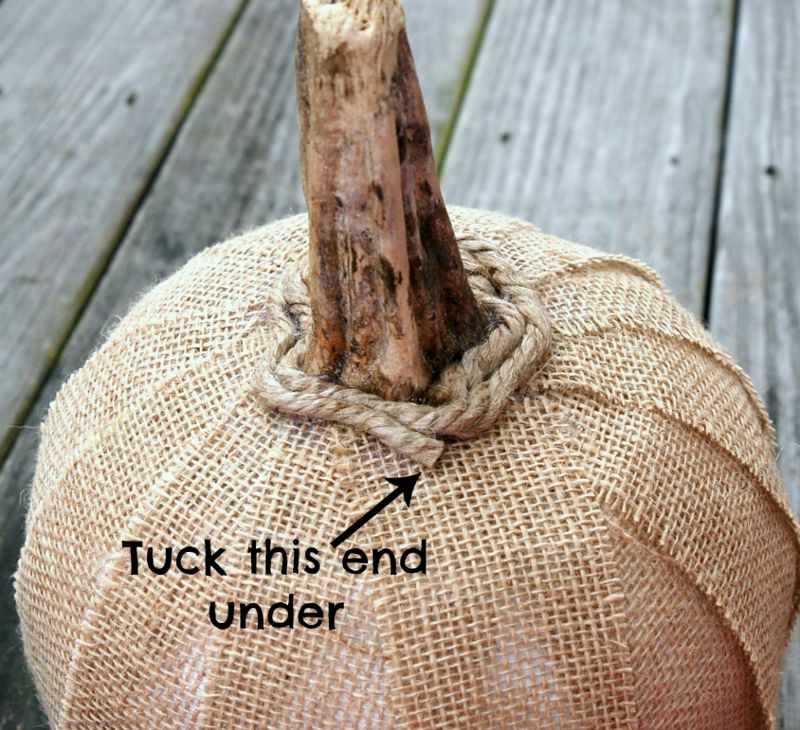
I had to go around twice to cover up all the white at the top of mine, but you can do as much or as little as you want. When you feel as though you have enough, just cut the cord and tuck it under the part you already wrapped.
To make the little flower, take a 1 1/2-inch strip of lighter colored burlap and form it into a pleated circle. I held it together with a few little stitches right through the middle, but you could glue it if you prefer.
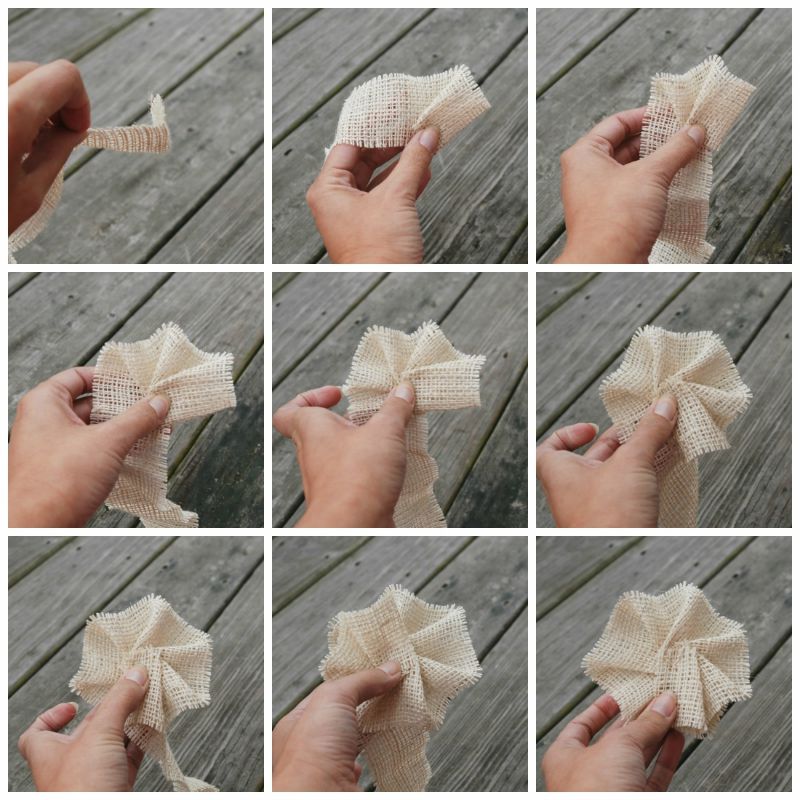
I then created a jute rosette. You can see my tutorial on how to make those here. Then I glued the rosette onto the flower and glued the whole shebang onto the pumpkin.
Boom! Now he’s all done!
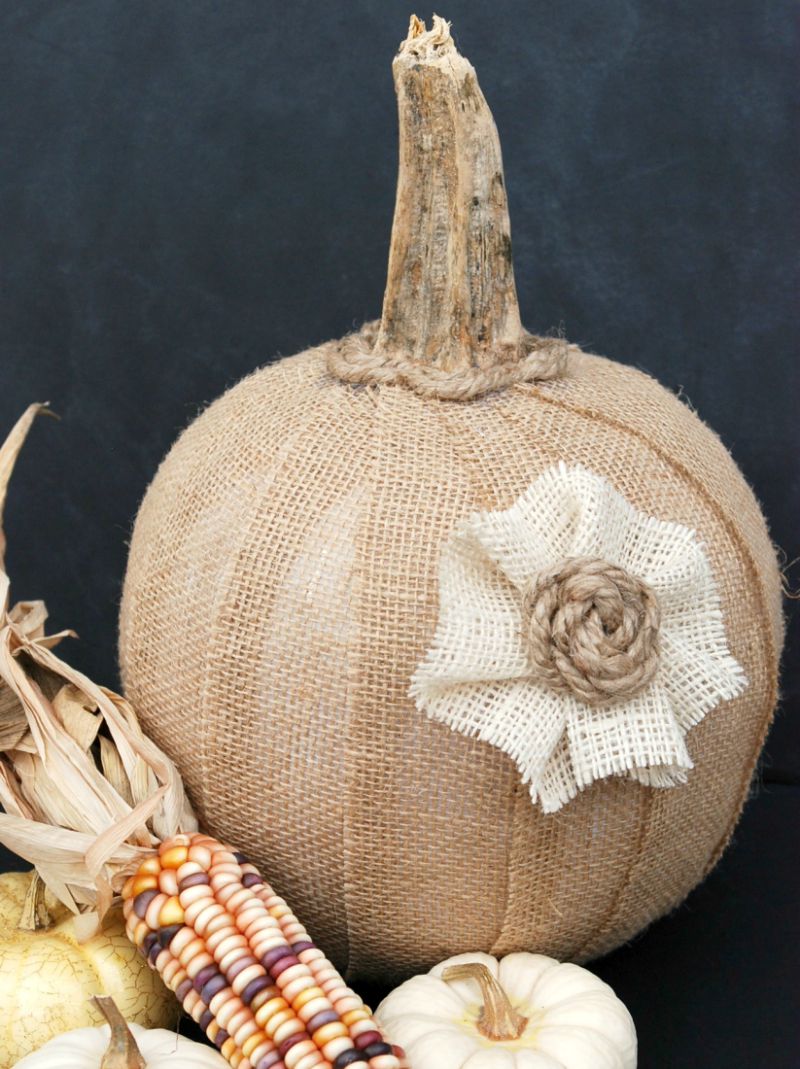
Can you believe that used to be a cheap orange plastic bucket?!? It’s kind of crazy to think about.
Thanks again to Julie for having me. I love having the opportunity to share some fun DIY ideas with all of you! For more fun projects like this one, visit me on my blog Endlessly Inspired!
This is ridiculously adorable! Thanks for the idea.
Wow! I love this! Saved it to my Pumpkin Decor board and stumbled it, too. Have you shared this at my Wonderful Wednesday Blog Hop? Please do ♥ My readers will love it 🙂
Sinea from Ducks ‘n a Row
What a great makeover, Julie! I love me some burlap and your pumpkin turned out darling. Thanks for sharing at Inspiration2. Hugs!
…sorry… Great makeover, Jenn! 😉
Very, very cute!
Very creative and easy !!!!thanks I love it!!!!!
love this makeover! If you are using this outside you might want to weigh it down with something like a rock so they don’t blow away:) will try this idea! thanks again.
Excellent idea!!
great idea!… that real stem REALLY makes it! I would have done a happy dance too 🙂
Hi there, this was such a good tutorial! I incorporated it on my fall table this year. This was actually the only burlap accent in the decor and I got many complements!
I’m so glad Riffat!!
Any suggestions on what to use if you don’t have a real pumpkin stem?
Great job. Put the stem on after burlap. Would look more finished
Adorable! Going to pull down my Halloween stuff to get our old pumpkins down today!
Thought it looked kind of cheap and tacky
If you ave nothing nice to say!!! Than just keep it to yourself . I can’t believe how rude people have gotten in this world. Treat others the way you’d like to be treated……
If you notice, they’re only rude when they’re not standing directly in front of you
The same people that cut you off on the highway would never cut you off in the grocery line because you’re standing there
They feel a sense of safety, but don’t worry Karma has a way of dealing with them
Have you never heard the expression “If you cant say something nice, dont say anything at all”?
This is absolutely awesome, Jenn! I was trying to figure out how to get full use of those buckets instead of hiding the face up against a wall. I tried this and used some satin ribbon that matched my decor. It is the talk of my house!!!